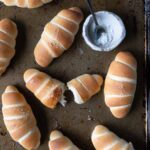
Shio pan 塩パン (Japanese sea salt butter rolls)
These shio pan have a fragrant, rich, buttery and crunchy crust on the bottom with a soft fluffy interior. Check out this recipe and make your own!
Servings: 10 breads
Calories: 165kcal
Equipment
- cooking spray
- parchment paper
- pastry brush
Ingredients
Over Night Sponge Dough
- 100 g warm water (around 105°F/40°C)
- ¾ tsp instant yeast I used SAF instant yeast
- 45 g plain yogurt
- 150 g bread flour
Shio Pan Dough
- all the sponge dough
- 80 g bread flour
- 70 g cake flour
- 40 g cold water
- 20 g sugar
- 10 g unsalted butter soften
- 6 g sea salt
Other Ingredients
- 50 g salted butter European butter is recommended.
- flaky/coarse sea salt I use fleur de sel
Instructions
Make sponge dough the day before.
- Mix instant yeast with warm water before stirring in yogurt and bread flour. Stir in the same direction for about 30 seconds until it's well combined.
- Cover the bowl with plastic wrap and let it sit on the counter for about 40 minutes to an hour before storing in the fridge overnight.
- The volume of the sponge starter should roughly triple by the next day. Make sure you use it within three days for the best result.
Make shio pan dough.
- Add all the dough ingredients except salt into a stand mixer, knead for 10 minutes on medium speed before adding salt and knead for another 10-15 minutes until the dough is smooth and passes the windowpane test.
- Take the dough out from the mixer, form it into a ball by folding the edges to the center and pinching together. The dough should be soft and fairly easy to handle.
- Put it seam side down in a lightly greased bowl, cover, and let it rise for 40 minutes to 1 hour in room temperature until the dough almost doubles in size.
Prepare salted butter
- While the dough is proofing, cut salted butter into 10 even pieces that's 5g with the dimension around 0.5(L) x 1.5(W) x 0.5(H) inches, which is about 1.25(L) x 3.5(W) x 1.25(H) cm. Store them in the freezer until it's ready to use.
Assemble shio pan (please see the video for instructions)
- Transfer the dough onto a working surface and cut it into 10 even pieces, about 50g each.
- Press the dough down into a rough disk shape before folding the edge closer to you over the rest of the dough. Rotate 90 degrees and fold the closer part of the dough over the rest of the dough again. Then repeat this rotate and fold step two more times before before rolling one side of the dough thinner with your hand to form a cone shape.
- Cover with a damp towel and let the dough rest for 15 minutes.
- Take one piece of dough and roll it out flat into a long triangle, flip it over and continue to roll until it's about 3" (7cm) wide on the top and 14" (35cm) long.
- Place one piece of salted butter on the wide part of the dough, fold the top part of the dough down over the butter and lightly press down to seal the butter. Gently roll the top part all the way down to make it look like a croissant. Repeat the same for the rest of the dough.
Final proof and bake.
- Place the shio pan on a baking sheet lined with parchment paper or spray with baking spray, cover with damp towel and proof at 80-85°F (27-30°C) for 30 minutes.
- Meanwhile, adjust the oven racks so that one rack is on the lowest level while the other rack is one level up from the middle. Place a cast iron pan or baking tray on the bottom rack (in a later step, we will pour water on the hot pan to produce steam while baking shio pan).
- Preheat the oven to 450°F (230°C) in the last 15 minutes.
- Once the bread is done proofing, brush water on the surface and sprinkle a pinch of flaky salt on top of each shio pan before placing them on the upper rack in the oven.
- Pour a cup a water into the cast iron pan or baking tray in the bottom to produce steam and quickly close the oven door. Make sure you wear oven mitts and be careful of the hot steam. Bake for 13-14 minutes or until golden brown.
- Take the tray out of the oven, let the bread cool down a little and enjoy while they're warm. They taste the best when they are freshly baked!
Video
Notes
- Make sure you weigh all the ingredients with a kitchen scale.
- When shaping shio pans, try working fast so there won't be too much difference in terms of proofing time between the first and the last one.
- If you are new to making bread and need more time, store the first few rolls in the fridge (covered with damp towel) to slow down the proofing process. Take them out to do the final proof with all other rolls once they are all assembled.
- The rolls should look puffy after the final proof. To check if the rolls are proofed enough, dip your finger with water and gently press the surface of the bread, if it bounces back yet leaves a light dent, then you know it's done proofing. Over proved bread will be tasteless and under proofed bread will be dense.
- If you prefer a crispier crust on the surface, omit the 10g of butter in the dough mixture. However, the texture of the bread will be a bit less soft and fluffy.
- See the FAQs section in the post for more information.
Nutrition
Serving: 1bread | Calories: 165kcal | Carbohydrates: 24g | Protein: 4g | Fat: 5g | Saturated Fat: 3g | Polyunsaturated Fat: 0.4g | Monounsaturated Fat: 1g | Trans Fat: 0.2g | Cholesterol: 13mg | Sodium: 236mg | Potassium: 46mg | Fiber: 1g | Sugar: 2g | Vitamin A: 151IU | Vitamin C: 0.003mg | Calcium: 11mg | Iron: 0.3mg