

After about a year's worth of obsessive research and experimentation, I developed this recipe for the perfect tender and fluffy dinner rolls. This is the go-to recipe I've made regularly over the past eight years, and I’m sharing all my best tips so you can bake them perfectly every time.
This is likely one of the things friends and family request that I make the most! So the only downside to trying this recipe is that others may keep bothering you to make more!
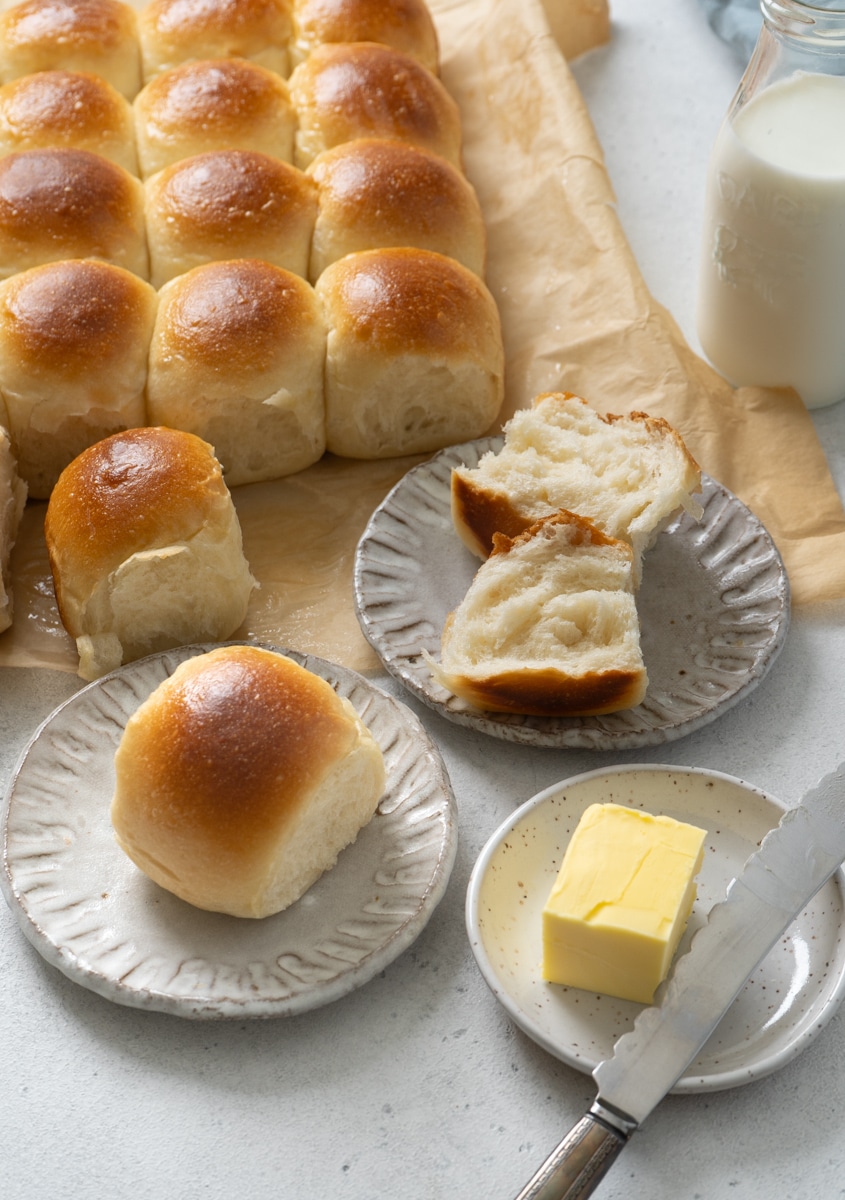
A Few years ago I shared my Milk Bread Rolls recipe - a great option for beginners who want to learn how to make soft, fluffy and delicious bread rolls. However, whenever I need to make dinner rolls, this recipe is the one that I actually use, as they are even tastier than the basic milk bread rolls.
I've make these amazing rolls at least a hundred times, so often that I don't even need to look at the recipe. They’re always a hit with family and friends, and whenever there’s a dinner gathering, everyone’s excited when they see I’ve brought these along.
This recipe isn’t the quickest or easiest, but if you follow my step-by-step instructions and take note of all the tips and tricks I’m about to share (many of which you won’t find anywhere else!) you’ll be able to recreate these amazing sweet dinner rolls right in your own kitchen!
Why You Should Try This Recipe
- Tried and True – This is the recipe I’ve used for over eight years, making it over a hundred times. It’s been a consistent crowd-pleaser and is always a hit at dinner gatherings.
- Unmatched Texture and Flavor – These rolls are irresistibly soft, fluffy, and aromatic. They will stay soft for three days and freeze well for up to three months.
- Helpful Tips You Won’t Find Elsewhere – I’m sharing all my best tips and techniques from 10 years of bread making experience, making it easier for you to get perfect results, even if you're not an expert baker.
Ingredients You'll Need
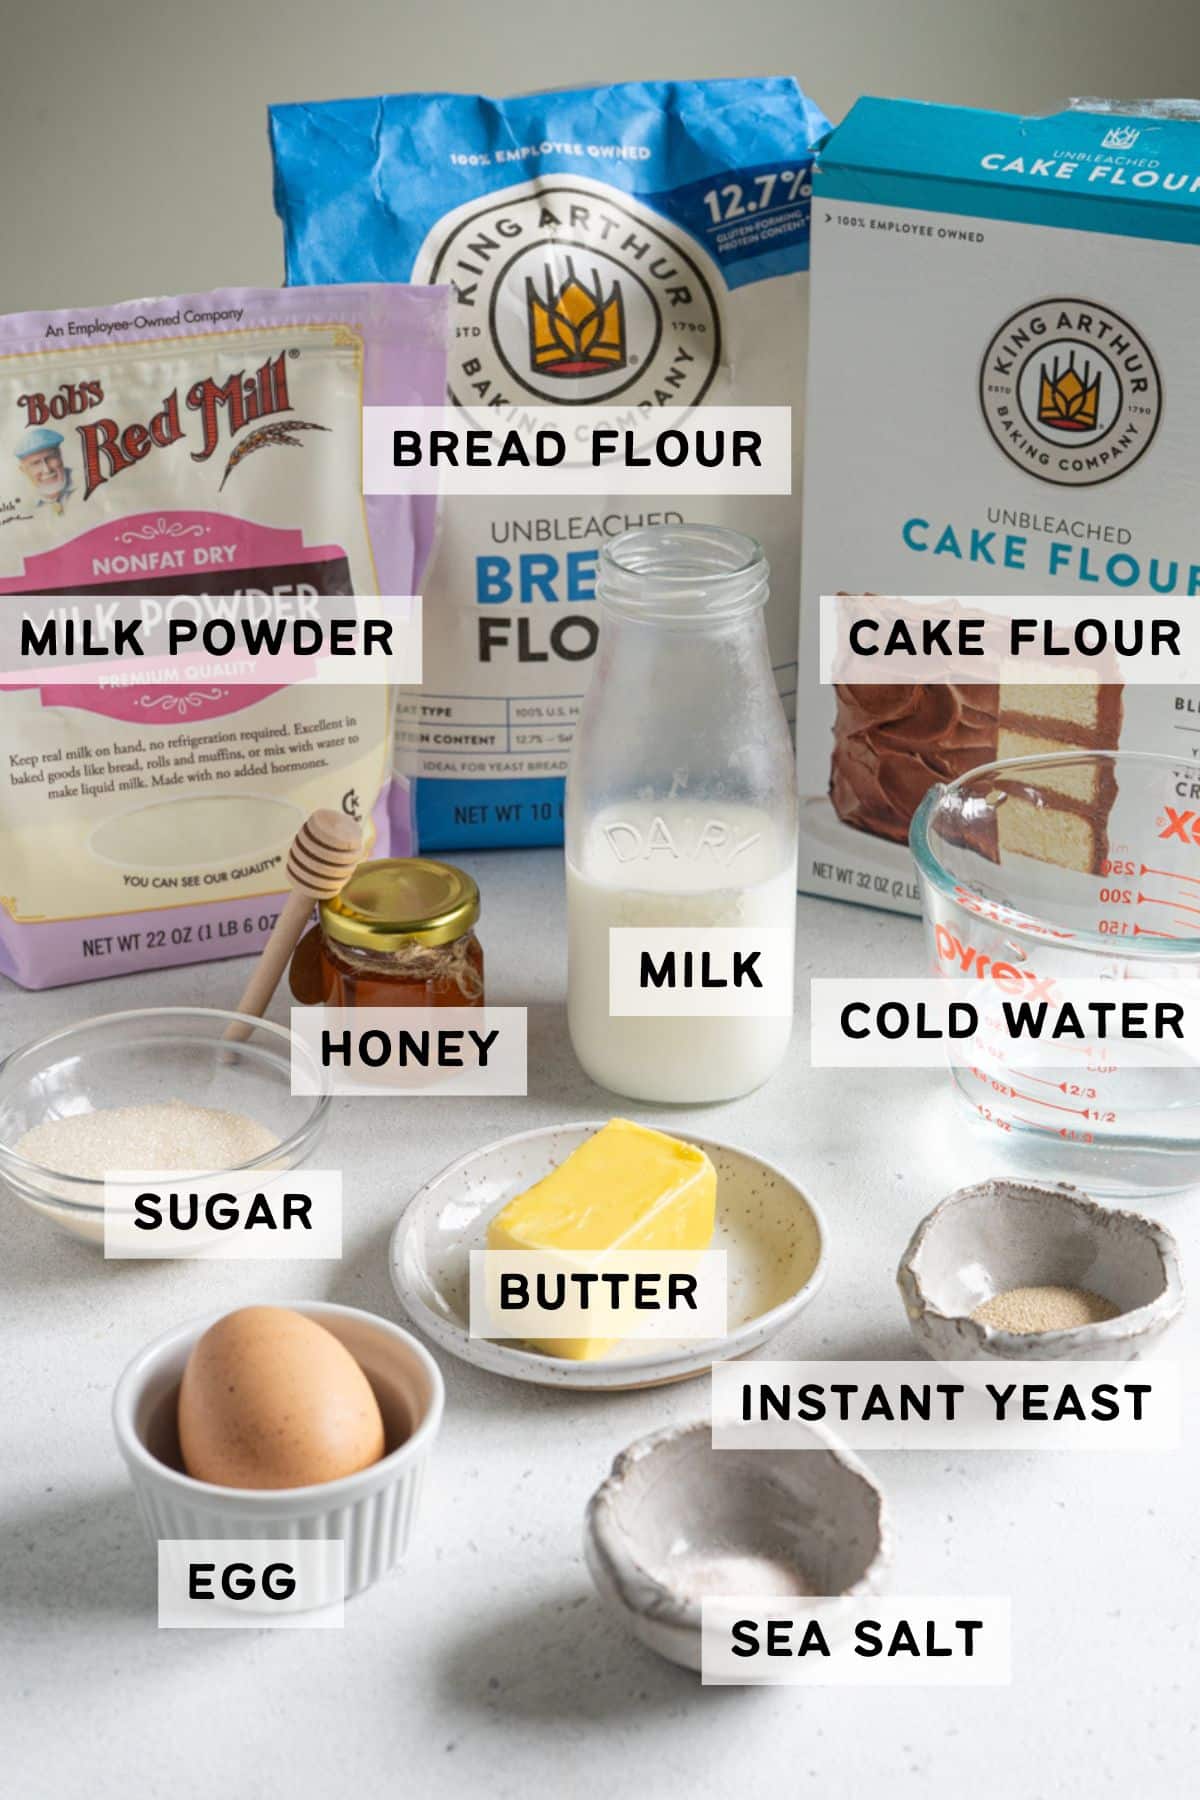
Ingredient Notes
- Butter - use good quality unsalted butter. I personally like Kerrygold or Vital Farms butter.
- Bread flour - bread flour is the key for this recipe, replacing with all purpose flour is not recommended as you won't get the same texture.
- Cake flour - adding a small amount of cake flour into the dough is an easy way to make the bread lighter and fluffier.
- Milk - use whole milk.
- Dried milk powder - dried milk powder improves both the flavor and texture of the bun, you can skip it if you don't have it, but I highly recommend using it. You can also use this to make Snowflake crisp and Taiwanese milk butter bun if you need more reasons to get some.
- Honey - honey helps keep the bun moist.
- Instant yeast - Saf instant yeast is highly recommended, you will be surprised with how it can improve the texture of the bun. I use the gold label Saf, but the red label will work just fine.
Step by Step Instructions
Step 1 - Make Tangzhong
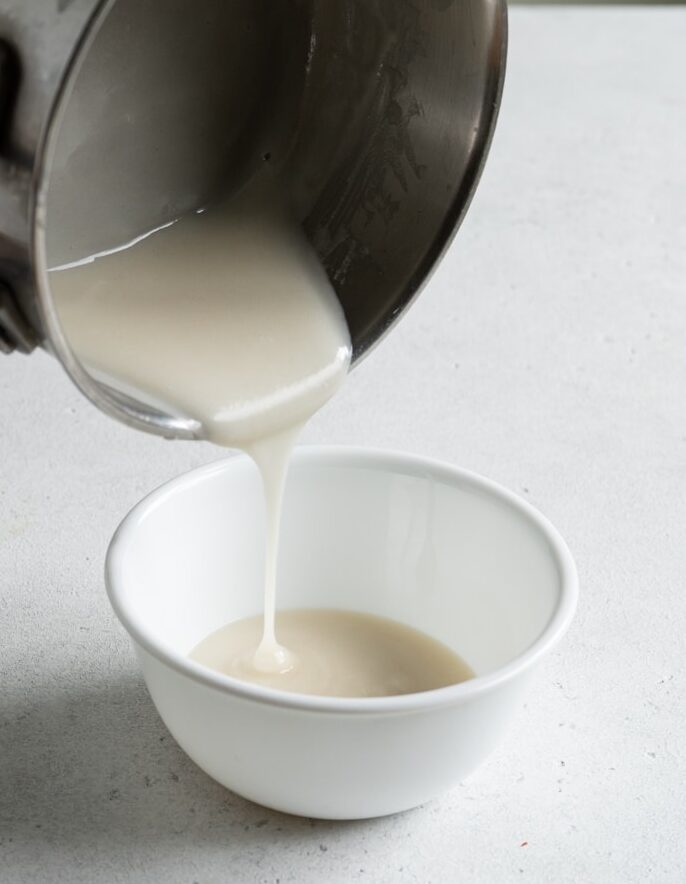
In a small saucepan, whisk together the flour and water until smooth. Cook over medium-low heat, stirring constantly, until the mixture just begins to thicken. As soon as it starts to thicken, remove the pan from the heat and continue whisking for another 20–30 seconds. The tangzhong should be loose and pourable, more like a slurry than a thick paste.
Pour the tangzhong into a small bowl or container, cover it, and place it in the freezer for 20–30 minutes. It should be completely cooled, ideally with a thin layer of ice having just formed near the edge. You can also let it cool in the refrigerator for 1–2 hours, or overnight if you’re preparing ahead.
Step 2 - Make the dough
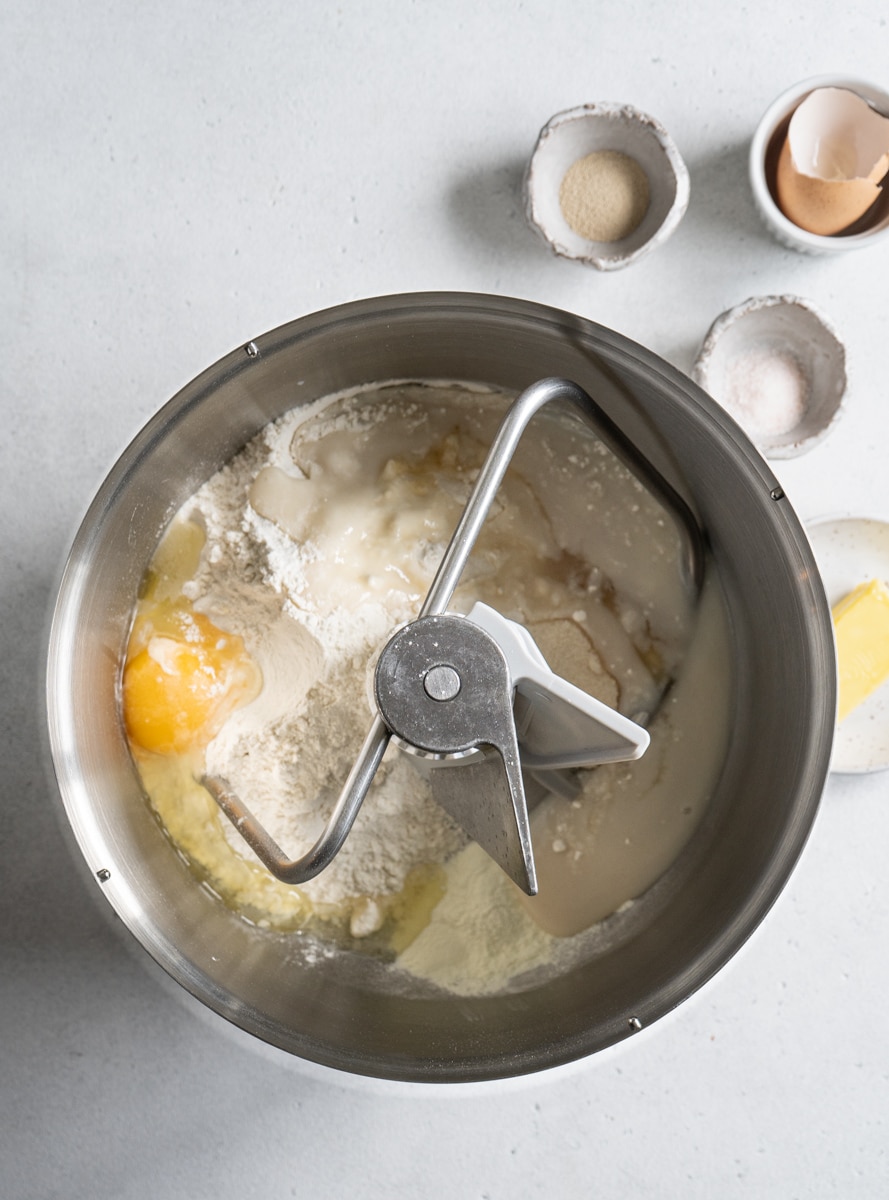
In a stand mixer, mix all the dough ingredients except yeast, sea salt and unsalted butter until a rough dough is formed. Cover and let it rest for 30 minutes (in the fridge, if possible).
This step is called the autolyse method, which will help shorten the kneading time later and prevent the dough from getting too warm (which negatively impacts the texture of the buns).
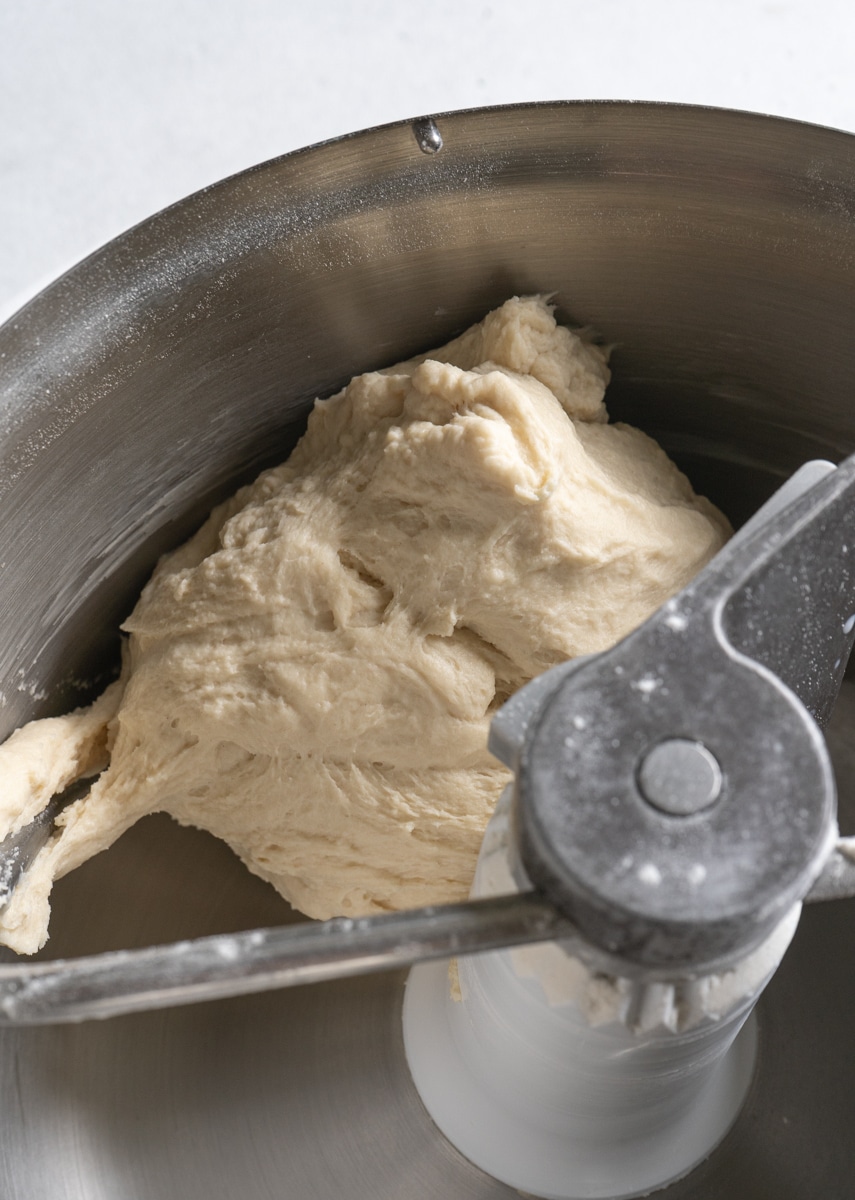
After resting, do the following steps:
- Add salt and knead for 2 minutes.
- Add unsalted butter, one piece at a time, and knead for another 6-8 minutes until the butter is well incorporated with the dough and the dough starts to look smoother.
- Mix instant yeast with 1 tablespoon of water and stir until well combined.
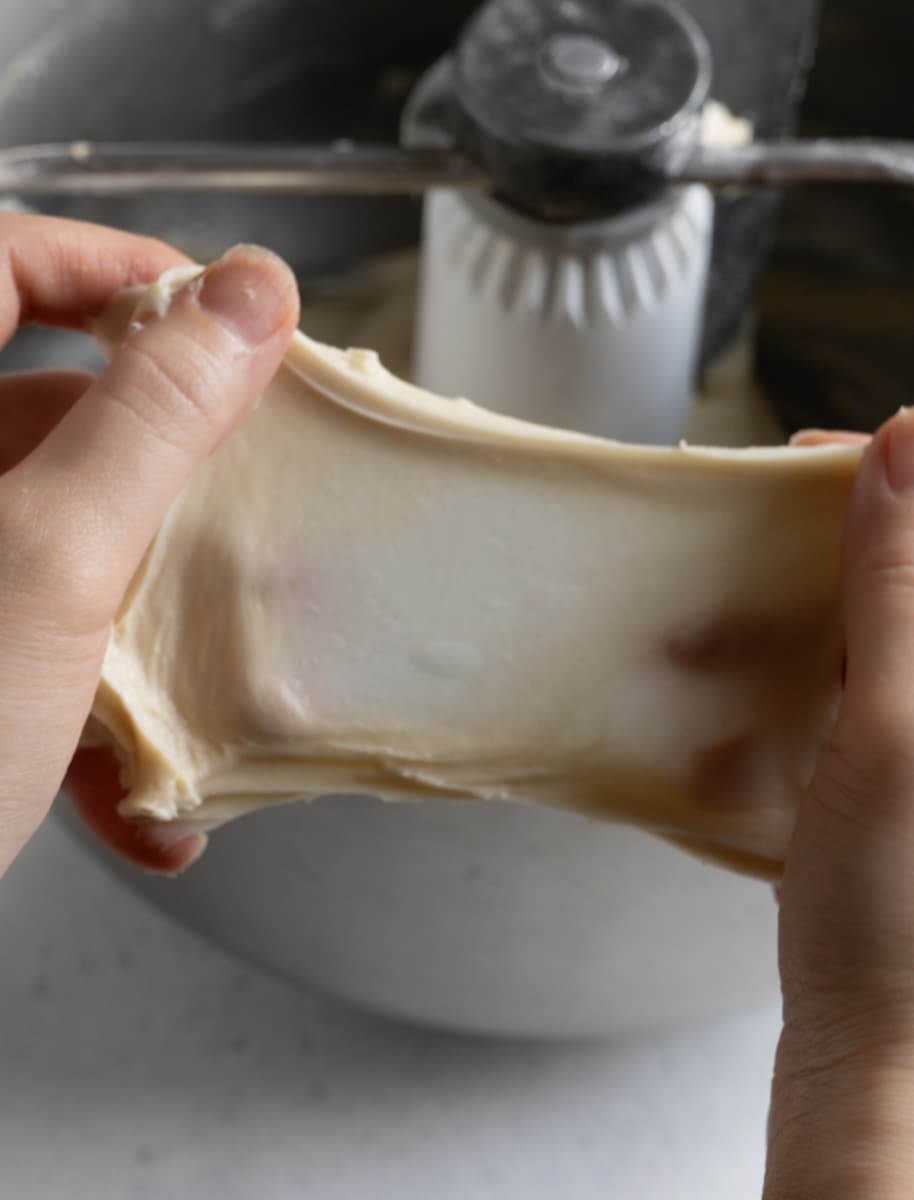
- Add yeast mixture and knead on medium high speed for 6-8 minutes until the dough is smooth and able to pass the windowpane test (see picture below).
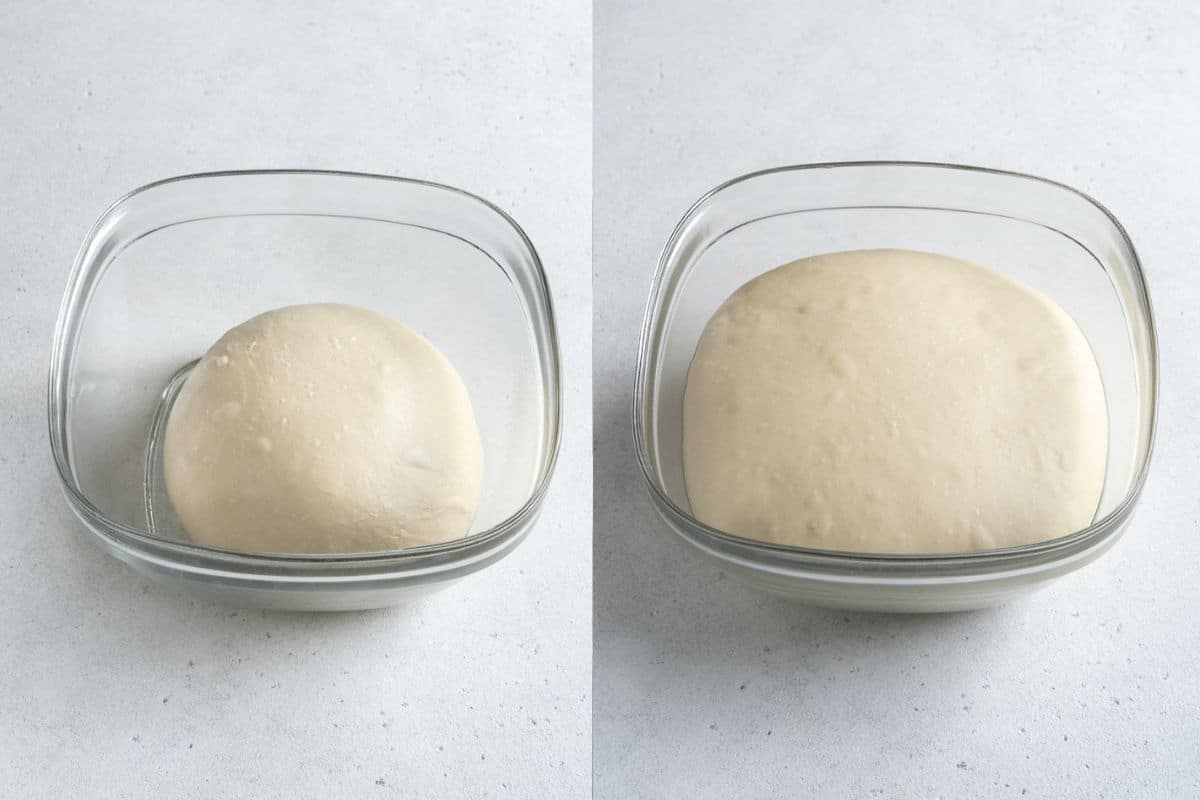
Form the dough into a ball, place it in a greased airtight container or gallon sized ziploc bag and store in the fridge for around 12-18 hours (See FAQ below for more details).
Step 3 - Shape the buns
Take the dough out from the fridge, transfer it to a lightly floured surface and divide the dough into 20 equal portions with a dough cutter (don't tear it!)
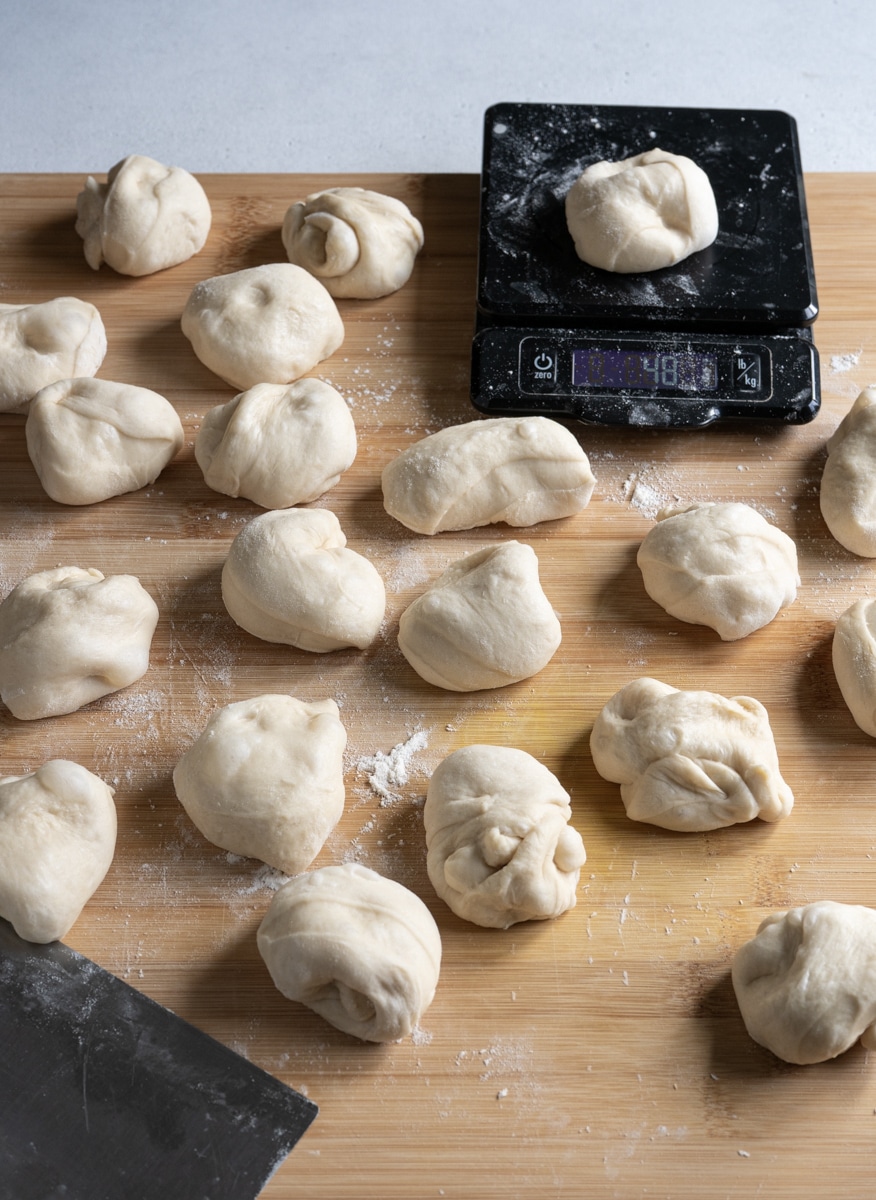
Flatten the dough with your palm before folding the edges in to the center, pinch them together to form a ball and flip it over so that the seam side is down (see picture below).
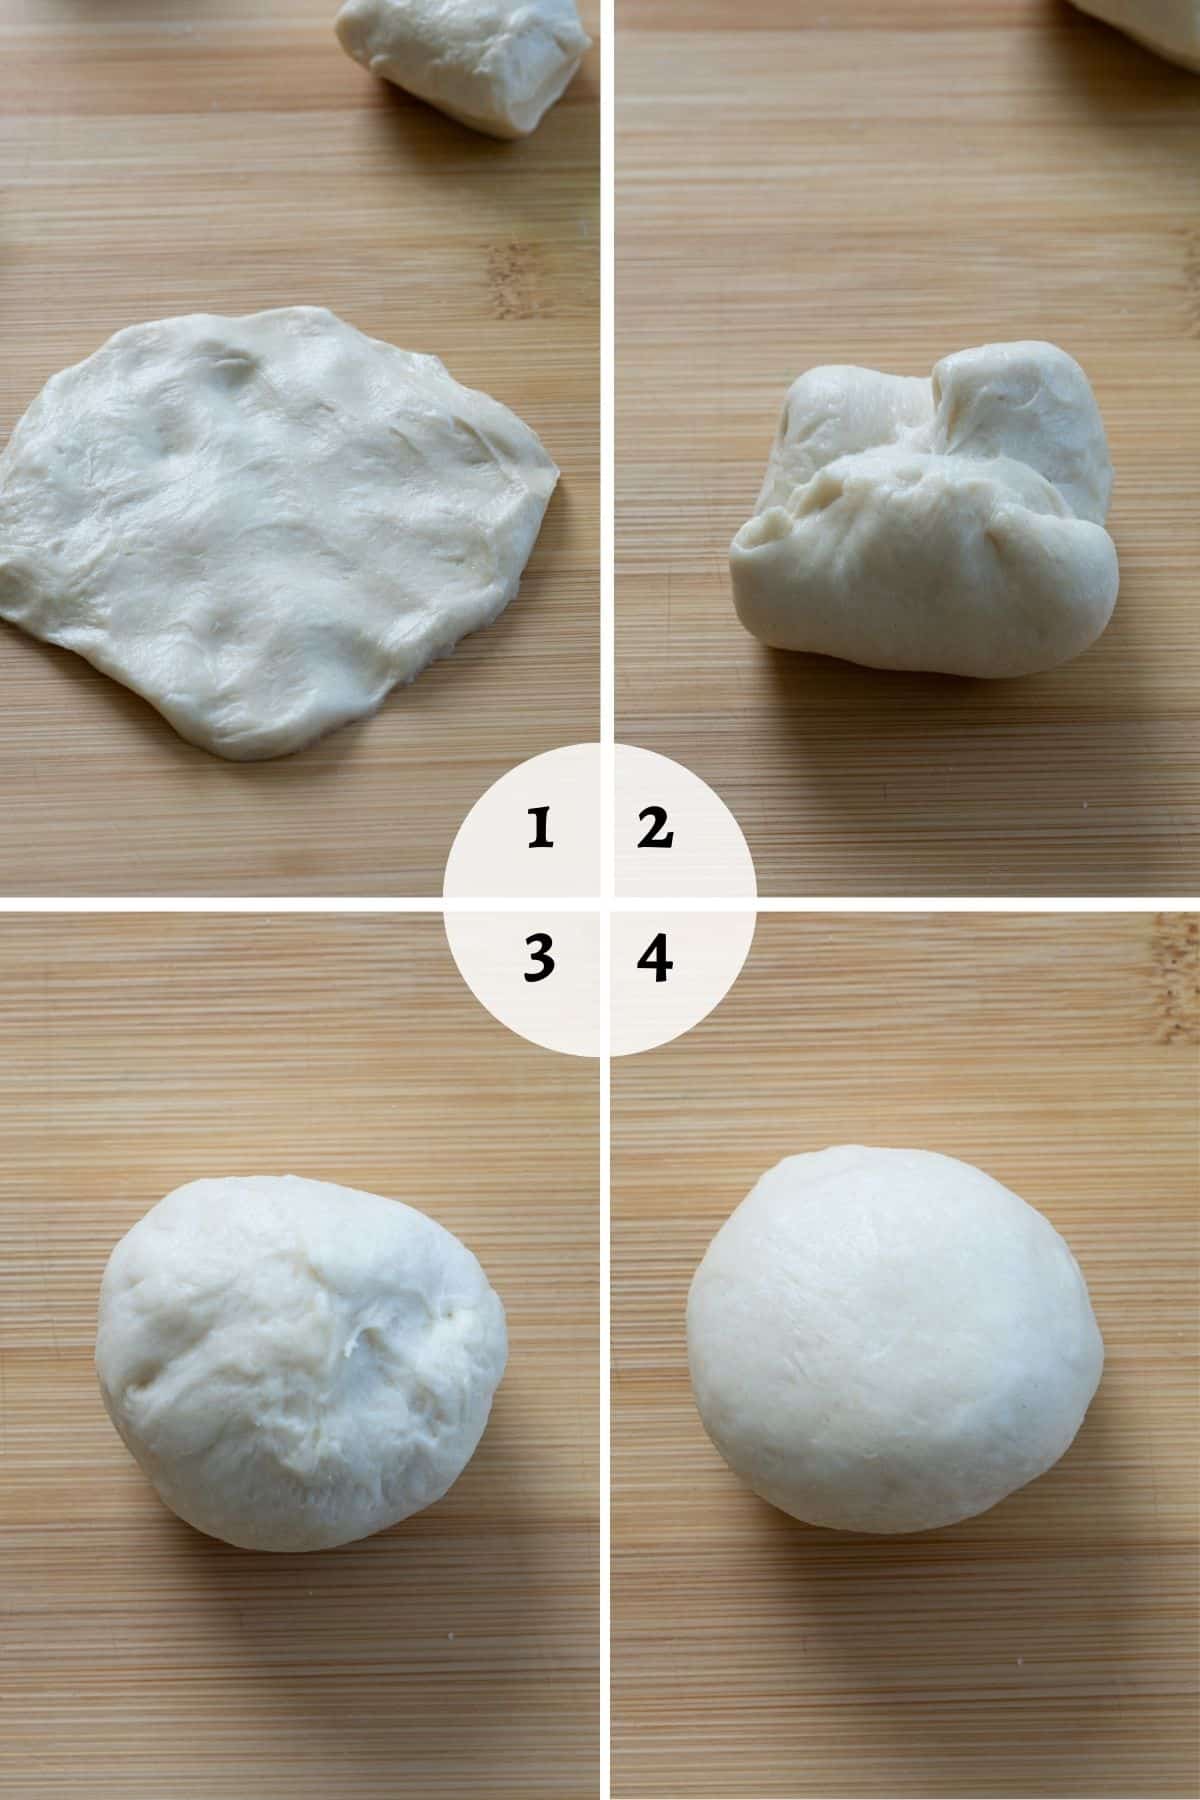
Cover the dough with a damp tea towel and let it rest for 15 minutes.
After resting, tighten the dough balls again, and place them in a 9 by 13 cake pan lined with parchment paper.
To do so, form your hand into a C shape, roll the dough with your hand (against the working surface) by pushing the ball up with the side of your palm that's close to your thumb and pulling it back with the other four fingers in a circular motion. Do this for two to three times and let the tension between the dough and working surface tighten up the dough ball. See video for a demonstration.
Step 4 - Final proofing and bake
Cover the cake pan with a damp towel or greased plastic wrap (I use oil spray, but you can also use your hand and apply a thin layer of vegetable oil on it) and let them proof in a warm place (82°F / 28°C~ 95°F / 35°C) for an hour to an hour and a half, see the picture below as a reference.
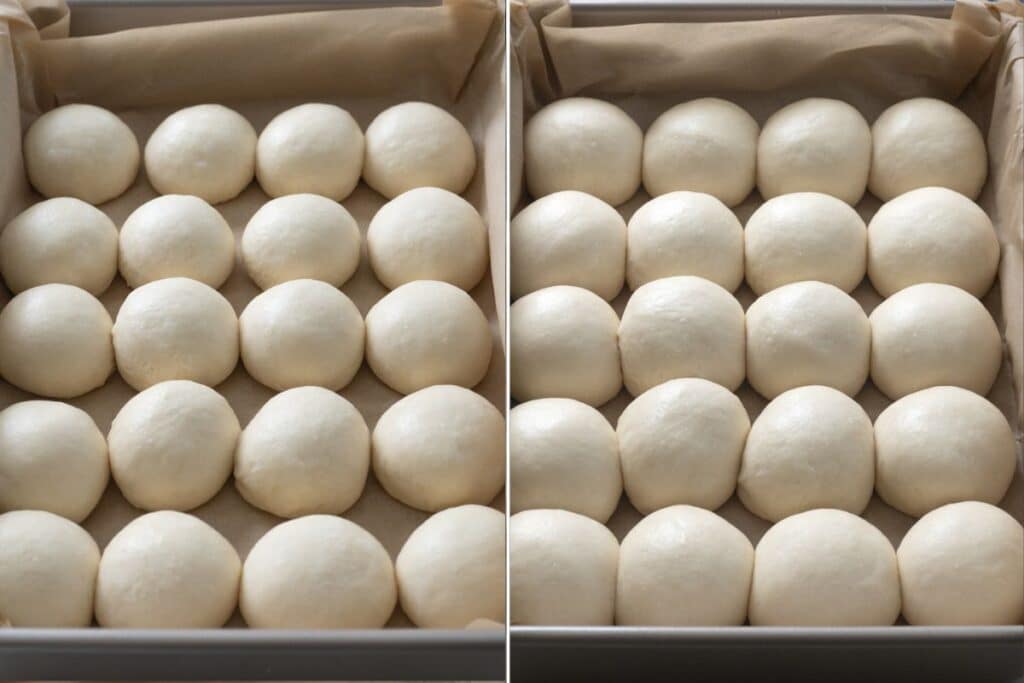
Preheat the oven to 375°F / 190°C; adjust the oven rack to the middle.
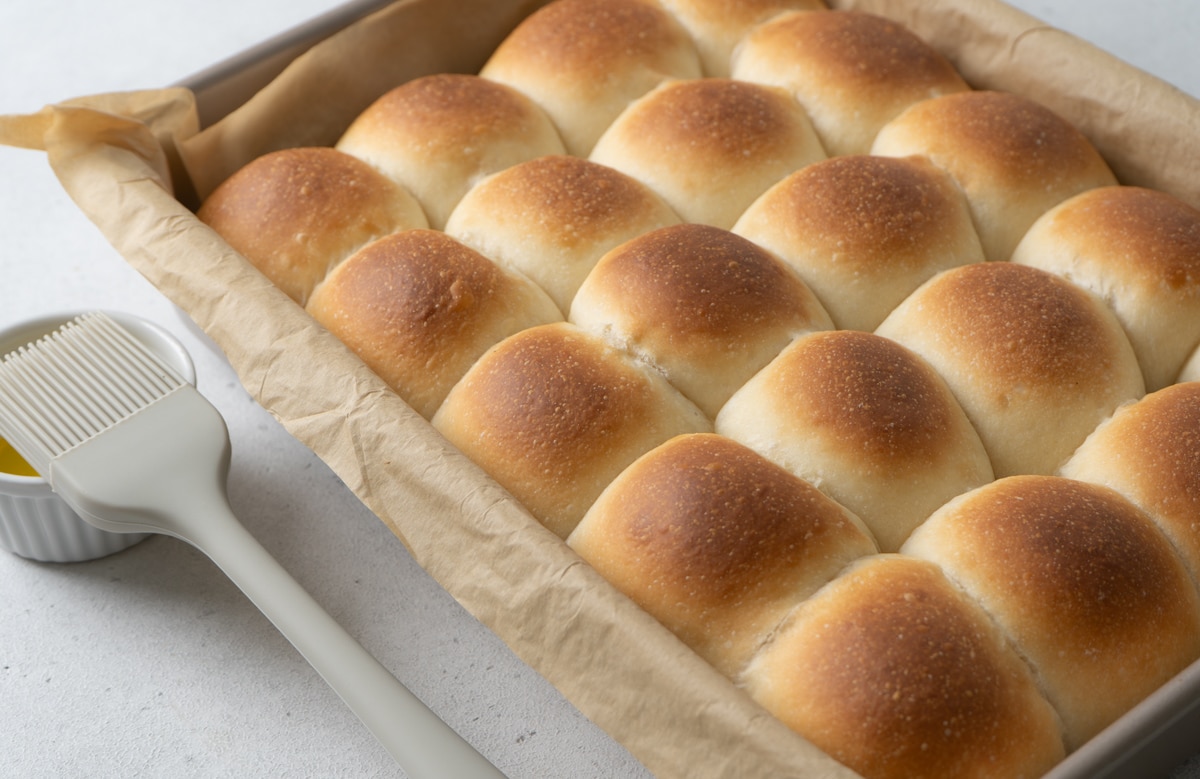
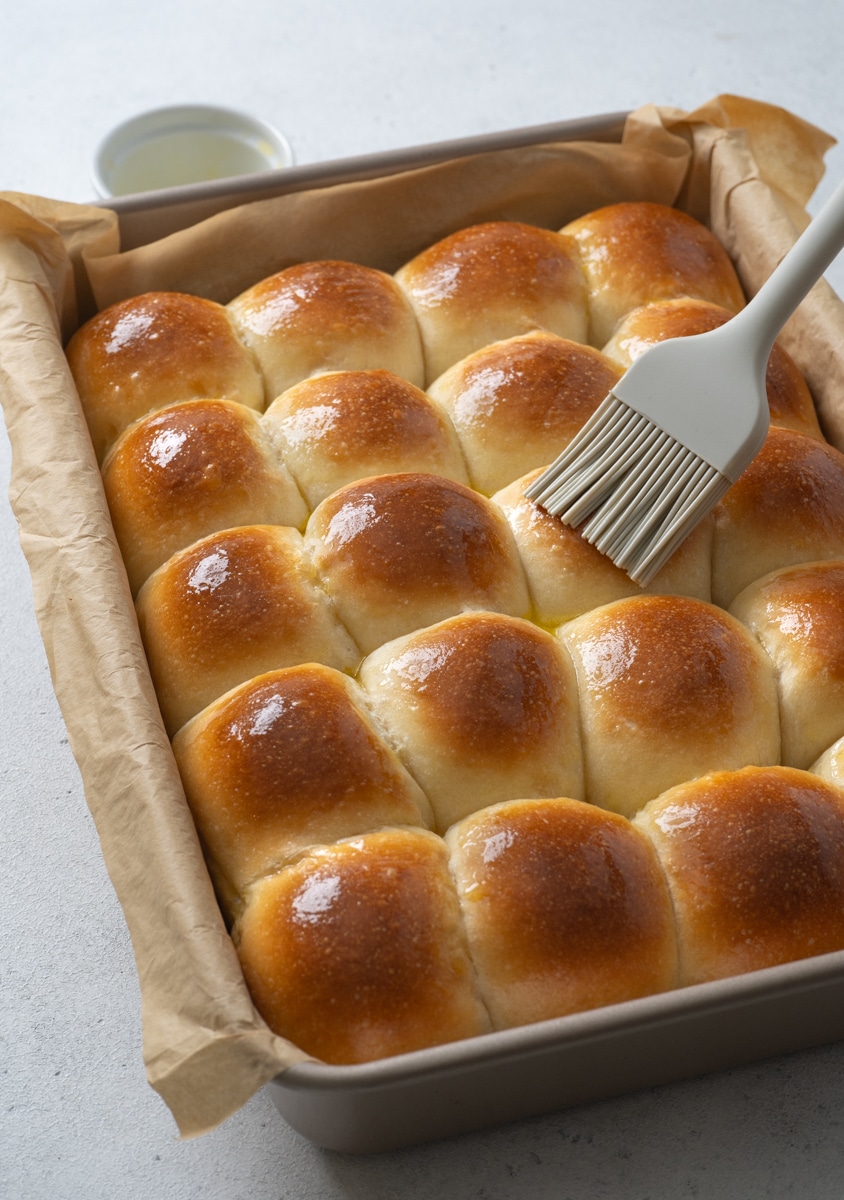
Bake for 18–20 minutes, or until golden brown. If you like, brush the tops with melted butter. Carefully lift the rolls out of the pan by holding the edges of the parchment paper, then set the whole batch on a cooling rack. Allow them to cool for 10 minutes before enjoying.
Recipe Tips and Tricks
- Measure your ingredients with a kitchen scale! This is especially true for flour and liquids, because your one cup can be very different from my one cup.
- When making Tangzhong for this recipe, make sure you remove it from the heat once it starts to thicken up, you don't want to bring it to a boil.
- Start with cold liquid - I learned this from professional bakers in Taiwan. Since the dough needs a lot of kneading, using cold liquid prevents the final dough from becoming too warm (which negatively impacts the texture of the bun). In summer, I would even place the milk in a freezer until a thin layer of ice forms near the edge before I use it.
- Since we are adding yeast towards the end, it's important to make sure it dissolves in water completely before adding it to the dough.
- Letting the dough rise overnight in the fridge slows down the fermentation, which helps develop a deeper flavor. The chilled dough is also much easier to handle and shape, and it spreads the bread making process over two days, so you don’t have to finish everything at once.
- The best temperature for final proofing is between 80 - 90°F (26.5 - 32°C). If your indoor temperature is too low, you can proof your dough in the oven over a separate tray/pan on the bottom rack that's filled with water brought to a boil.
- If your oven has a proofing function, then for the first proof, only use this function for the first 20 minutes so that the temperature won't be too high. For the second proof, however, you can turn on the proofing function for the whole time as we need a higher temperature for the second proof.
- Don't overproof your dough! This will affect the texture and the taste of your buns.
Recipe FAQs
This is not recommended, as the texture won't be as good.
The windowpane test is a simple way to check if the dough has been kneaded enough. To perform this test, simply get a small piece of dough and stretch it carefully to see if it can be stretched into a smooth and almost see-through membrane. I usually do this test once the surface of the dough is very smooth from kneading.
Since this recipe required a longer kneading time, adding yeast at the end can prevent the dough from rising too early, which will result in a rougher texture.
If your dough doesn't seem to rise after 12 hour, it might be that your fridge is too cold. You can place it in the room temperature for another 30 minutes or so to proof.
Yes! you can proof it for 1 hour or until it's double in size in a warm place and continue the rest of the steps.
Yes! Actually freezing is the best way to store these buns if you are not eating within a day. Separate the buns and place them in a Ziploc bag once they cool completely and freeze it for up to three months. Never store these in the fridge as they will dry up.
Let the buns thaw for 15 minutes or so before baking in 350°F (180°C) for about 5 minutes, and it will taste as good as fresh ones!
Don't Forget to Try

Perfect Sweet Dinner Rolls (Better Than Bakery!)
Equipment
- Stand mixer
- 9 x 13 cake pan
Ingredients
Tangzhong Roux
- 25 g bread flour
- 125 g water
Dinner Rolls Dough
- 375 g bread flour
- 100 g cake flour
- 40 g sugar
- 20 g dry milk powder
- 180 g cold milk
- 20 g honey, or condensed milk
- 1 large egg
- 1 teaspoon sea salt
- 50 g unsalted butter(soften), cut into 6-8 pieces
- 1 teaspoon instant yeast, ideally saf instant yeast
Butter for Brushing
- 2 tablespoons melted butter
Instructions
Make Tangzhong
- In a small saucepan, whisk together the flour and water until smooth. Cook over medium-low heat, stirring constantly, until the mixture just begins to thicken. As soon as it starts to thicken, remove the pan from the heat and continue whisking for another 20–30 seconds. The tangzhong should be loose and pourable, more like a slurry than a thick paste.
- Pour the tangzhong into a small bowl or container, cover it, and place it in the freezer for 20–30 minutes. It should be completely cooled, ideally with a thin layer of ice having just formed near the edge. You can also let it cool in the refrigerator for 1–2 hours, or overnight if you’re preparing ahead.
Make the dough
- In a stand mixer, mix all the dough ingredients except yeast, sea salt and unsalted butter until a rough dough is formed. Cover and let it rest for 30 minutes (in the fridge, if possible).
- After resting, Add salt and knead for 2 minutes.
- Add unsalted butter, one piece at a time, and knead for another 6-8 minutes until the butter is well incorporated with the dough and the dough starts to look smoother.
- Form the dough into a ball, place it in a greased airtight container or gallon sized ziploc bag and store in the fridge for around 12-18 hours
Shape the rolls
- Take the dough out from the fridge, transfer it to a lightly floured surface and divide the dough into 20 equal portions with a dough cutter (don't tear it!)
- For each piece of dough, flatten with your palm before folding the edges in to the center, pinch them together to form a ball and flip it over so that the seam side is down. When finished, cover the dough balls with a damp tea towel and let it rest for 15 minutes.
- After resting, tighten the dough balls again. To do so, form your hand into a C shape, roll the dough with your hand (against the working surface) by pushing the ball up with the side of your palm that's close to your thumb and pulling it back with the other four fingers in a circular motion. Do this for two to three times and let the tension between the dough and working surface tighten up the dough ball. See video for a demonstration.
- Place them in a 9 by 13 cake pan lined with parchment paper. Cover the cake pan with a damp towel or greased plastic wrap and let them proof in a warm place (82°F / 28°C~ 95°F / 35°C) for an hour to an hour and a half, until the rolls look noticeably larger and puffier, filling in more of the gaps between them.
Bake the rolls
- Preheat the oven to 375°F (190°C) in the last 20 minutes of the second proof.
- Bake for 18–20 minutes, or until golden brown. Once it's done baking, take the cake pan out from the oven, and If you like, brush the tops with melted butter.
- Carefully lift the rolls out of the pan by holding the edges of the parchment paper, then set the whole batch on a cooling rack. Allow them to cool for 10 minutes before enjoying.
Leave a Reply