

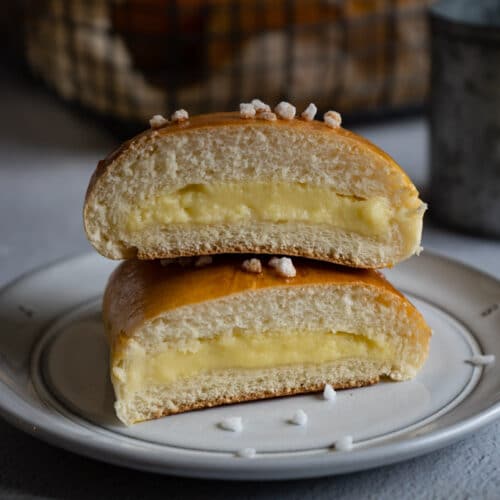
These pillowy milk buns filled with sweet, rich and creamy milk butter are some of the most popular items in Taiwanese bakeries. Give this a try and you'll understand why!

Taiwanese milk butter (奶酥醬) is so popular in Taiwan that people come up with creative ways to incorporate it into different types of buns and treats. The most popular ways are either spreading it on a thick slice of toast and baking until golden brown, or using it as filling for buns of all shapes and sizes. Whichever way you try it, Taiwanese milk butter just seems to make everything delicious!
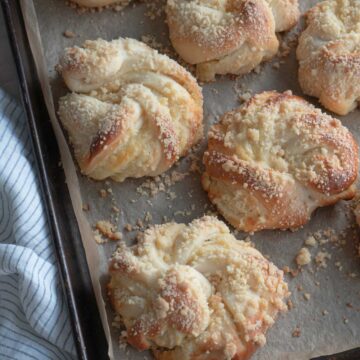
Today, I'm showing you how to make milk butter filled twisted buns with crumb topping. Each bite of this bun gives you some sweet and creamy milk butter along with some of the crispy crumb topping for some contrasting texture. These buns are so good that it's almost impossible to stop with just one. If you like my custard bun, I'm sure you will like this milk butter bun as well!

Why You Need to Try This Recipe
- Milk butter buns are super tasty but are relatively hard to find in the US as they aren't so widely known yet.
- You can make more milk butter and use it as a toast spread for a quick and easy treat.
- My detailed instructions will help you make a milk butter bun that looks and tastes professional.
Ingredients You'll Need
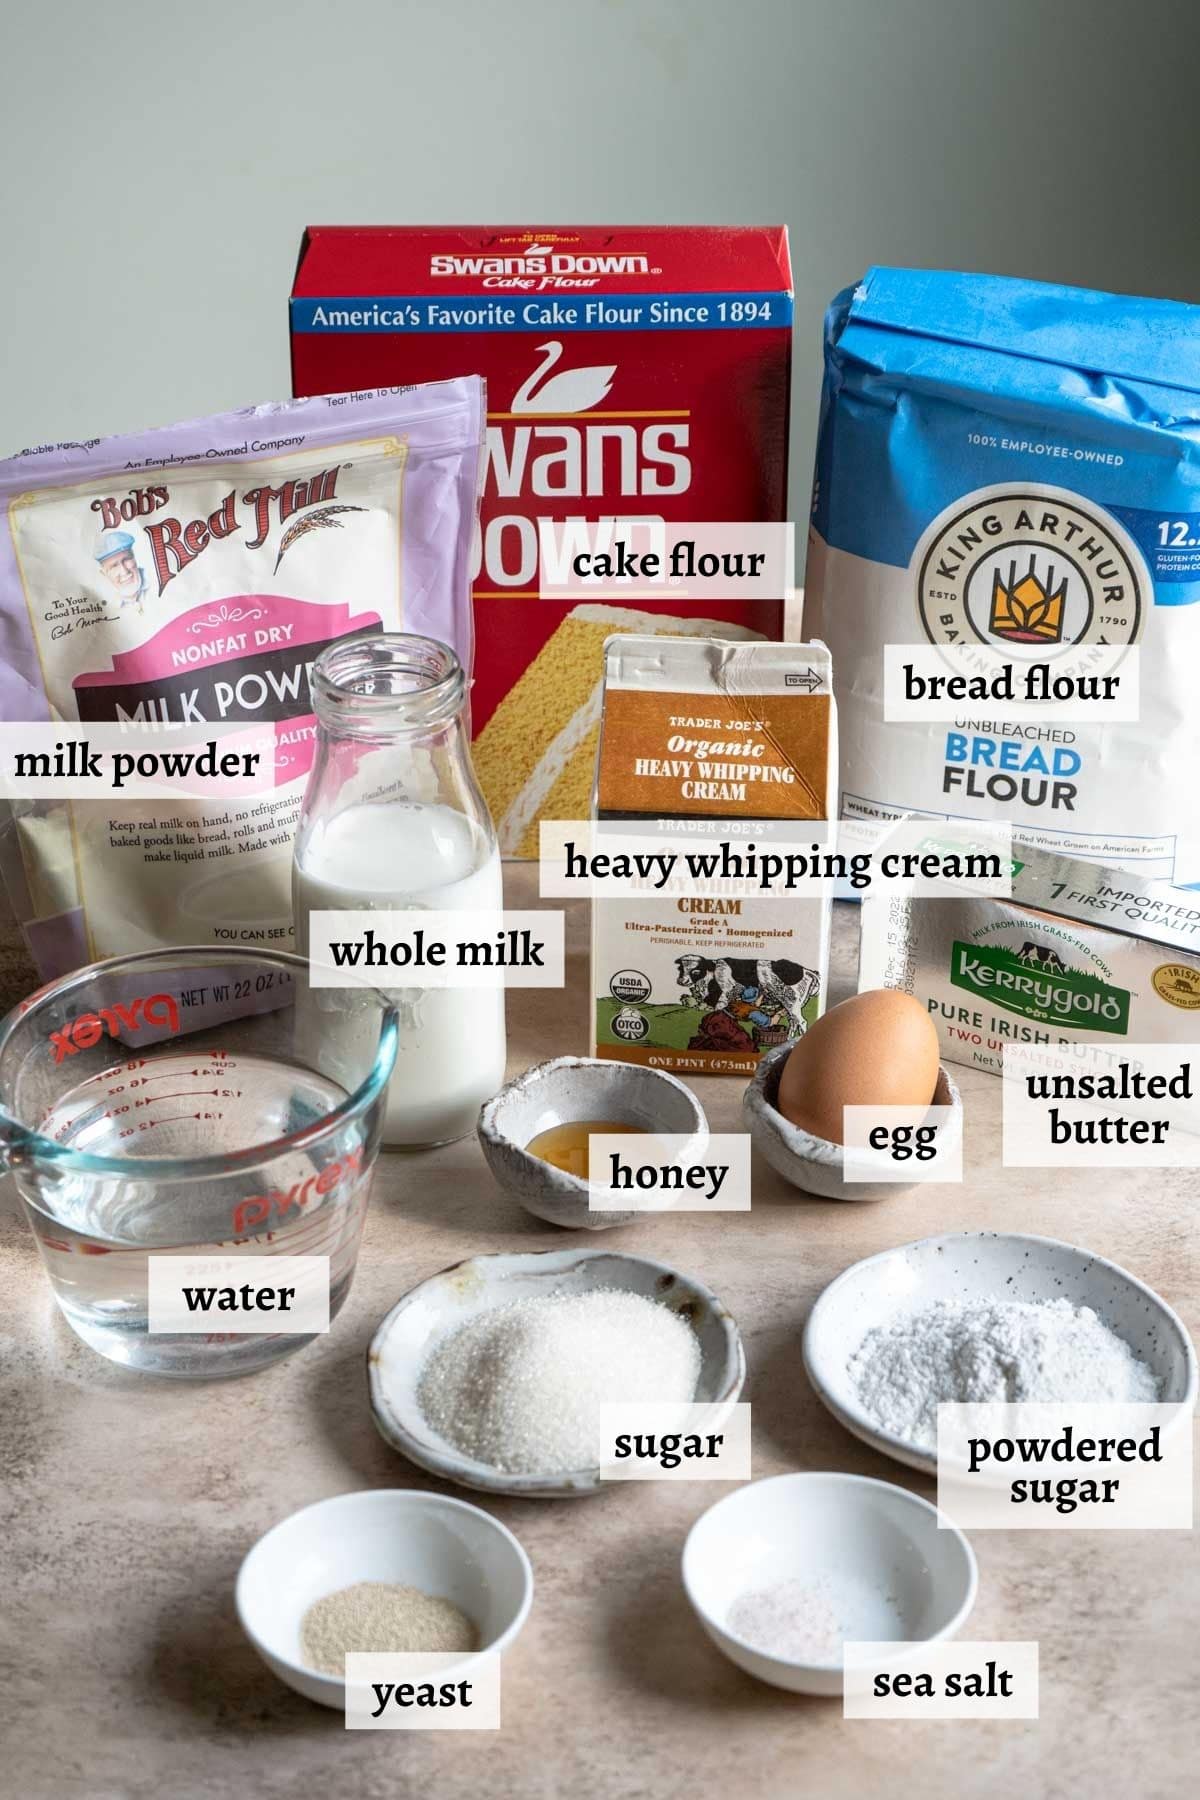
notes
- Yeast - use instant yeast, I recommend using saf-instant yeast.
- Powdered sugar - I usually just blend sugar in my blender until it's powdery. it doesn't need to be super fine.
- Honey - honey helps keep the bun moist.
- Unsalted butter - I recommend using European butter as it contains a higher amount of butterfat.
Step by Step Instruction
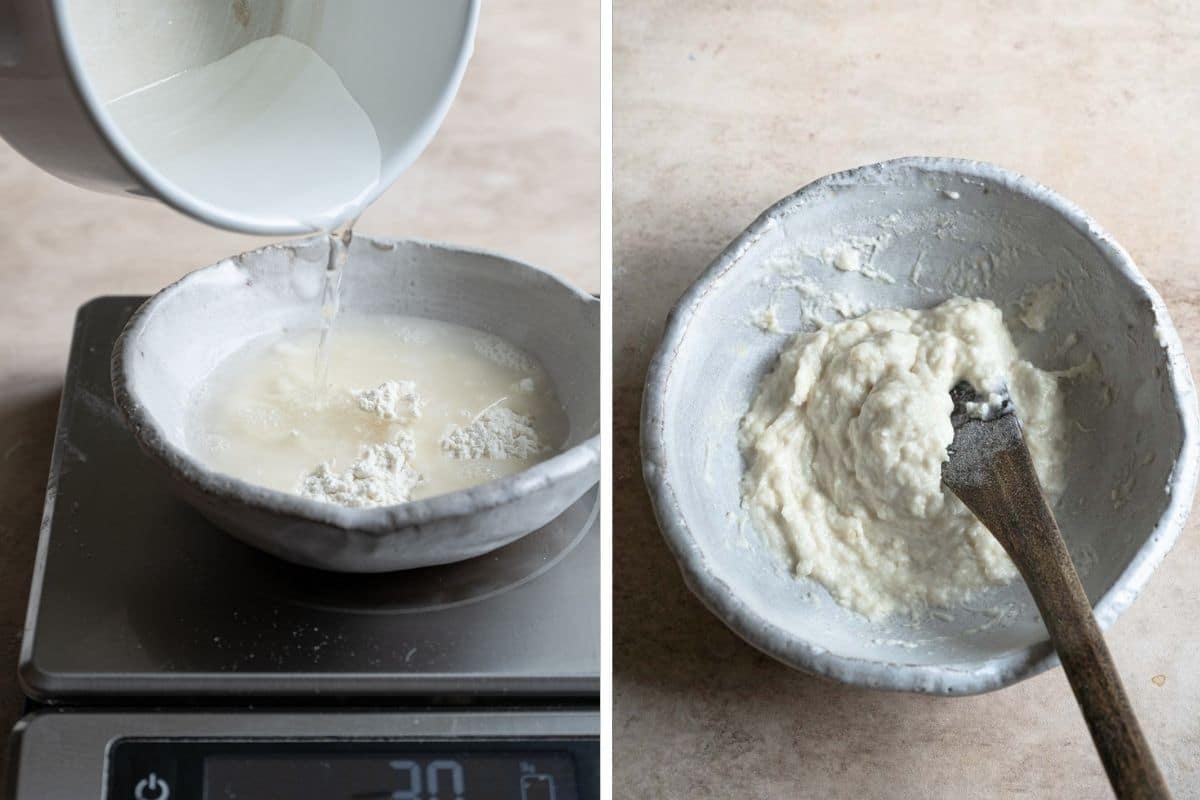
Step 1 - Make yudane (tangzhong) roux paste the day before.
Pour boiling water into a small bowl with bread flour and immediately mix well. Cover and store in the fridge after it's cooled for between 12 and 48 hours.
Step 2 - Make milk bun dough.
In a stand mixer, mix all the dough ingredients except yeast, sea salt and unsalted butter until a rough dough is formed. Cover and and let it rest for 30 minutes.
This step is called the autolyse method, which will help shorten the kneading time later and prevent the dough from getting too warm (which negatively impacts the texture of the buns).
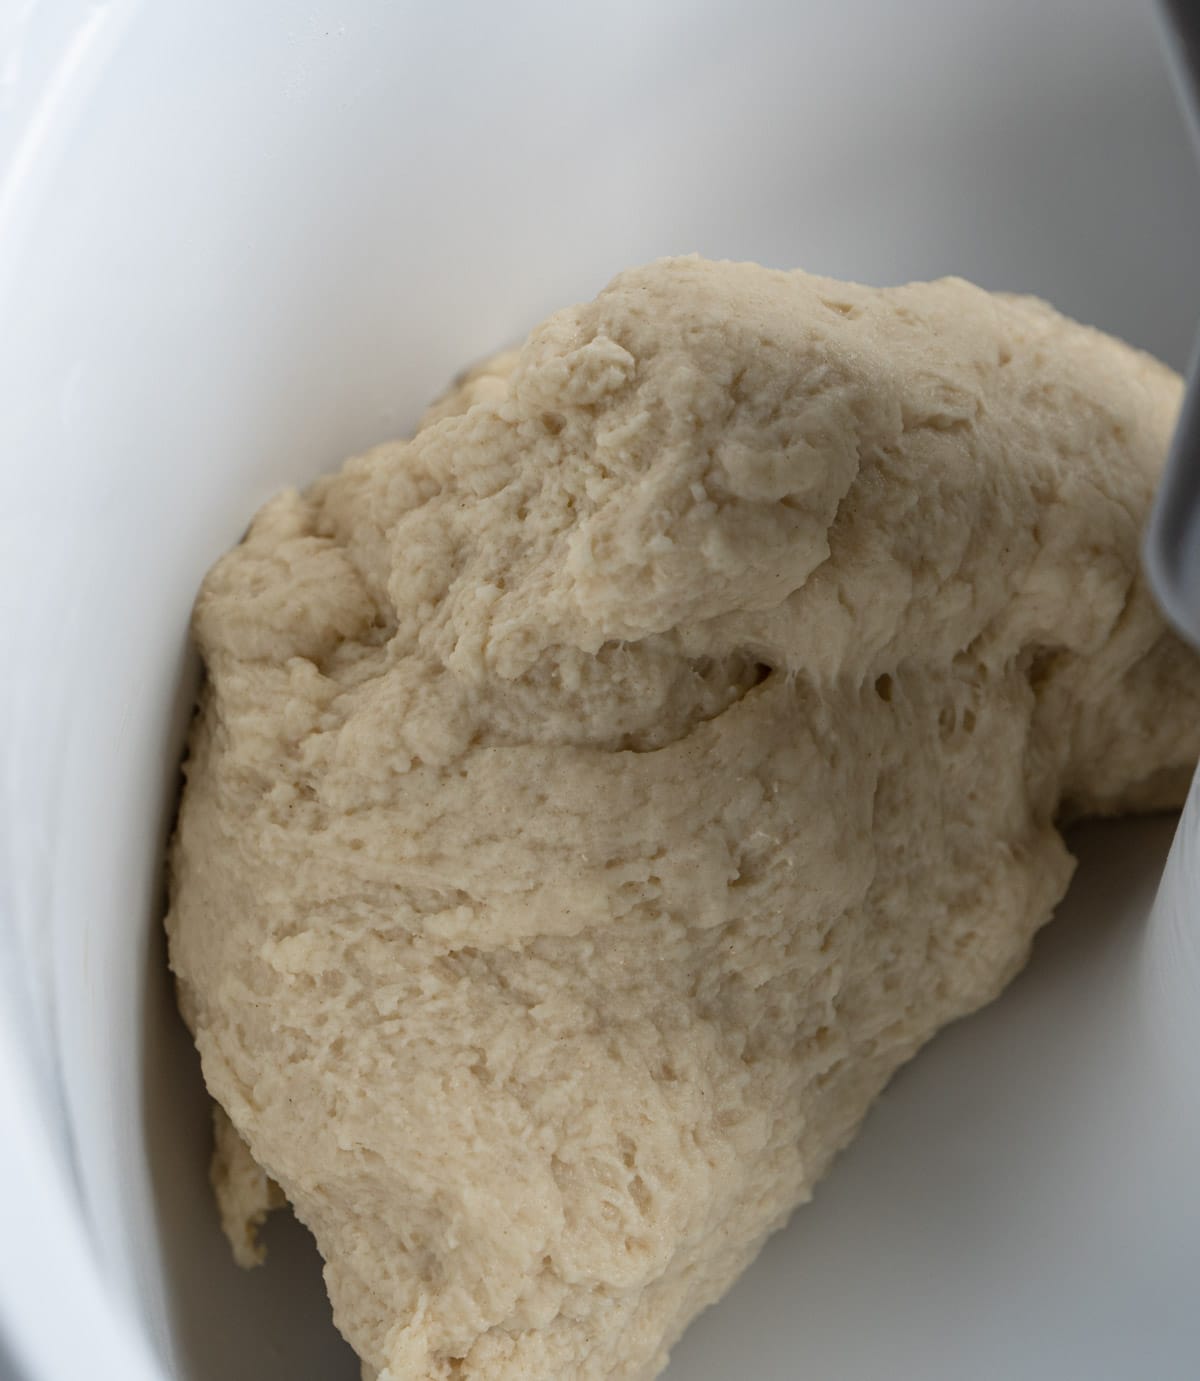
After resting, add yeast and knead for 1-2 minutes on medium speed before adding salt. Knead for another 2-3 minutes before adding unsalted butter, one piece at a time. Knead until the dough is smooth and able to pass the windowpane test (see FAQ below for more details). About 10 minutes.
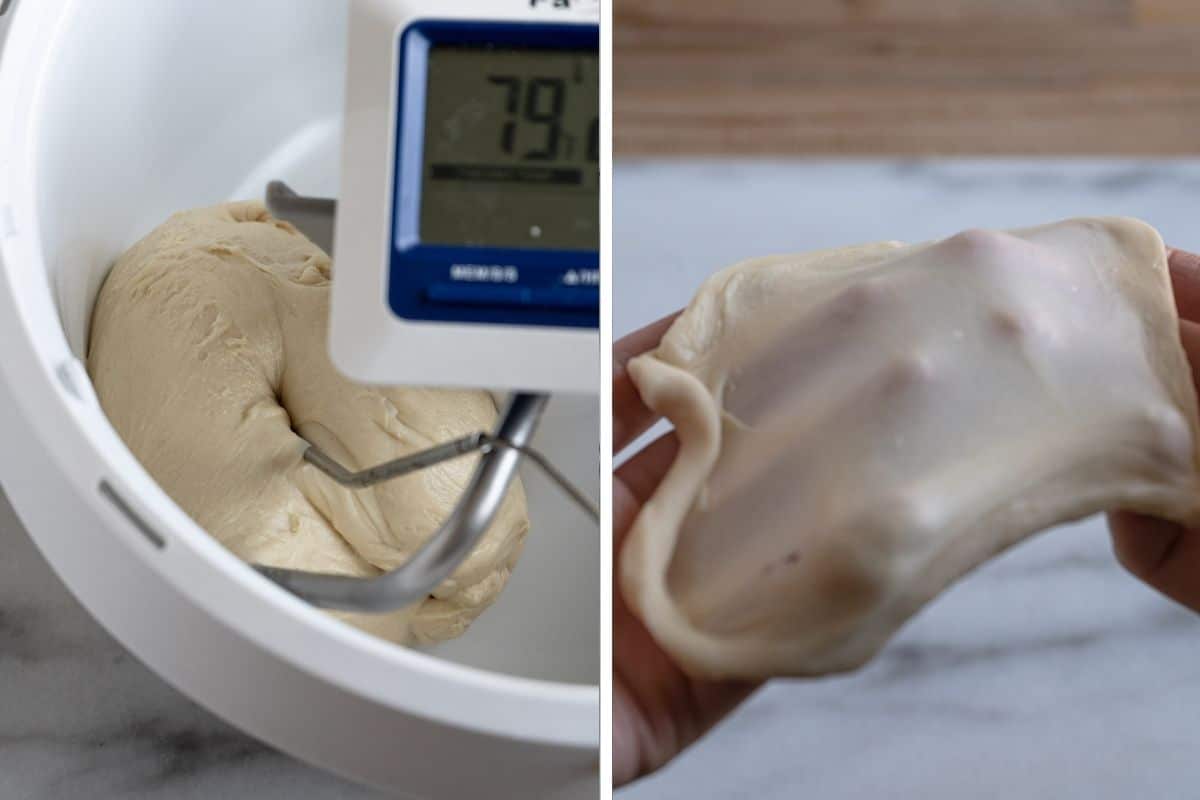
Make sure the dough stays cool during the entire kneading process. If the temperature of your dough becomes higher than 82°F (28°C) when it's done kneading, place it on a tray and chill it in the freezer for 1-2 minutes before proofing.
Place dough in a greased bowl, cover and proof in a warm place (82°F / 28°C) for an hour or until the dough just about doubles in size.
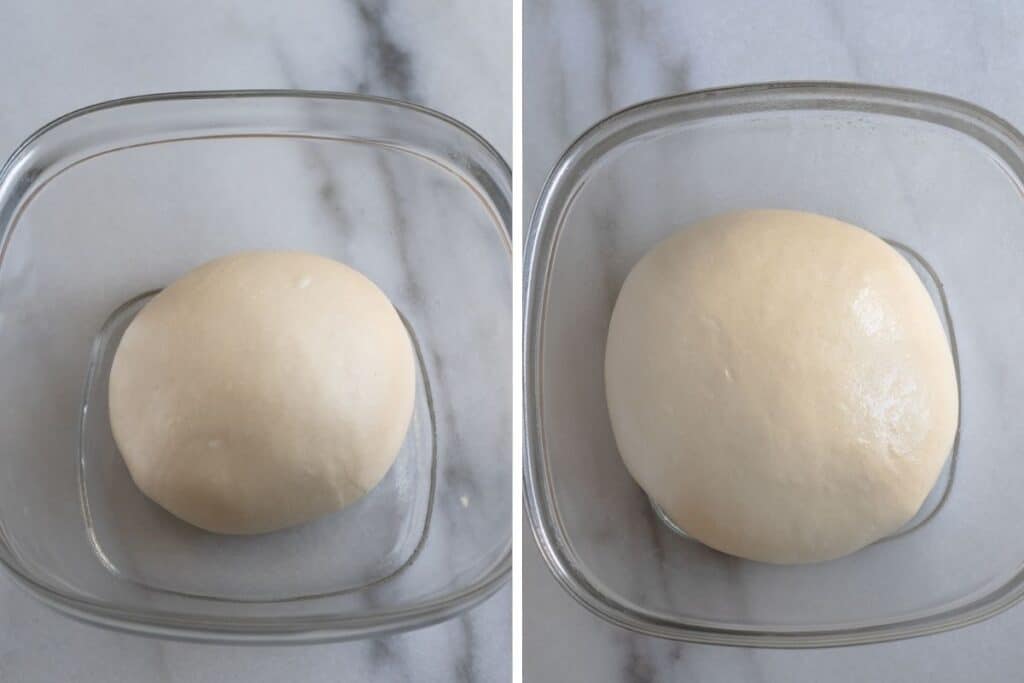
Quick tip - If you find it difficult to tell whether it has doubled in size or not, place the dough in a container with about double of the volume of the dough. That way, when the dough nearly fills the container, you know it's done proofing.
Step 3 - Make crumb topping and milk butter while the dough is proofing.
To make the crumb topping, mix softened unsalted butter, sugar and bread flour together with your finger tips until well combined. Cover and store it in the fridge.
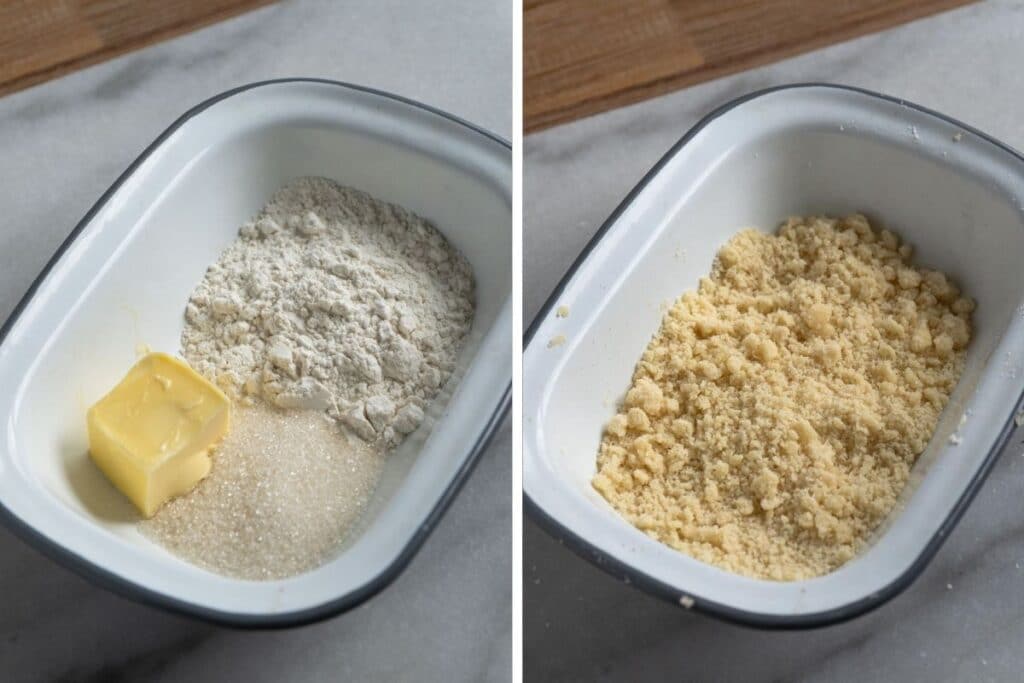
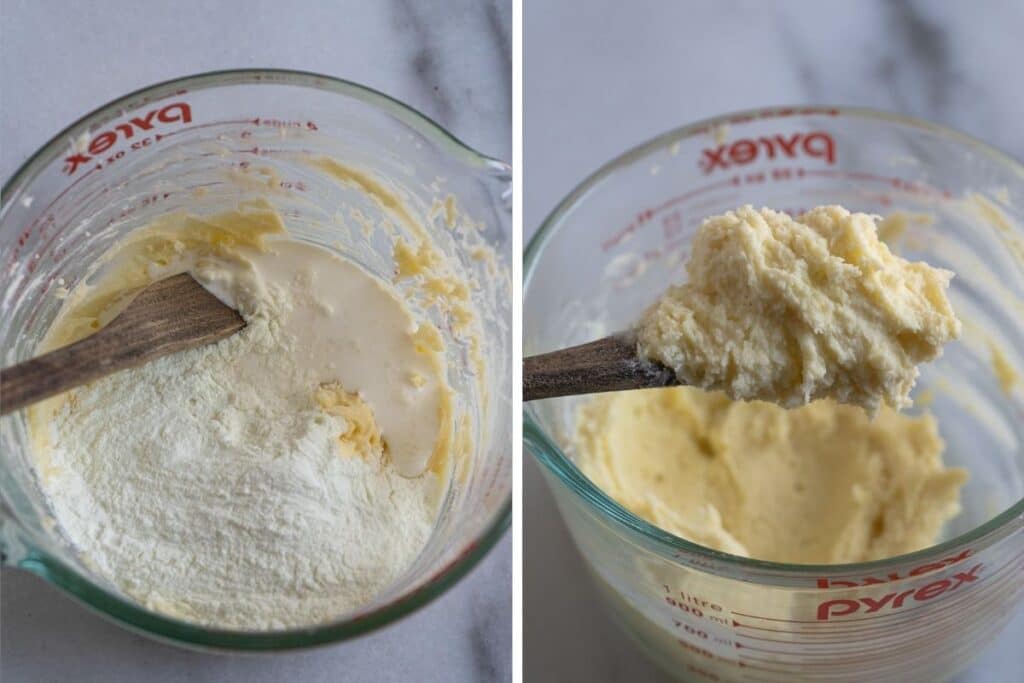
To make milk butter, cream unsalted butter with sugar together until smooth before stirring in milk powder and heavy whipping cream. Cover and leave it at room temperature until it's ready to use.
Step 4 - Assemble the buns and final proof.
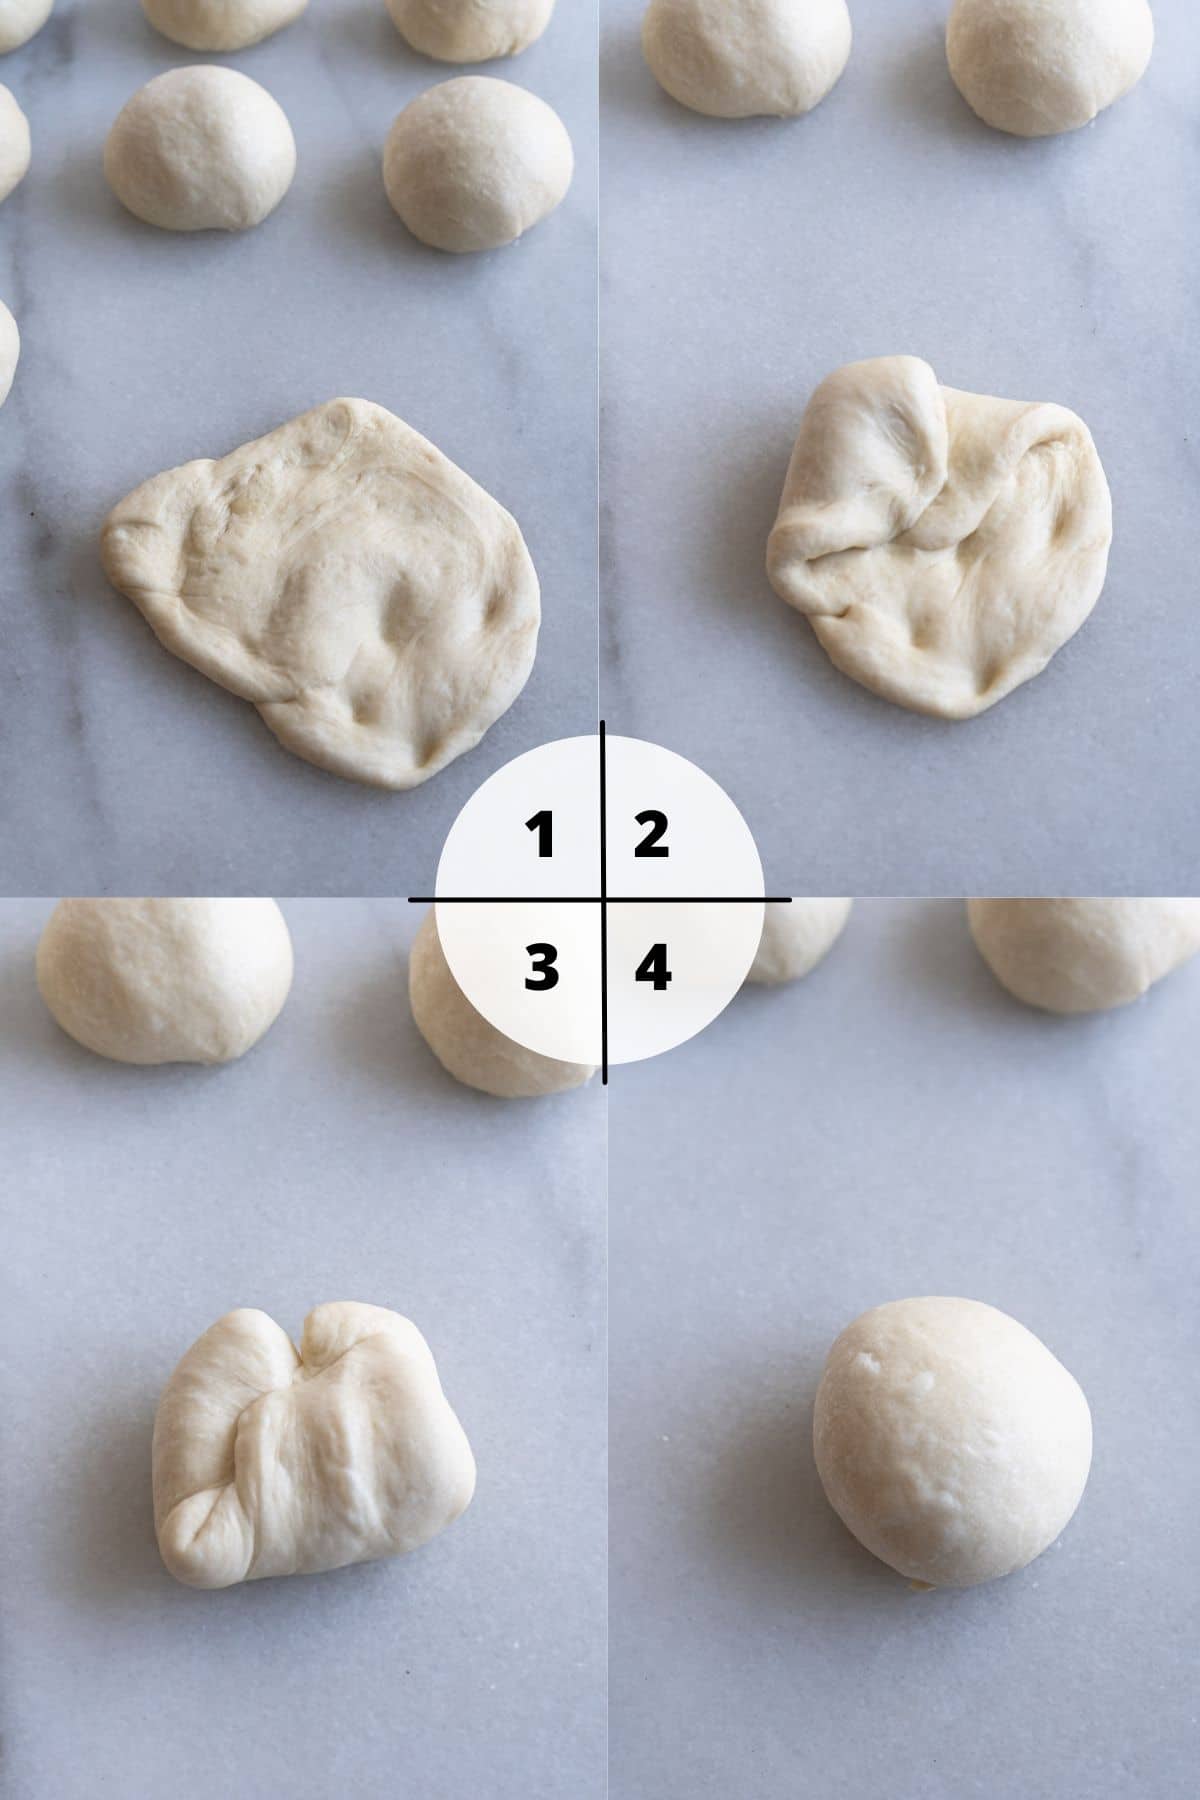
Divide the dough into 8 equal portions with dough cutter (don't tear it!)
Flatten the dough with your palm before folding the edges to the center, pinch them together to form a ball and flip it over so the seam side is down. Cover the dough with a damp tea towel and let it rest for 15 minutes.
To form the bun, dust the working surface with a bit of flour, roll the dough ball into a rectangle that's about the size of your hand.
Spread about 25g of milk butter on the dough. Fold ⅓ of the dough from the side to the middle, then fold in the same direction again (See the video below to see how I form the buns.). Cut two lines in the middle of the dough length-wise and twist it two times before curling it up like a snail shell and stick the end into the bottom.
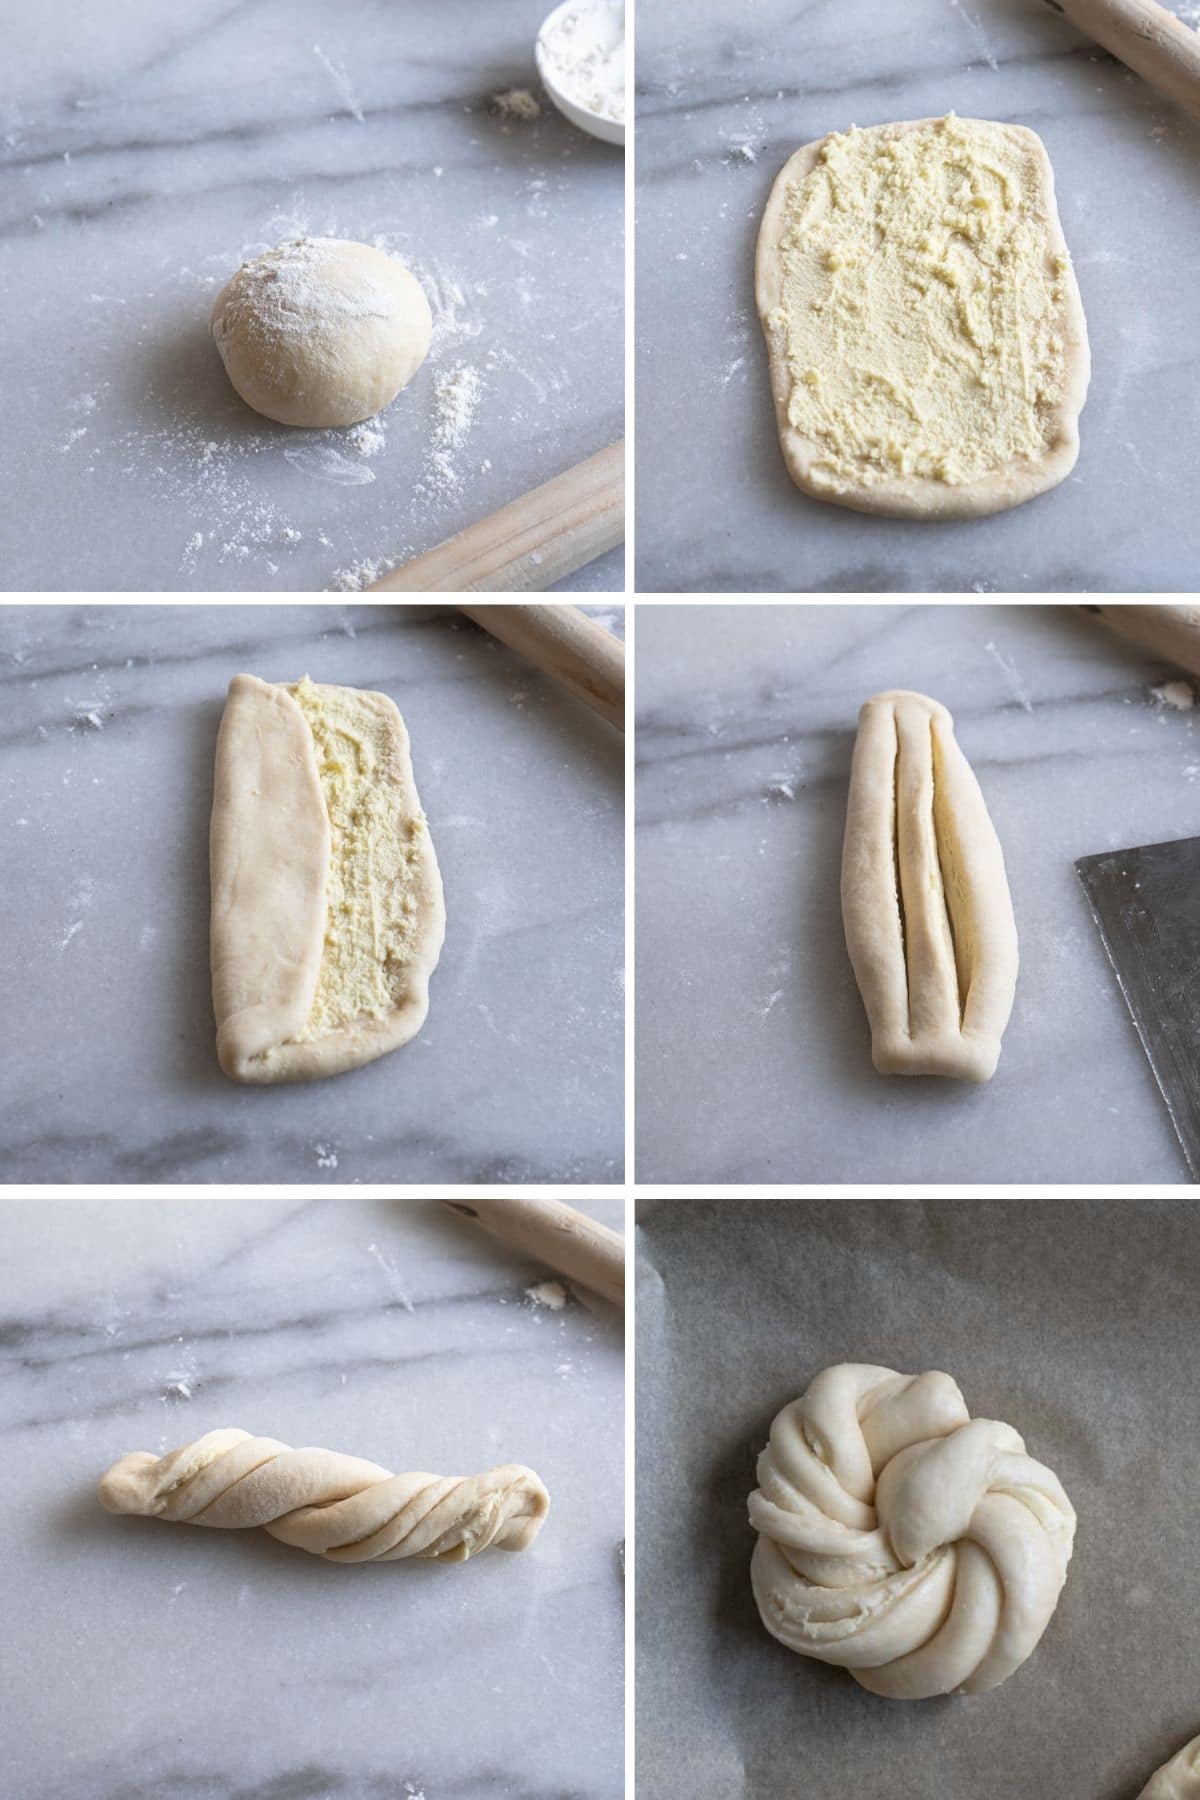
Video Tutorial on How to Shape the Bun
Place the buns on a lined baking sheet, cover with a damp tea towel and let it rest in a warm place (82°F / 28°C) for 50 minutes.
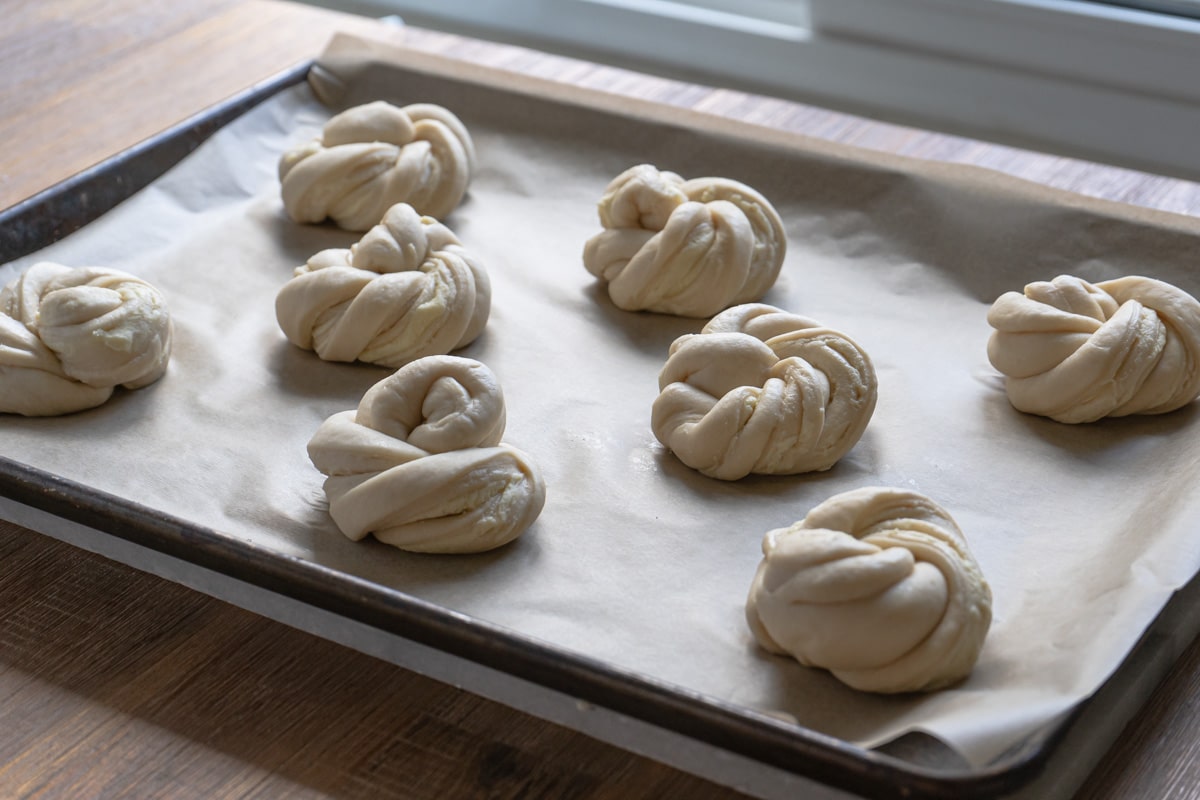
Step 5 - Top the bun with crumb and bake
Preheat the oven to 375°F / 190°C. Brush each bun with egg wash gently and sprinkle the crumb on top of the buns.

When the oven is done preheating, bake the buns for 14-15 minutes.
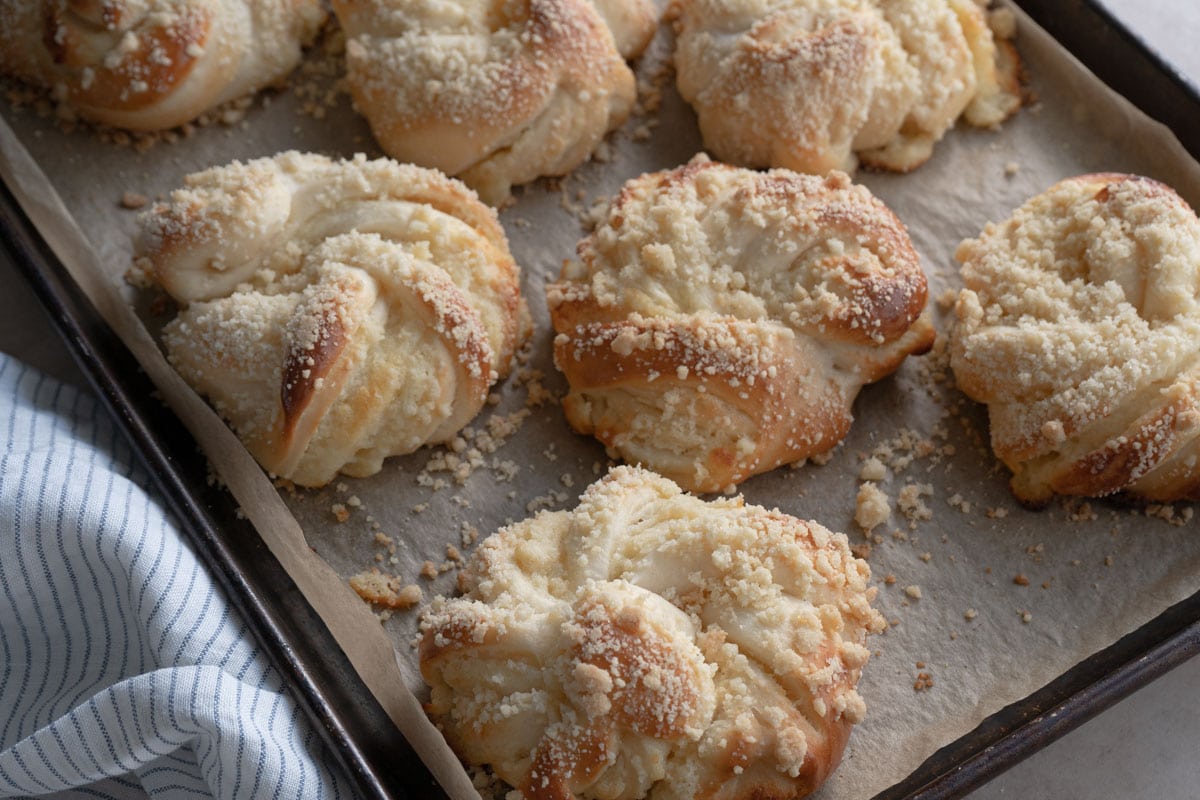
Let the buns cool on the cooling rack for 10-15 minutes before enjoying.

Recipe Tips and Tricks
- Measure your ingredients with a kitchen scale! Especially for flour and liquids, because your one cup can be very different from my one cup.
- Start with cold liquid - I learned this from professional bakers in Taiwan. Since the dough needs a lot of kneading, using cold liquid prevents the final dough from becoming too warm (which negatively impacts the texture of the bun). In summer, I would even place the milk in a freezer until a thin layer of ice forms near the edge before I use it.
- The best proofing temperature is between 80 - 90°F (26.5 - 32°C). If your indoor temperature is too low, you can proof your dough in a sealed oven over a separate tray/pan on the bottom rack that's filled with boiling water.
- If your oven has a proofing function, for the first proof, only turn it on for the first 20 minutes instead of using it for the whole time so the temperature won't be too high. For the second proof, you can turn on the whole time as we need higher temperature for second proof.
- The buns might not be golden brown when it's done baking due to the crumb topping. If your oven has a convection bake function, you can turn it on for the last 1-2 minutes to help the buns achieve a golden brown color.
Recipe FAQs
This is not recommended, as the texture won't be as good.
If your dough doesn't seem to rise after an hour, it might be that your yeast is not fresh or the proofing temperature is too low.
The windowpane test is a simple way to check if the dough has been kneaded enough. To perform this test, simply get a small piece of dough and stretch it carefully to see if it can be stretched into a smooth and almost see-through membrane. I usually do this test once the surface of the dough is very smooth from kneading.
Yes! Place the dough in a greased zip lock bag, squeeze out the air and place it in the fridge overnight (12-24hrs). When you are ready to shape it, take it out and continue the rest of the steps directly. In this case, the second proof might take a bit longer, as the dough is cold.
Yes! The milk butter might become harder and hard to spread after storing in the fridge, so remember to take it out from the fridge and let it soften a little when you do your first proofing.
Yes! Actually freezing is the best way to store these buns if you are not eating within a day. Place the buns in a zip lock bag once they are cool completely and freeze it for up to three months. Never store these in the fridge as they will dry up.
Let the bun thaw for 15 minutes or so before baking in 350°F (180°C) for about 5 minutes, and it will taste as good as fresh ones!
I hope you try this recipe because I know you'll love these milk butter buns if you get to try one!
Happy baking!!
Don't Forget to Try
I would like to hear from you! If you make this recipe, please consider leaving a star rating and comment in the section further down the page. Stay in touch by following my Instagram and Pinterest!
Taiwanese Milk Butter Buns (奶酥麵包)
Ingredients
Tangzhong (Yudane)
- 30 g boiling water, 2 tbsp
- 25 g bread flour, 2½ tbsp
Milk Bun Dough
- 250 g bread flour, 2 cup
- 30 g cake flour, ¼ cup
- 10 g dry milk powder, 1 tbsp
- 30 g sugar, 2 tbsp
- 15 g honey, a little bit less than 1 tbsp
- 25 g large egg, beaten, ½ large egg, ⅛ cup, save the rest for making cookie top
- 80 g cold whole milk, ⅓ cup
- 60 g cold water, ¼ cup
- all tangzhong (Yudane) paste
- 1 teaspoon instant yeast, preferably saf instant yeast
- 4 g sea salt, ½ tsp
- 30 g unsalted butter, cut into 6 - 8 pieces
Crumb Topping
- 25 g unsalted butter, slightly less than 2 tbsp, softened
- 20 g sugar, 1½ tbsp
- 40 g bread flour, ⅓ cup
Milk Butter
- 65 g unsalted butter, 4½ tablespoon
- 40 g powdered sugar , ⅓ cup
- 30 g heavy whipping cream, 2 tbsp
- 65 g dry milk powder, ½ cup
Egg Wash
- leftover beaten egg
- 1 teaspoon water
Instructions
Make Tangzhong (Yudane) the Night Before
- Measure 25 grams of bread flour in a bowl. Set the kitchen scale to zero with the flour and bowl on it and pour in 30 grams of boiling water. Stir until combined to form a sticky dough.
- Let it cool down before storing in the fridge overnight or for 12 hours. Use it within 48 hours.
Milk Bun Dough
- In a stand mixer, mix all the dough ingredients except yeast, sea salt and unsalted butter until a rough dough is formed. Cover and and let it rest for 30 minutes.
- After resting, add yeast and knead for 1-2 minutes on medium speed before adding salt. Knead for another 2-3 minutes before adding unsalted butter, one piece at a time.
- Knead until the dough is smooth and able to pass the windowpane test (see FAQ for more details). About 8-10 minutes. Make sure the dough stays cool during the entire kneading process. If the temperature of your dough becomes higher than 82°F (28°C) when it's done kneading, place it on a tray and chill it in the freezer for 1-2 minutes before proofing.
- Place dough in a greased bowl, cover and proof in a warm place (82°F / 28°C) for an hour or until the dough just about doubles in size.
Make Crumb Topping and Milk Butter While the Dough is Proofing.
- To make the crumb topping, mix softened unsalted butter, sugar and bread flour together with your finger tips until well combined. Cover and store it in the fridge.
- To make milk butter, cream unsalted butter with sugar together until smooth before stirring in milk powder and heavy whipping cream. Cover and leave it at room temperature until it's ready to use.
Assemble the Buns
- Divide the dough into 8 equal portions with dough cutter (don't tear it!)
- Flatten the dough with your palm before folding the edges to the center, pinch them together to form a ball and flip it over so the seam side is down. Cover the dough with a damp tea towel and let it rest for 15 minutes.
- To form the bun, dust the working surface with a bit of flour, roll the dough ball into a rectangle that's about the size of your hand.
- Spread about 25g of milk butter on the dough. Fold ⅓ of the dough from the side to the middle, then fold in the same direction again (See the pictures and video in the post to see how I form the buns.).
- Cut two lines in the middle of the dough length-wise and twist it two times before curling it up like a snail shell and stick the end into the bottom.
- Place the buns on a lined baking sheet, cover with a damp tea towel and let it proof in a warm place (82°F / 28°C) for 50 minutes.
Baking
- Preheat the oven to 375°F / 190°C. Brush each bun with egg wash gently and sprinkle the crumb on top of the buns.
- When the oven is done preheating, bake the buns for 14-15 minutes.
- Let the buns cool on the cooling rack for 10-15 minutes before enjoying.
Video
Notes
- Measure your ingredients with a kitchen scale! Especially for flour and liquids, because your one cup can be very different from my one cup.
- Start with cold liquid - I learned this from professional bakers in Taiwan. Since the dough needs a lot of kneading, using cold liquid prevents the final dough from becoming too warm (which negatively impacts the texture of the bun). In summer, I would even place the milk in a freezer until a thin layer of ice forms near the edge before I use it.
- The best proofing temperature is between 80 - 90°F (26.5 - 32°C). If your indoor temperature is too low, you can proof your dough in a sealed oven over a separate tray/pan on the bottom rack that's filled with boiling water.
- If your oven has a proofing function, for the first proof, only turn it on for the first 20 minutes instead of using it for the whole time so the temperature won't be too high. For the second proof, you can turn on the whole time as we need higher temperature for second proof.
- The buns might not be golden brown when it's done baking due to the crumb topping. If your oven has a convection bake function, you can turn it on for the last 1-2 minutes to help the buns achieve a golden brown color.
- Read the FAQs section for more information.
Thank you for this recipe! It was so hard to find a recipe for milk butter buns, so I am really thankful that your one came up in a google search. My mum grew up in Taiwan and in my home state (Victoria, Australia), there is only one bakery about an hour away that sells these buns. It has been a few years since we've bought these. I had been meaning to make some for my mum for so long because of this reason, and I finally made this a few days ago with great success! It means a lot that my mum was able to enjoy these. Thank you so much 🙂 (I'll send a photo through on instagram)
Thank you so much for sharing your story, Ivy! It means a lot to me, I'm sure your mom was very touched 🙂
I used all purpose flour and it turned out great. Amazing recipe. Thx!
I can’t get dried milk powder where I live (South Africa). What can I use instead? We only get dried coffee creamer here, which I don’t think is the same
Hi Henrietta, unfortunately dry milk powder is an essential ingredient for this recipe and can't be substituted.
This is everything I dreamt it would be! I used to work at a bakery and my boss made 'Asian buns' and one of my favorites was the milky filling buns. I've missed them so much. This dough was great and I did 30% more of the filling because I knew I'd want it and I don't regret anything! Thank you so much for this recipe!
Hi Lettie, thanks for trying my recipe! Milk butter bun is very popular in Taiwan but not many people know about it in other countries, I'm so glad to hear you like it 🙂
Hi, just want to mention.....tangzhong is usually cooked on stove paste, this is more yudane /yukone style ....
I've made this recipe probably 5-10 times, and I have to say it's among the best of any recipe I've ever baked. They are so delicious and always a hit with everyone -- of the 60+ recipes from KAF, NYT cooking, and others that I've baked in the past 6 months, these are the undisputed #1. It's a shame that they're quite involved to make, but I *promise* they are so so worth it. If you haven't made these yet, start with a double batch! You'll be sorry if you only make eight.
Wow Camille, thank you so much for speaking so highly of my recipe! This is also one of my favorite buns that I hope more people can get a chance to try 😀