

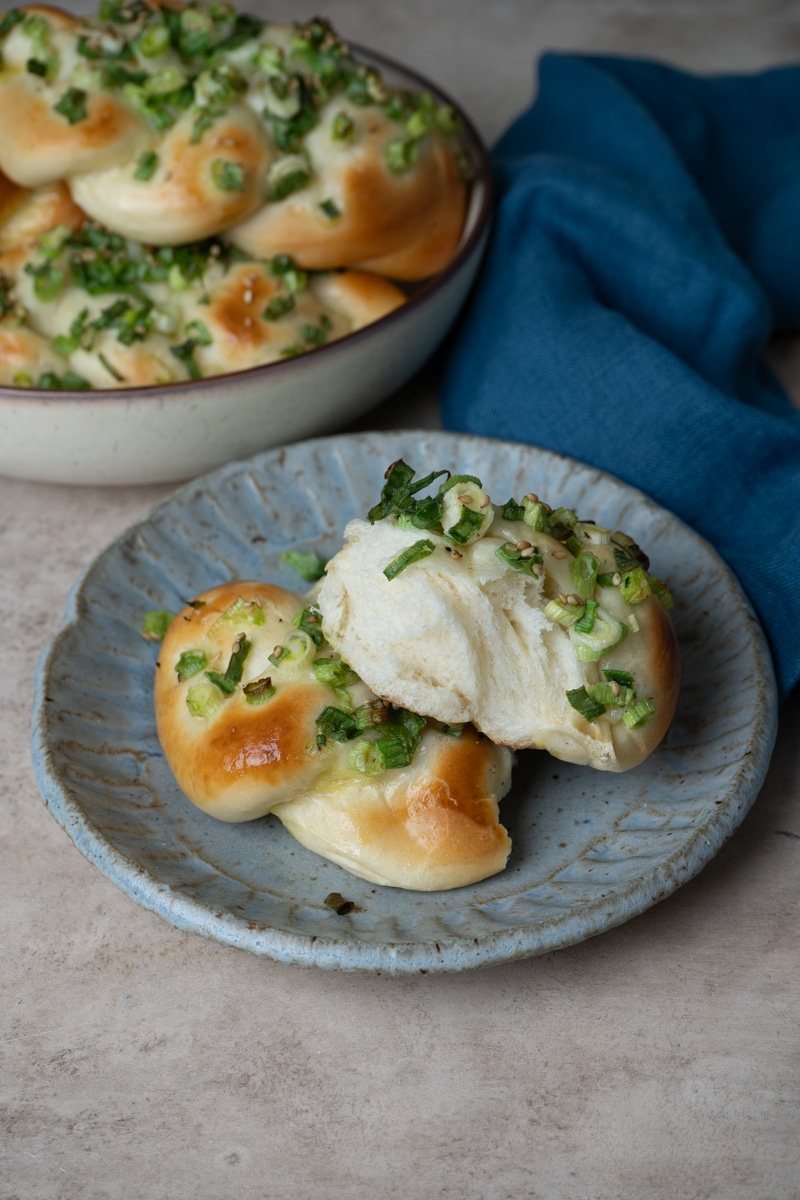
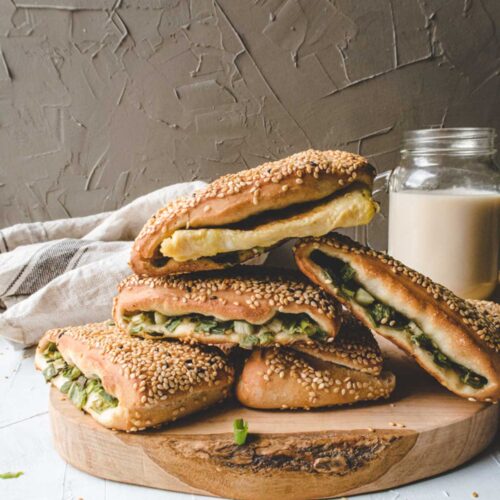
Fluffy, savory, and full of that irresistible scallion fragrance, this traditional Taiwanese scallion bread is a nostalgic favorite that’s perfect for breakfast or an afternoon snack. In this recipe, I’ll show you how to recreate this classic Asian bakery-style bread at home—so good, that it may just beat what you get from the store!
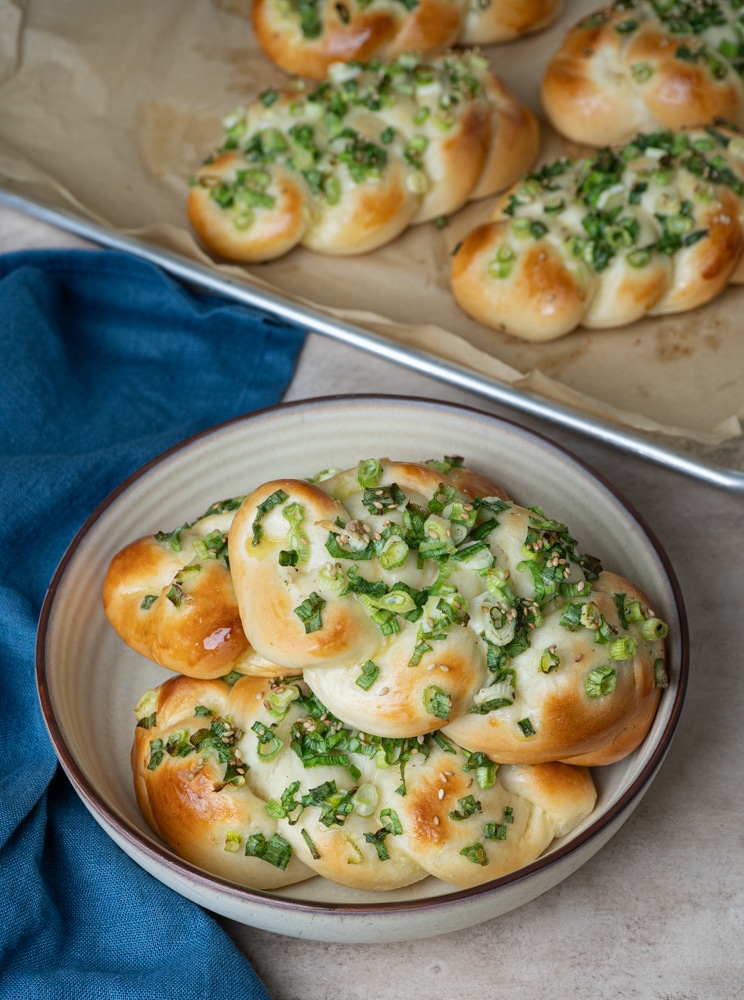
This Taiwanese scallion bread is the kind of thing I grew up eating from the corner bakery—soft yet satisfyingly bouncy, and packed with that irresistible scallion oil aroma. It’s the perfect mix of a fragrant savory flavor with a hint of sweetness all in one bite.
After trying different recipes, I found that this scallion bread tastes the best using my signature pastry bread dough with Yudane method, which is the same dough I use for my Pineapple Bun, Taiwanese Milk Butter Bun and Tuna Bun. It not only improves the texture of the bun but also allows it to stay soft longer.
Why You Need to Try This Recipe
- You can now try this classic and delicious Taiwanese scallion bread without traveling to Taiwan!
- It's fun to make! Don’t let the braided shape fool you, the steps are surprisingly simple for how professional the finished product looks.
- Whether you’re a beginner or an experienced baker, you’ll be able to make delicious bread at home with my easy-to-follow recipe.
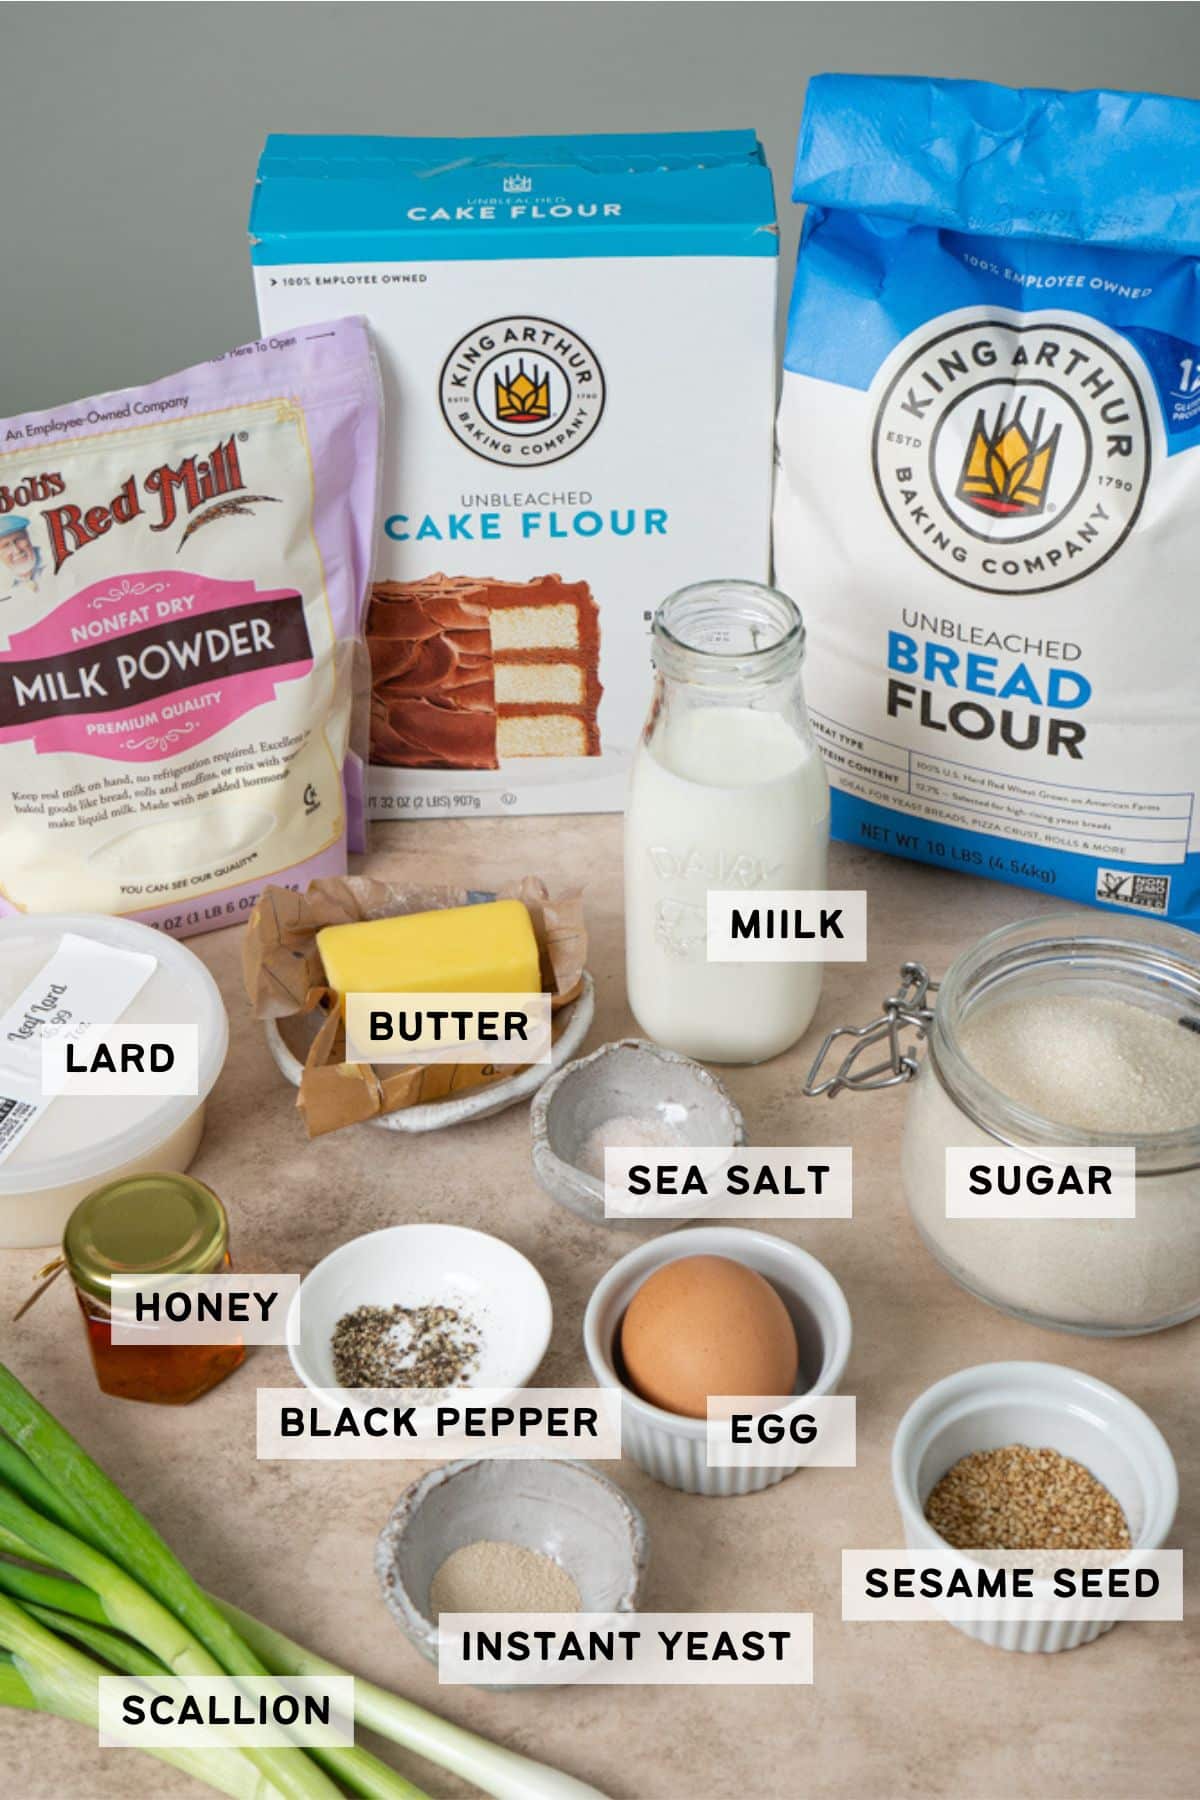
Ingredients You'll Need
Here are the main ingredients you'll need for making this recipe. Check the recipe box below for the full ingredient list with actual measurements.
Notes
- Yeast - use instant yeast, I recommend using saf-instant yeast.
- Milk - use whole milk for the best results.
- Cake flour - adding a small amount of cake flour into the dough is an easy way to make the bread lighter and fluffier.
- Dried milk powder - dried milk powder improves both the flavor and texture of the bun, you can skip it if you don't have it, but I highly recommend using it. You can also use this to make snowflake crisp and Taiwanese milk butter bun if you need more reasons to get some.
- Honey - honey helps keep the bun moist.
- Lard - if you want to replicate the authentic flavor of traditional Taiwanese scallion bread then lard is a must. It provides a unique aroma and flavor that you won't be able to get from using vegetable oil. However, if you are vegetarian or just don't want to use lard, you can replace it with regular cooking oil.
Step by Step Instructions
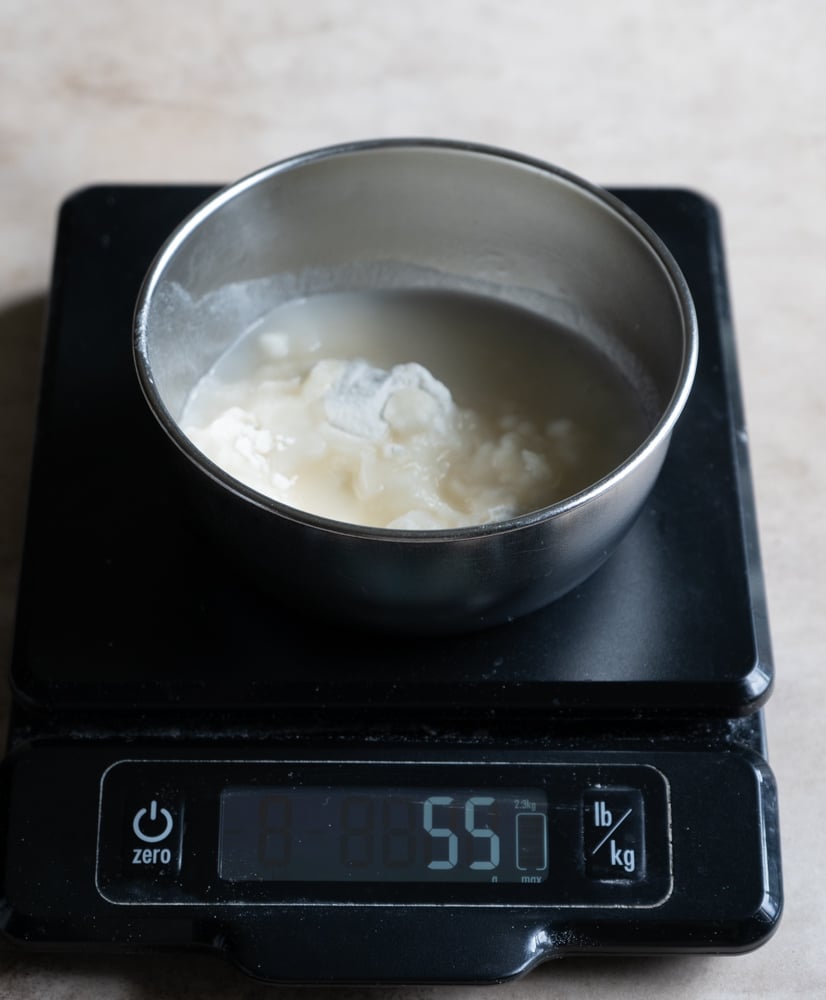
Step 1 - Make yudane (tangzhong) roux paste the day before.
Pour boiling water into a small bowl with bread flour and immediately mix well. Cover and store in the fridge after it's cooled for between 12 and 48 hours (or at least 2 hours if you can't wait).
Step 2 - Make milk bun dough.
In a stand mixer, mix all the dough ingredients except yeast, sea salt and unsalted butter until a rough dough is formed—about 5 minutes. Cover and let it rest for 30 minutes.
This step is called the autolyse method, which will help shorten the kneading time later and prevent the dough from getting too warm (which worsens the texture of the buns).
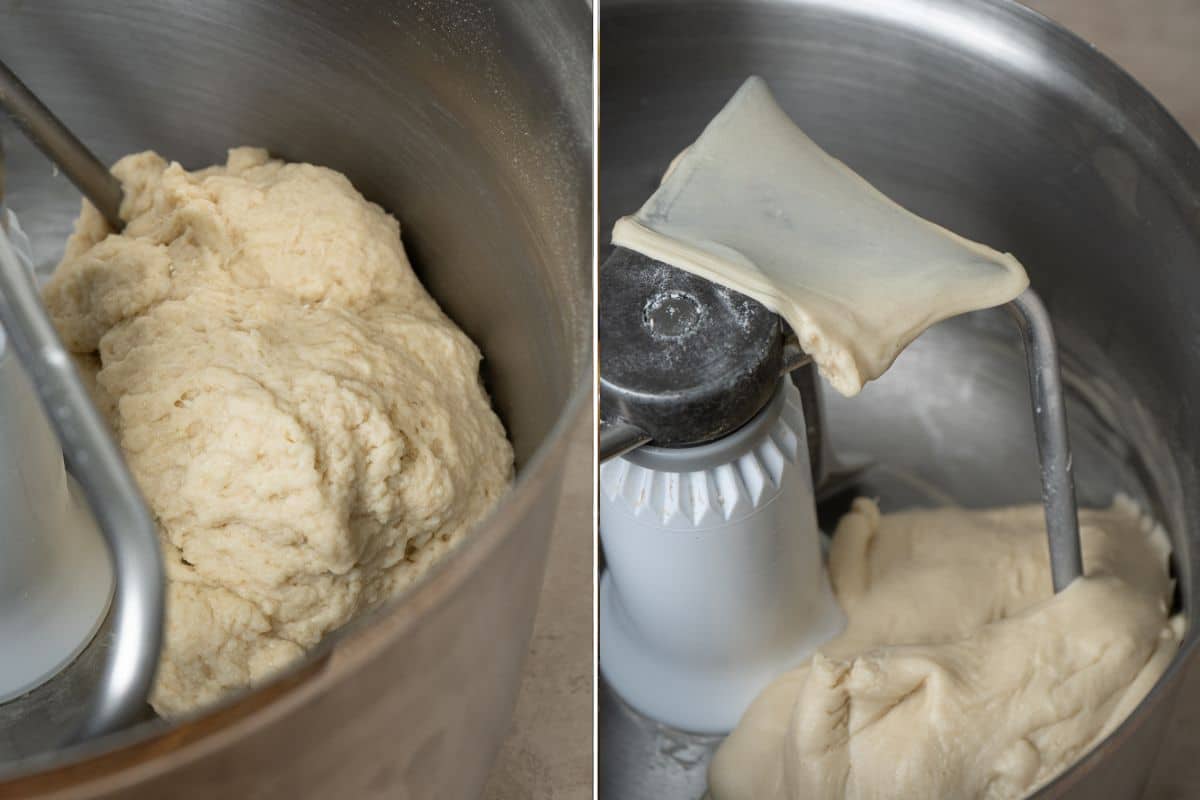
After resting, add yeast and knead for 1-2 minutes on medium speed before adding salt. Knead for another 2-3 minutes before adding unsalted butter, one piece at a time. Knead until the dough is smooth and able to pass the windowpane test (see FAQ below for more details)—about 10 minutes.
Make sure the dough stays cool during the entire kneading process. If the temperature of your dough becomes higher than 82°F (28°C) when it's done kneading, place it on a tray and chill it in the freezer for 1-2 minutes before proofing.
Place dough in a greased bowl, cover and proof in a warm place (82°F / 28°C) for an hour or until the dough just about doubles in size.

Quick tip - If you find it difficult to tell whether it has doubled in size or not, place the dough in a container with about double of the volume of the dough. That way, when the dough nearly fills the container, you know it's done proofing.
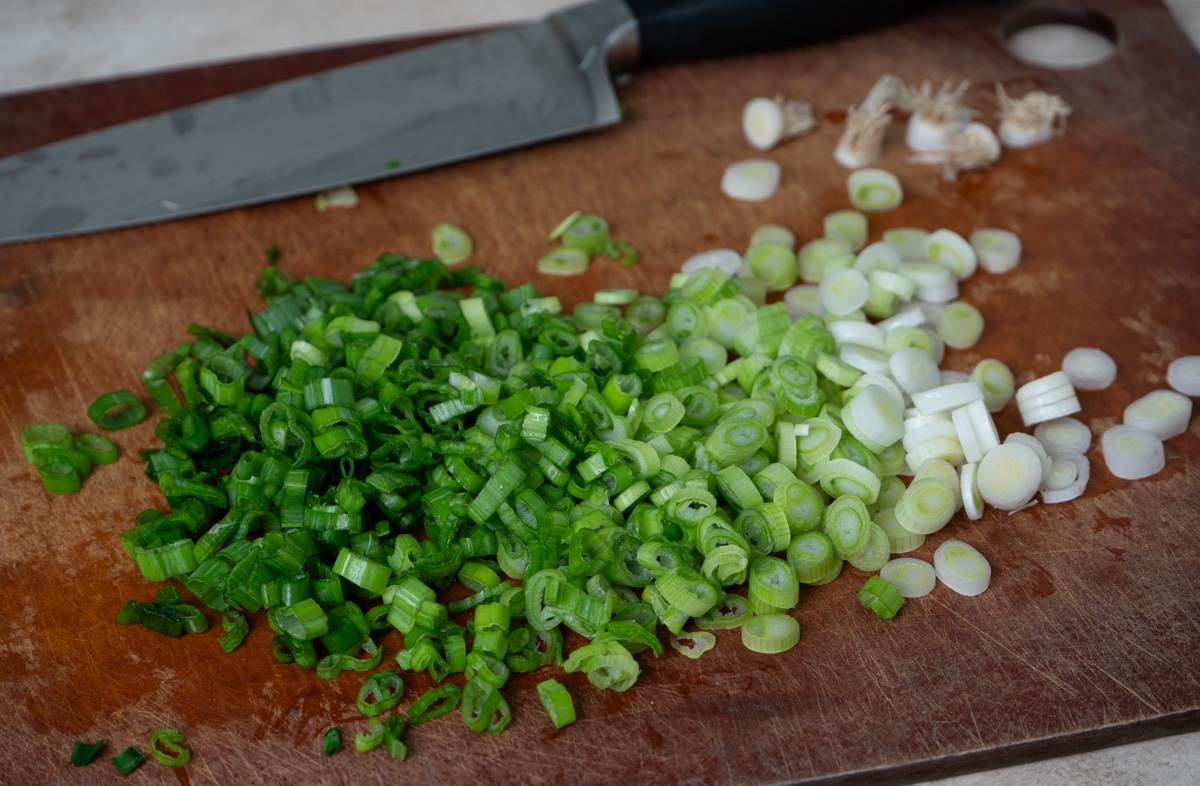
Step 3 - Prepare Scallions
While the dough is proofing, wash, pat dry and slice the scallions. Let the sliced scallions dry on the chopping board until ready to use.
Step 4 - Shape the bread and final proof.
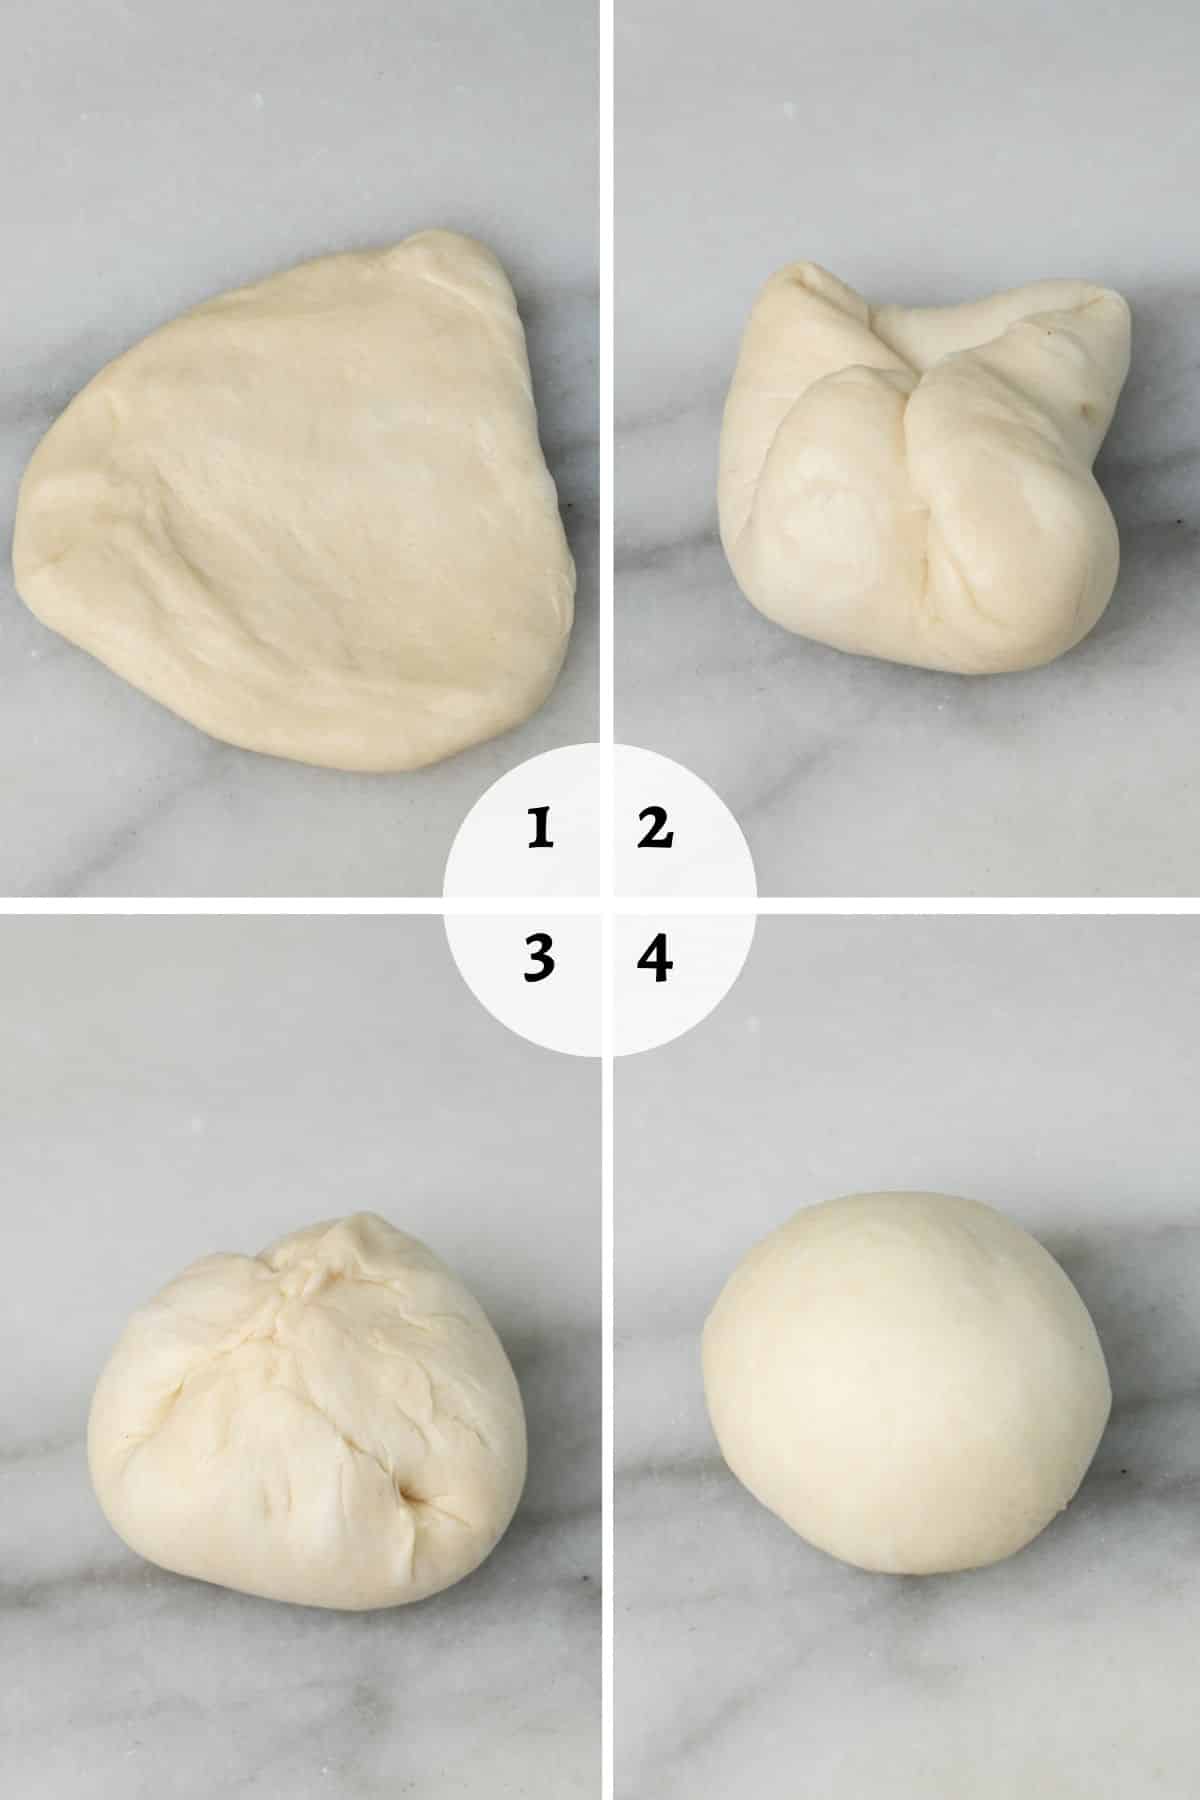
Divide the dough into 8 equal portions with a dough cutter (don't tear it!)
Flatten the dough with your palm before folding the edges to the center, pinch them together to form a ball and flip it over so that the seam side is down. Cover the dough with a damp tea towel and let it rest for 15 minutes.
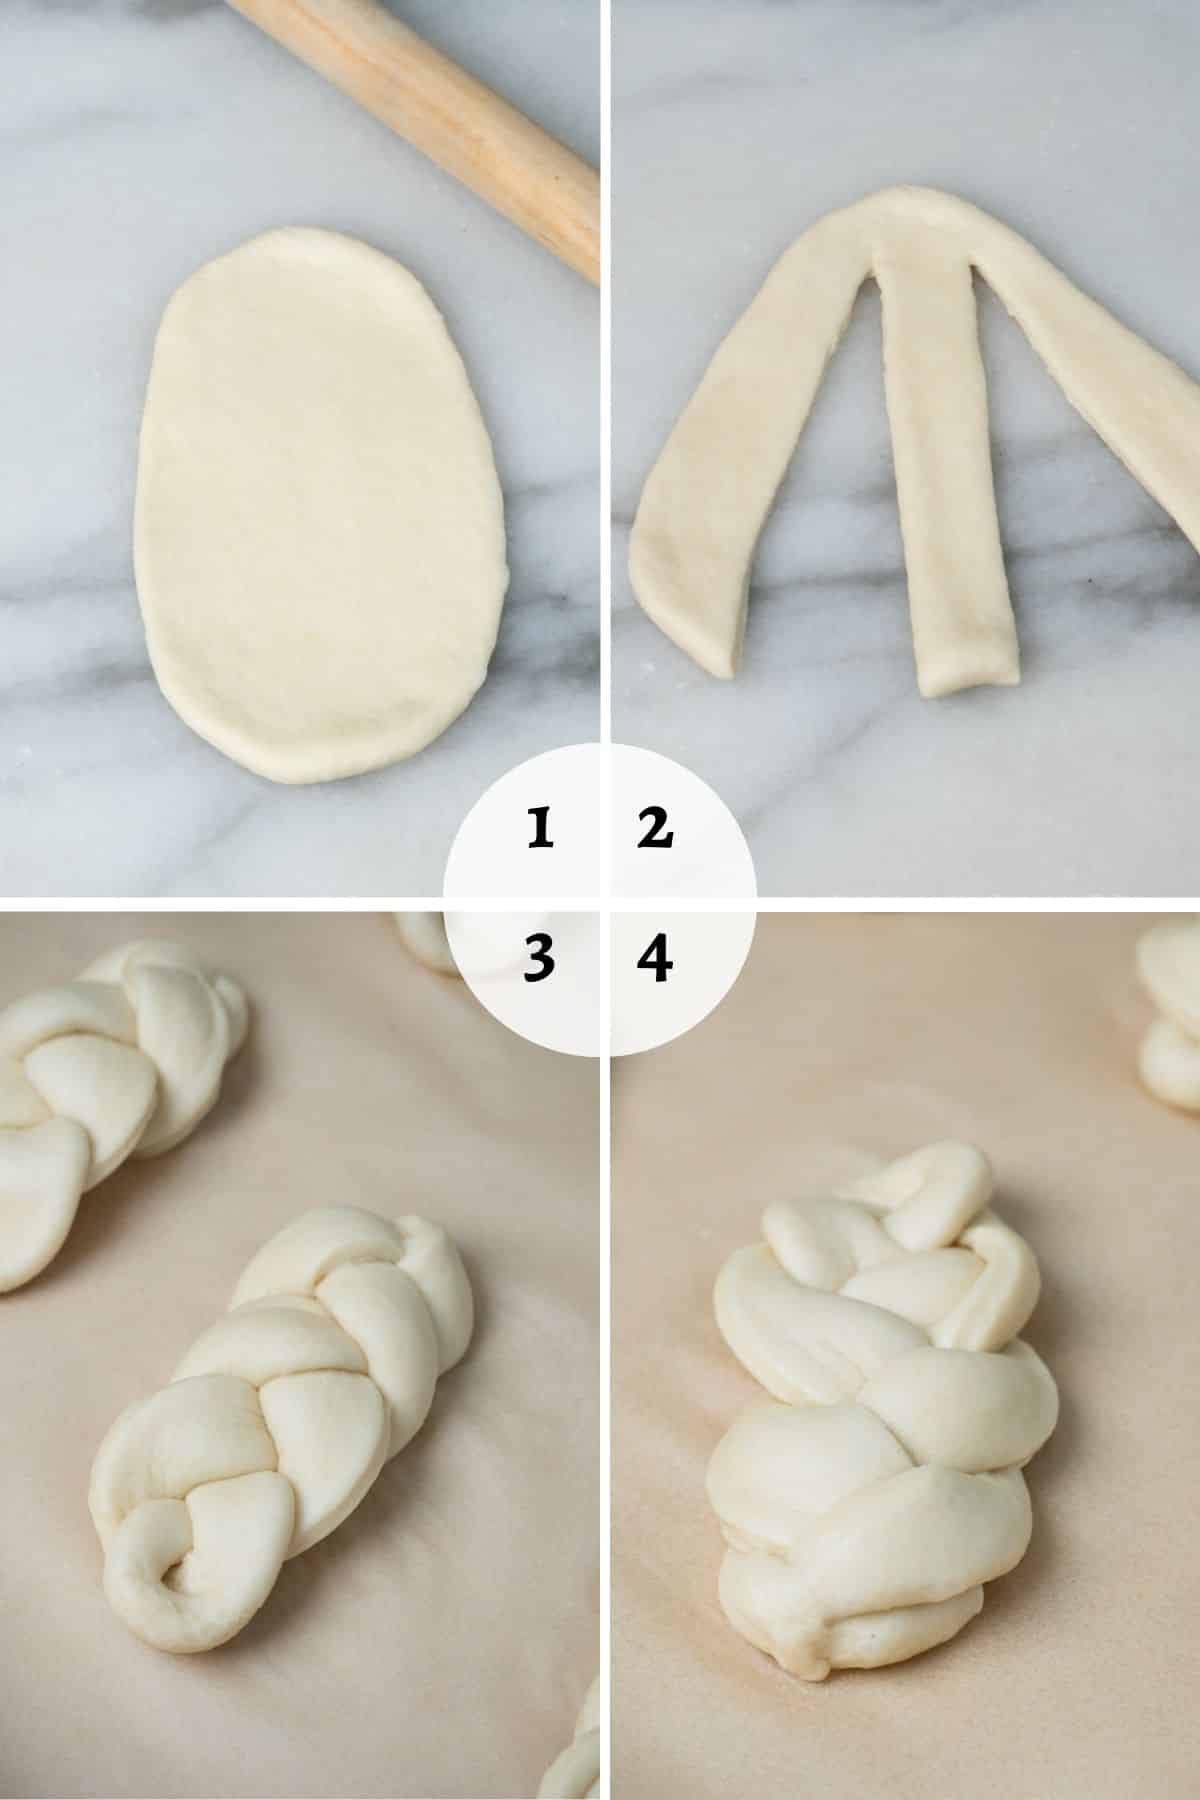
To form the bread, roll the dough ball into a flat oval shape about the size of your hand. Then, using a knife or dough cutter, slice the oval length-wise into three long strips, leaving the top portion intact so the strips remain connected, as shown in the picture below.
Gently braid the three strips together as you would with hair, crossing the right strand over the middle, then the left over the strand that is now in the middle, and so on. Pinch the ends together to secure the braid.
Place the buns on a lined baking sheet, cover with a damp tea towel and let it rest in a warm place (82°F / 28°C) for 50 minutes.
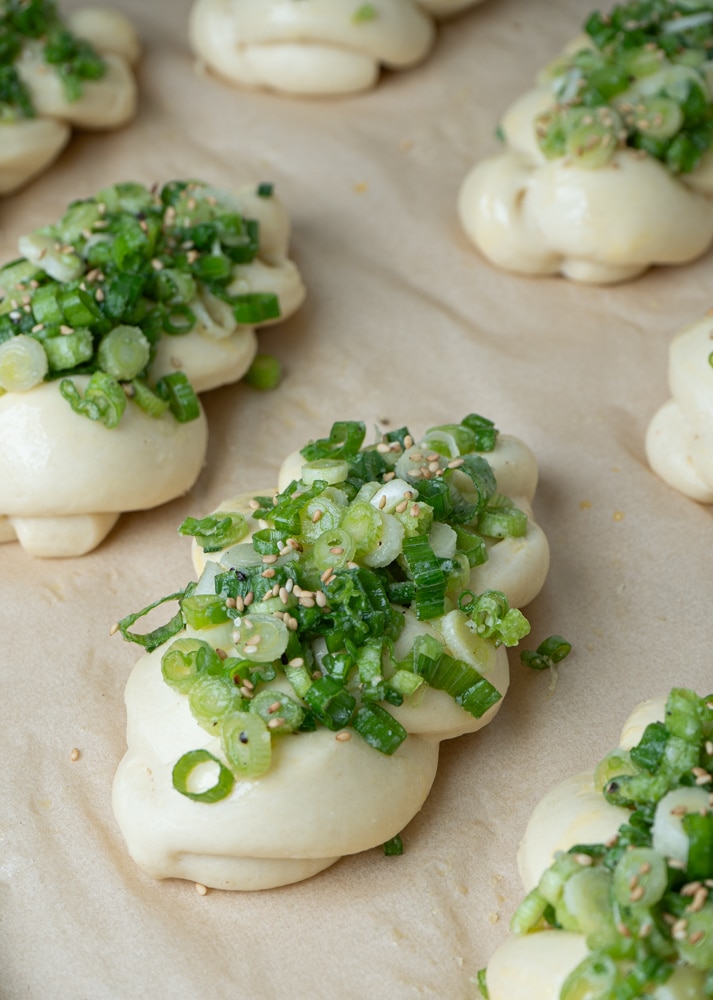
Step 5 - Assemble the bread and bake
Preheat the oven to 375°F / 190°C.
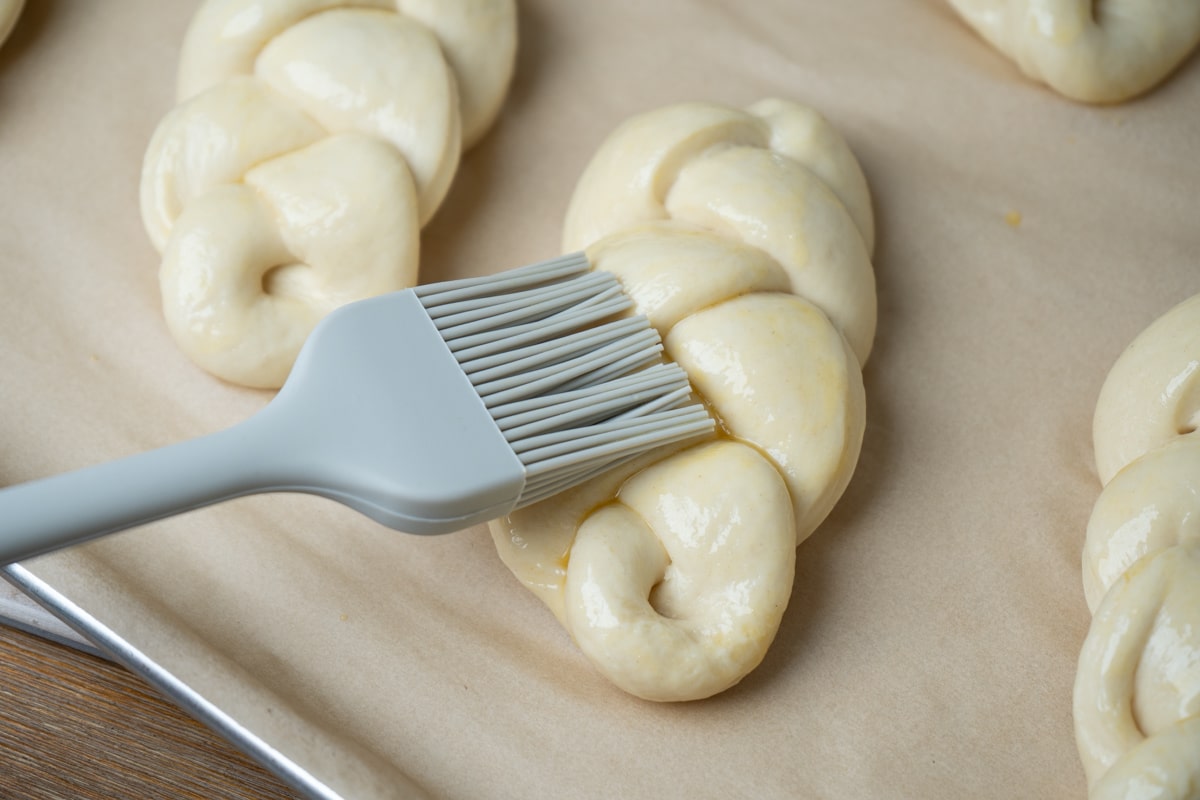
Brush each braided dough with the leftover beaten egg.
In a bowl, mix the remaining beaten egg with melted lard, before stirring in the chopped scallions, salt and pepper. Spoon an equal amount of the scallion mixture on top of each braided dough. Sprinkle toasted white sesame seeds on top if using.
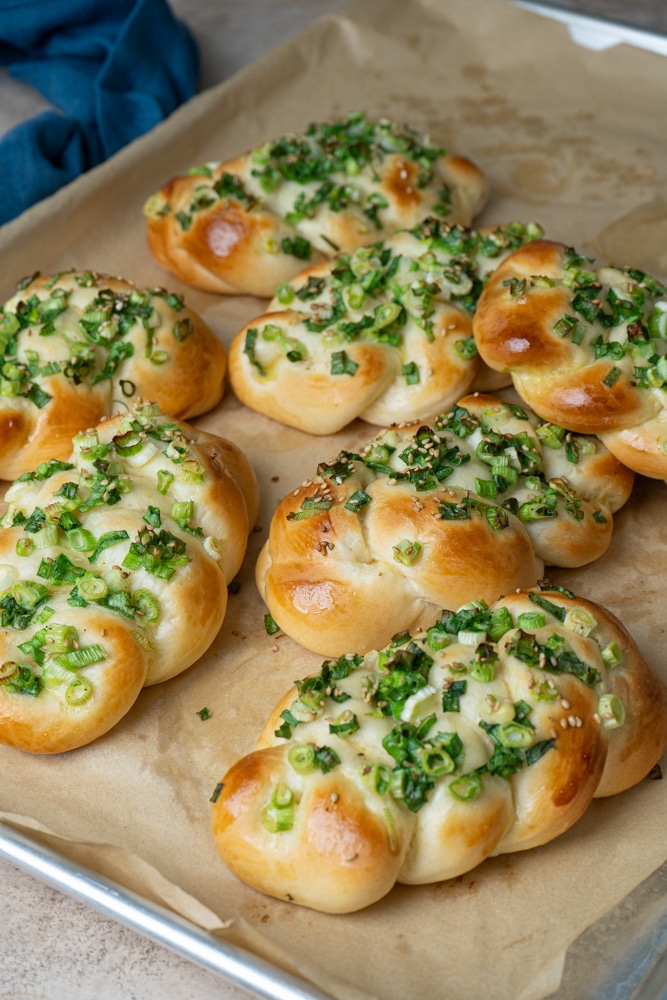
When the oven is done preheating, bake the bread for 17-18 minutes or until the bottom part becomes golden brown.
Let the bread cool on a cooling rack for 10 minutes before enjoying.
Recipe Tips and Tricks
- Measure your ingredients with a kitchen scale! Especially for flour and liquids, because your one cup can be very different from my one cup.
- Start with cold liquid - I learned this from professional bakers in Taiwan. Since the dough needs a lot of kneading, using cold liquid prevents the final dough from becoming too warm (which worsens the texture of the bun). In summer, I would even place the milk in a freezer until a thin layer of ice forms near the edge before I use it.
- The best proofing temperature is between 80 - 90°F (26.5 - 32°C). If your indoor temperature is too low, you can proof your dough in a sealed oven over a separate tray/pan on the bottom rack that's filled with boiling water.
- If your oven has a proofing function, for the first proof, only turn on the proofing function for the first 20 minutes as using it the whole time would be too hot. For the second proof, you can use the proofing feature the whole time as we need a higher temperature for the second proof.
- If your oven doesn't have a proofing function, you can create a warm, humid environment by placing a small pot of freshly boiled water in the oven alongside the dough while it proofs.
- If the lard solidifies when mixing with egg, put the bowl in hot water and continue to mix until they're well combined.
- The bread might not be golden brown when it's done baking due to the scallion topping. If your oven has a convection bake function, you can turn it on for the last 1-2 minutes to help the buns achieve a nice golden brown color.
Recipe FAQs
This is not recommended, as the texture won't be as good.
If your dough doesn't seem to rise after an hour, it might be that your yeast is not fresh or the proofing temperature is too low.
The windowpane test is a simple way to check if the dough has been kneaded enough. To perform this test, simply get a small piece of dough and stretch it carefully to see if it can be stretched into a smooth and almost see-through membrane. I usually do this test once the surface of the dough is very smooth from kneading.
Yes! Place the dough in a greased Ziploc bag, squeeze out the air and place it in the fridge overnight (12-24hrs). When you are ready to shape the dough, take it out and continue the rest of the steps directly. In this case, the second proof might take a bit longer, as the dough is cold.
It's best to prepare the scallion mixture just before using it. If you make the mixture in advance, the salt will draw out moisture from the scallions and make the mixture too watery and difficult to work with.
Yes! Actually freezing is the best way to store these buns if you are not eating them within a day. Place the buns in a Ziploc bag once they are cooled completely and freeze it for up to three months. Never store these in the fridge as they will dry up.
Let the bun thaw for 15 minutes or so before baking in 350°F (180°C) for about 5 minutes, and it will taste as good as fresh ones!
I hope you can give this recipe a try because I know you'll love this scallion bread if you get to try one!
Happy baking!!
Don't Forget to Try

I would like to hear from you! If you make this recipe, please consider leaving a star rating and comment in the section further down the page. Stay in touch by following my Instagram and Pinterest!

Taiwanese Scallion Bread
Equipment
- Stand mixer
- Scale
Ingredients
Tangzhong (Yudane)
- 30 g boiling water, 2 tablespoons
- 25 g bread flour, 2½ tbsp
Bread Dough
- 250 g bread flour, A bit less than 2 cups
- 30 g cake flour, ¼ cup
- 10 g dry milk powder, 1 tablespoon
- 30 g sugar, 2 tablespoons
- 15 g honey, a little bit less than 1 tablespoon
- 25 g large egg, beaten, ½ large egg, ⅛ cup, store the rest in the fridge for brushing and making scallion mixture.
- 80 g cold whole milk, ⅓ cup
- 60 g cold water, ¼ cup
- tangzhong (Yudane) paste (see above)
- 1 teaspoon instant yeast, preferably saf instant yeast
- 1 teaspoon sea salt
- 30 g unsalted butter, cut into 6 - 8 pieces
Scallion Mixture
- 100 g scallions, about 6-8 stalks
- 1 tablespoon lard, or any kind of vegetable oil
- remainder of beaten egg (from above)
- ½ teaspoon sea salt
- pinch of sugar
- black pepper to taste, optional
- toasted sesame seeds, optional
Instructions
Make Tangzhong (Yudane) the Night Before
- Measure 25 grams of bread flour in a bowl. Set the kitchen scale to zero with the flour and bowl on it and pour in 30 grams of boiling water. Stir until combined to form a sticky dough.
- Let it cool down before storing in the fridge overnight or for 12 hours. Use it within 48 hours (or at least 2 hours if you can't wait).
Bread Dough
- In a stand mixer, mix all the dough ingredients except yeast, sea salt and unsalted butter until a rough dough is formed, about 5 minutes. Cover and and let it rest for 30 minutes.
- After resting, add yeast and knead for 1-2 minutes on medium speed before adding salt. Knead for another 2-3 minutes before adding unsalted butter, one piece at a time.
- Knead until the dough is smooth and able to pass the windowpane test (see FAQ for more details) -- about 8-10 minutes. Make sure the dough stays cool during the entire kneading process. If the temperature of your dough becomes higher than 82°F (28°C) when it's done kneading, place it on a tray and chill it in the freezer for 1-2 minutes before proofing.
- Place dough in a greased bowl, cover and proof in a warm place (82°F / 28°C) for an hour or until the dough just about doubles in size.
Prepare the Scallions While the Dough is Proofing.
- Wash, pat dry and slice scallions. Let the sliced scallion dry on the chopping board until ready to use.
Shape the Bread and Final Proof
- Place the dough on a working surface and divide the dough into 8 equal portions with a dough cutter or knife (don't tear it!)
- Flatten the dough with your palm before folding the edges to the center, pinch them together to form a ball and flip it over so the seam side is down. Cover the dough with a damp tea towel and let it rest for 15 minutes.
- To form the bread, roll the dough ball into an oval shape about the size of your hand. Then, using a knife or dough cutter, slice the oval lengthwise into three long strips, leaving the top portion intact so the strips remain connected (see the picture in the post).
- Gently braid the three strips together as you would with hair, crossing the right strand over the middle, then the left over the new strand in the middle, and so on. Pinch the end together to secure the braid.
- Place the braided dough on a baking sheet lined with parchment paper. Cover with a damp tea towel and let it proof in a warm place (82°F / 28°C) for 50 minutes. (See the Tips and Tricks section for more information)
Assemble and Bake
- Preheat the oven to 375°F / 190°C.
- Brush each braided dough with the remainder of the beaten egg.
- In a bowl, mix the remaining beaten egg with melted lard (or vegetable oil), then stir in the chopped scallions, salt and pepper, Spoon an equal amount of the scallion mixture on top of each braided dough. Optionally, sprinkle toasted white sesame seeds on top.
- When the oven is done preheating, bake the bread for 17-18 minutes or until the bottom part becomes golden brown.
- Let the bread cool on a cooling rack for 10 minutes before enjoying.
Notes
-
- Measure your ingredients with a kitchen scale! Especially for flour and liquids, because your one cup can be very different from my one cup.
-
- Start with cold liquid - I learned this from professional bakers in Taiwan. Since the dough needs a lot of kneading, using cold liquids prevents the final dough from becoming too warm (which worsens the texture of the bun). In summer, I would even place the milk in a freezer until a thin layer of ice forms near the edge before I use it.
-
- The best proofing temperature is between 80 - 90°F (26.5 - 32°C). If your indoor temperature is too low, you can proof your dough in a sealed oven over a separate tray/pan on the bottom rack that's filled with boiling water.
-
- If your oven has a proofing function, for the first proof, only turn on the proofing function for the first 20 minutes as using it the whole time would be too hot. For the second proof, you can use the proofing feature the whole time as we need a higher temperature for the second proof.
-
- If your oven doesn't have a proofing function, you can create a warm, humid environment by placing a small pot of freshly boiled water in the oven alongside the dough while it proofs.
-
- If the lard solidifies when mixing with egg, put the bowl in hot water and continue to mix until they're well combined.
-
- The bread might not be golden brown when it's done baking due to the scallion topping. If your oven has a convection bake function, you can turn it on for the last 1-2 minutes to help the buns achieve a golden brown color.
-
- Read FAQ for more information.
Leave a Reply