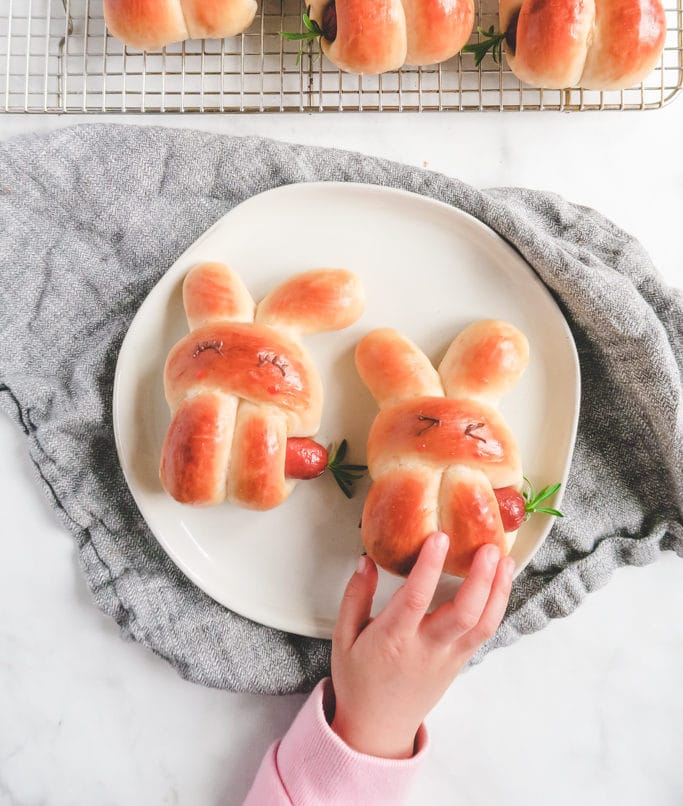
Not surprisingly, this bunny hot dog bun is my daughter's favorite. These are not only super cute (come on, it's a bunny holding a carrot!), but also because they taste amazing! The hot dogs are covered with a fragrant milk bread that creates a great balance in both flavor and texture. It's perfect for a kid's lunch box, snack, or for bringing on a picnic!
I still remember the first time when I made these buns was about 3 years ago. My family had a picnic with some other families with young kids, and two of the little girls were known for being... unenthusiastic eaters who required a lot of encouragement to finish their food. When they saw the cute bunny buns I brought, their eyes went wide and they couldn't wait to try some. That day, they totally surprised their parents by eating two or three of the rolls each!
If you would like to learn how to make some cute buns but are intimidated by difficult bun recipes, this is a great place for you to start!
If you are new to making Asian style bread/bun, make sure you scan through these two posts below for more details and tips that will help ensure your success with this recipe:
Soft and Fluffy Asian Style Pan Loaf
Asian Bakery Style dinner roll (The dough I use for this recipe)
Choosing the right hot dogs
You can use any type of hot dog, but make sure to get the thinner kind, otherwise your bunny will look kind of strange. The one I used is about 3⁄4" (2 cm) in diameter and 6 1⁄2" (16.5 cm) long.
Kneading the dough
In order to get the best flavor and texture for this bread, our goal is to knead the dough until it's very smooth and can pass the windowpane test, yet remain cool as much as possible, so it’s very important to use very cold liquids to start. What is the windowpane test? The windowpane test consists of taking a small piece of dough and gently stretching it to see if it can form a see-through layer without breaking. This is the best way to check if your dough is kneaded enough. In order to produce a dough that passes the windowpane test, I highly recommend trying the Autolyse method. This method simply consists of allowing the dough to rest for 30 minutes for the gluten to develop right after forming the dough and before adding salt and butter. Using the Autolyse method is almost like cheating on your (windowpane) test, as it really makes developing the proper dough for this recipe nearly fool-proof. This is why the instructions in the recipe box includes this resting step.
Shaping and Assembling
The most challenging part of this recipe is to roll the dough into a long and even log. Though that sounds simple, when you actually try doing this, the dough will keep shrinking back as you try to roll it out. If the dough isn't rolled out long enough, you will end up with a bunny with very short ears. To help you succeed in this step, simply let the dough to rest for 10 - 15 minutes before you start to work on it, and the dough won't shrink back as much when you try to roll it out.
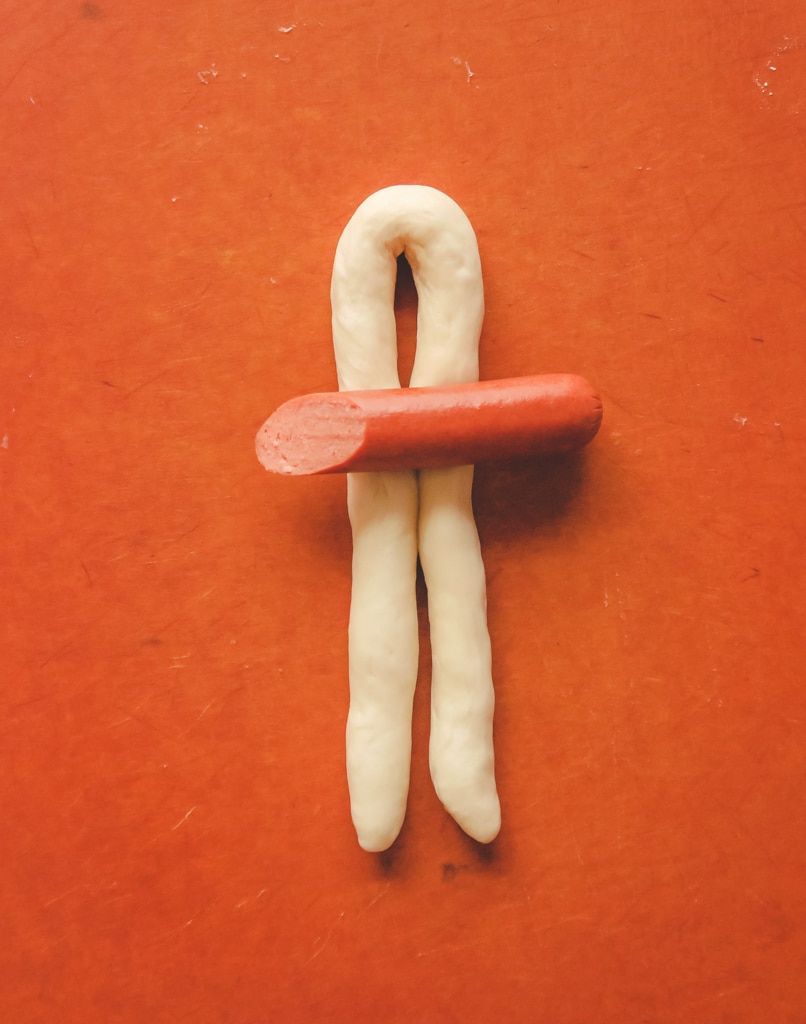
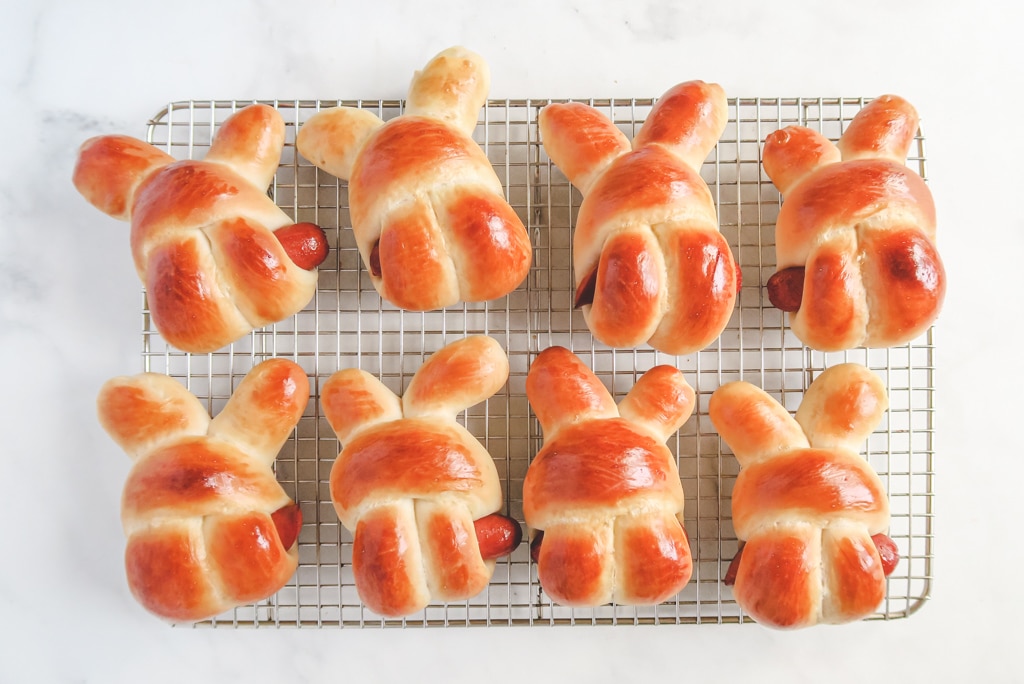
The ears will became shorter after it's baked, so make sure you pull the ears longer when you shape it!
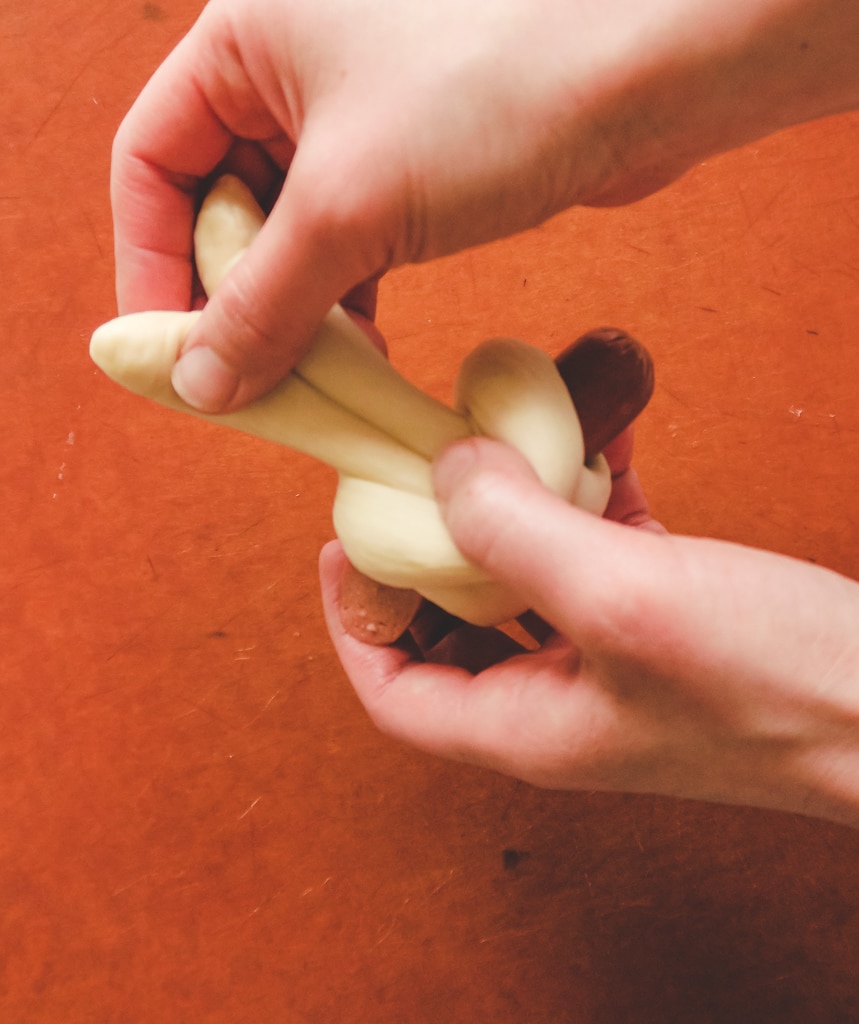
Decoration
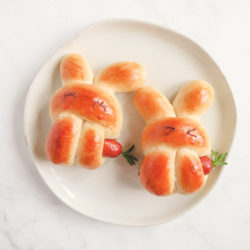
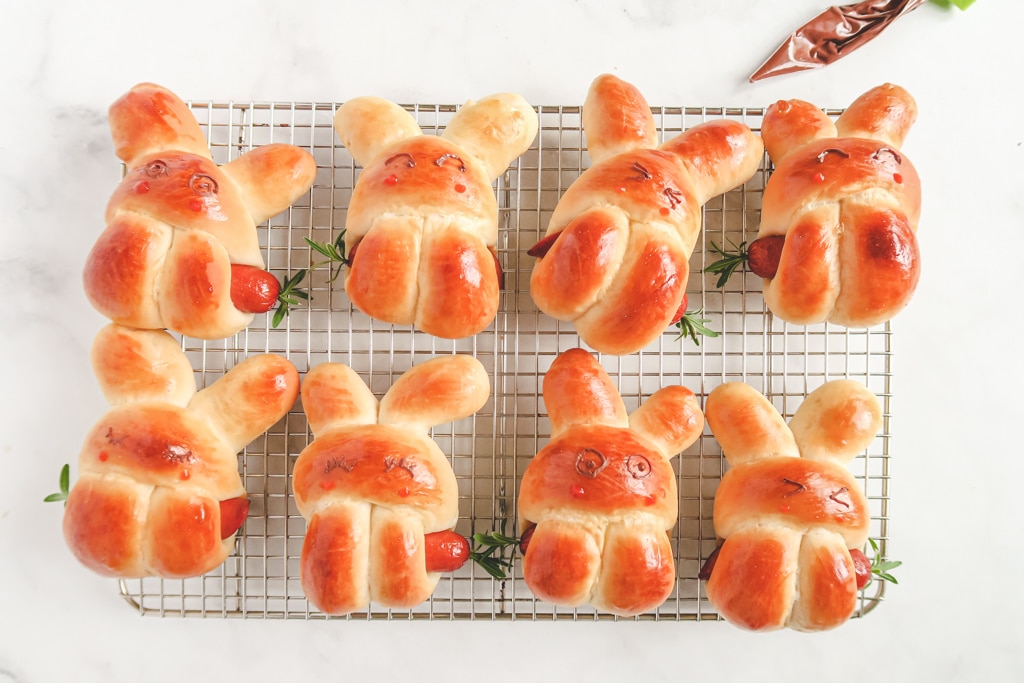
Now comes to the fun part! Use some melted chocolate to draw the eyes for the bunnies, stick a small sprig of herb (like parsley, cilantro, rosemary, etc.) on the sausage for the carrot leaves, and you have your cute little bunnies! They look like they are holding their carrots happily. As a busy mom, I found making these bunny hot dog buns to be very therapeutic, especially the drawing part -- you can have fun being creative with their faces, and it can even be a fun activity to do with your kids!
Hope you all can give it a try,
Happy Baking!
MAKE SURE TO FOLLOW ME ON PINTEREST AND INSTAGRAM TO SEE THE LATEST UPDATES!
Bunny Sausage bun
Ingredients
For the dough
- 250 g bread Flour, 2 cup
- 50 g cake flour, 1⁄3 cup
- 30 g sugar, 2 tablespoon + 1 tsp
- 20 g condensed milk, 1 tablespoon
- 85 g cold water, 1⁄3 cup + 1 tsp
- 80 g cold milk, 1⁄3 cup, preferably whole milk
- 1 large egg
- 1 teaspoon instant yeast
- 4 g sea salt, ½ tsp
- 30 g cold unsalted butter, 2 tbsp, cut into 6 small pieces
Others
- 4 hot dogs, see notes
- 1 tablespoon chocolate chips
- ketchup, optional
- herbs, parsley, rosemary or lavender, etc
Instructions
Forming the dough
- Add flour, sugar, condensed milk, milk, water, 25 g of the egg (about half of the egg, store the rest in the fridge for brushing) and yeast into the stand mixer and knead on low speed until the dough is formed.
- Cover the mixing bowl and let it rest for 30 minutes.
- When it's done resting, add salt and continue to knead the dough until you can pull and stretch the dough for 2 inches without breaking.
- Add butter cubes one at a time and knead until the dough is very smooth and passes the windowpane test. (This step takes me about 6 minutes, with 5 minutes on low speed and 1 minute on medium speed. The actual time it takes you depends on your mixer.)
- Form the dough into a ball (it will be very sticky, but if it's too sticky to handle, then add a little bread flour and knead for another 1~2 minutes) and put it in a lightly greased bowl. Cover, and let it rise for 1 hour to 1.5 hours in a warm place (about 82°F to 90°F) until it doubles in size.
- Transfer the dough onto a working surface and cut it into 8 even pieces. Form each piece into a ball by tucking the edge to the bottom, cover with a piece of greased plastic wrap and let it rest for 5 minutes.
Shaping & Assembling
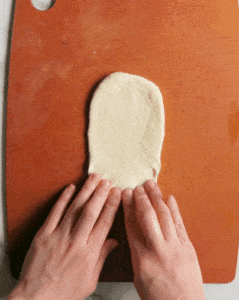
- Take one piece of dough, press it flat and roll it tightly into a log. (See the gif for reference). Repeat this step for the rest of the buns and arrange it in the order that they were rolled. Cover and let the buns rest for 10~15 minutes.
- Meanwhile, pat dry the hot dogs and cut each piece into half in a 45° angle, to make them a bit longer.
- Take the first bun (the one you first rolled) and roll it into a long, even and thin log, about 15" (40 cm) long, and eliminate all the air pockets. You will need to use some effort here as the log will keep shrinking back.
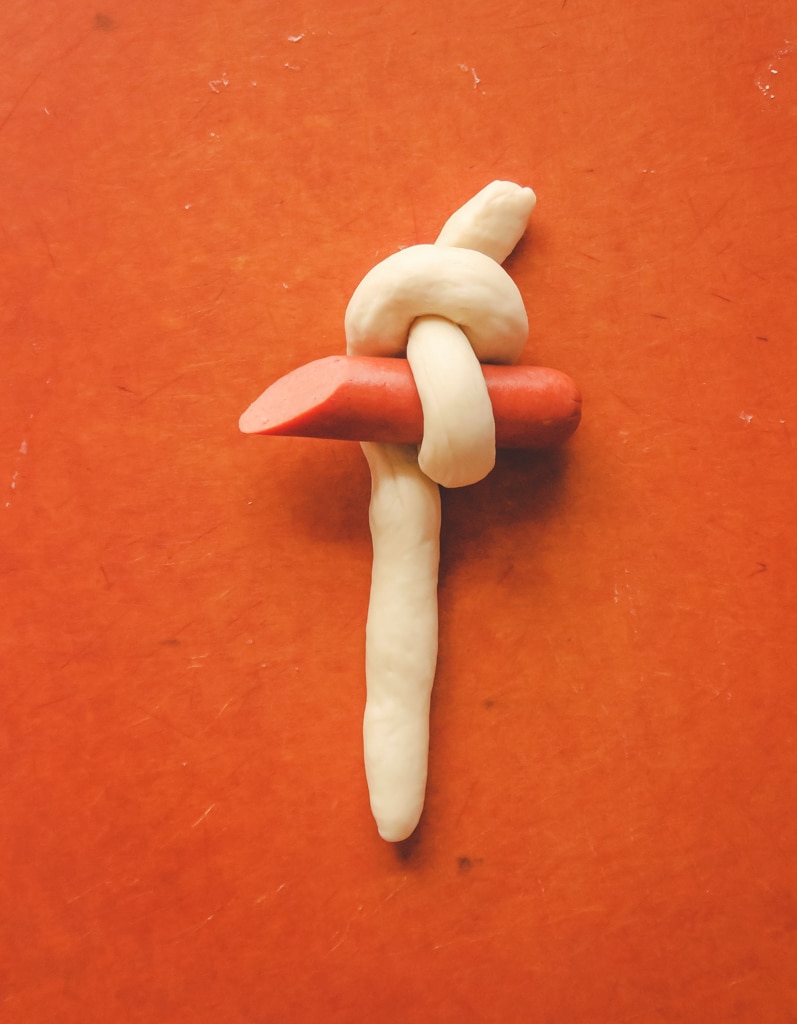
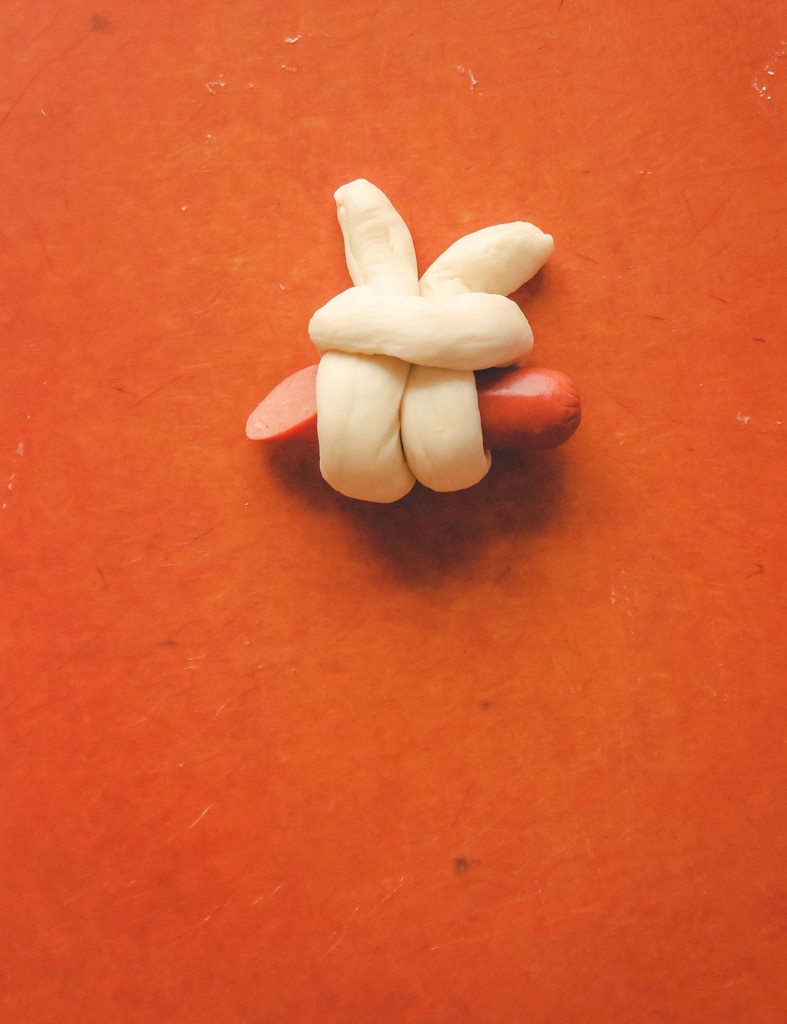
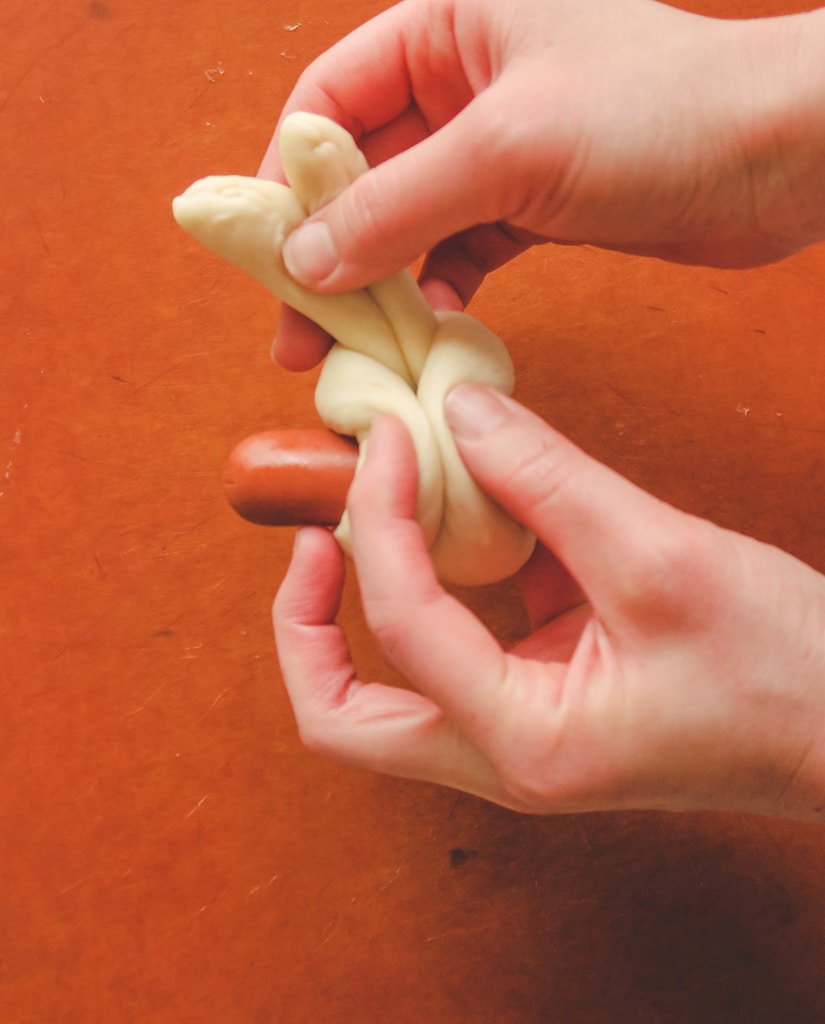
- Place the thin log into a U shape, place a piece of hot dog on it, feed both ends into the hole, one at a time. (See pictures in the post)
- Pull the "bunny ears" out a bit more to make the hot dog fit more snugly in the bun. Make the ears longer than you'd like, since they will shorten after baking. Pinch the back together to eliminate the gap (see picture in the post) before placing bun on a lined baking sheet.
- Repeat the process for the rest of the buns (working on them in order) and let them proof in a warm place (around 82 to 90°F) for about an hour until they're puffy and they spring back a bit to the touch.
- Preheat the oven to 375°F (190°C) towards the end of the proofing process.
- Brush the rolls with a thin layer of egg wash before placing them in the oven. Bake for 12~14 minutes until golden brown. Place the rolls on a cooling rack to cool down.
Decorating
- Meanwhile, put chocolate chips in a piping bag or the corner of a ziploc bag and soak in hot water to melt.
- Once the rolls are cool, cut the tip of the bag and squeeze the chocolate out of the bag to draw eyes on the bunny's face and put a bit of ketchup on the cheek if desired.
- Use a skewer to poke a hole at the end of the hot dog and put the stem of the herb in the hole to be the "carrot's leaves".
- If you are not eating these in the same day, the best way is to store them in the freezer once the rolls are cool, and decorate them after reheating on the day you want to eat them.
Notes


made this couple of times and turned out great, my family loves it. nothing much that I can say but thanks to you. stay safe and healthy