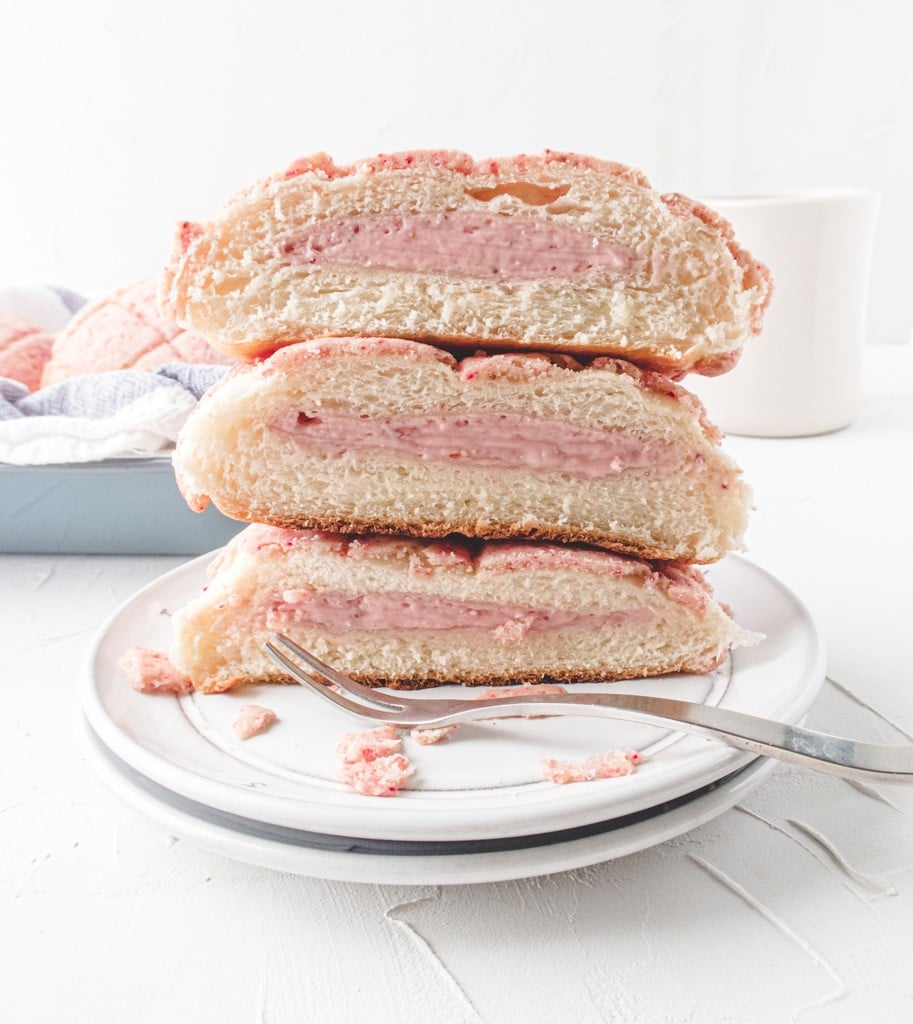
In this recipe I will show you how to make amazing strawberry flavored pineapple buns filled with strawberry cream cheese using all natural ingredients. These pineapple buns are soft and pillowy on the inside with a satisfyingly crunchy shell on the exterior providing a contrasting texture for the ultimate Asian bakery bun experience.
I'm using the Tangzhong method in this recipe to give the buns a better texture and that they will be able to stay fresh longer. This recipe requires a bit more work than usual, as you need to make the cookie top and the filling in addition to the bun itself. However, you'll have to take my word that the result is totally worth the work you put into it. I've had foodie-friends that have commented that these pineapple buns are even better than ones sold in many Asian bakeries on the west coast!
What is a Pineapple bun
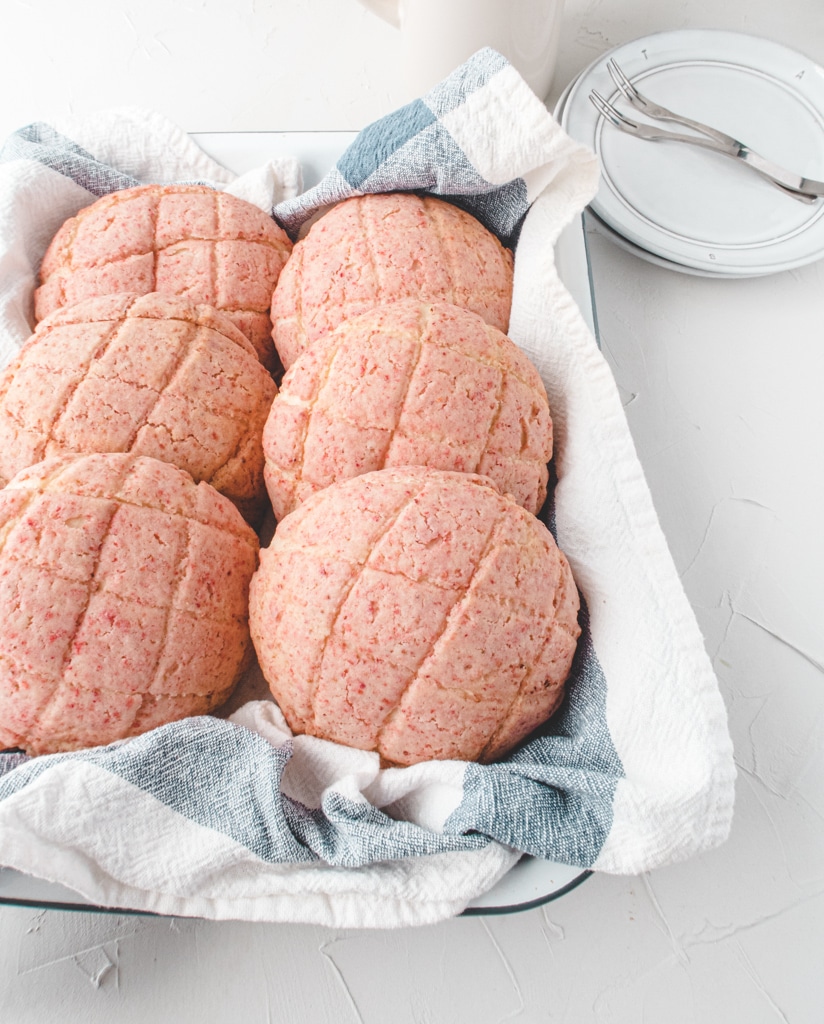
Pineapple bun (or bolo bao in Cantonese) is a classic Chinese pastry. It is basically a soft a fluffy bun topped with a cookie layer that provides a contrasting texture. These are one of the most popular and classic buns in Taiwan bakeries. These are so popular that variations occur in different cultures. The Japanese, for instance, have their own version of pineapple bun that they call melon pan. The recipe for these buns vary slightly from place to place, and my recipe is based on the Taiwanese and Japanese versions. The reason of these are called pineapple buns is because of the pattern on the bun the somewhat resembles the the pattern on a pineapple. So there's actually no pineapple in this recipe.
Tips for making great tasting Asian buns
There are several different tips for achieving a bun with a dreamy texture that's soft, fluffy, pillowy and can pull apart in silky strands. Here are my main tips:
The tangzhong method
The tangzhong method is an easy way to upgrade the texture of the bread. All you need to do is to heat up a small amount of the liquid and the flour together and add the mixture into your dough. You can get more information from King Arthur Flour and American's Test Kitchen if you like to know more about the science behind it.
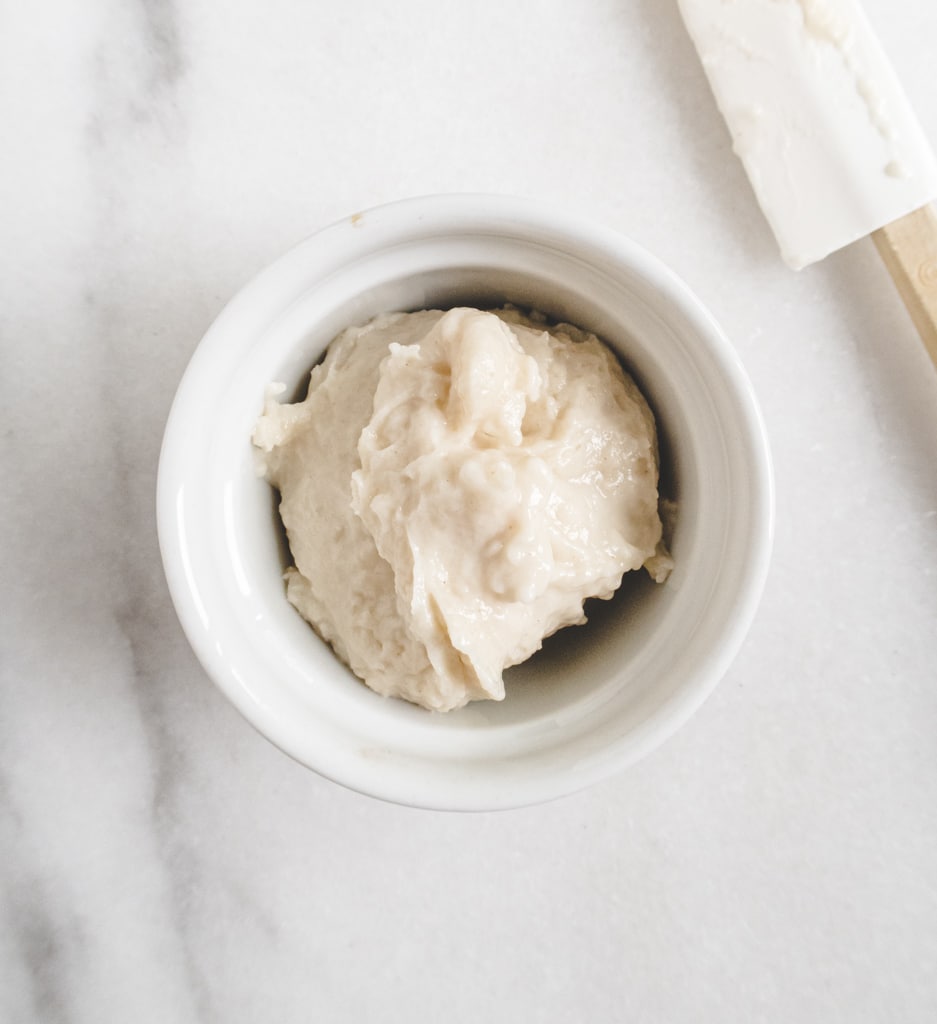
There are different ways to do Tangzhong, and the one I'm showing you in this recipe is my favorite one because it's easy and super effective. Simply mix some boiling water with bread flour, then store the resulting dough in the fridge overnight (or at least several hours) and it's ready to be added to your main dough when needed!
However, if you prefer not to use the Tangzhong method, you can use the dough recipe from my Asian bakery style dinner roll, which will also work out very well.
Start with cold liquid
I know many of you may be skeptical with this one -- aren't we supposed to use warm water to activate the yeast? Will the dough rise if I use cold liquid? Let me explain. When you are making bread, instant (rapid-rise) yeast is your best friend. It doesn't need to be pre-activated with warm water, just adding it directly into the mixture with other ingredients will do. I highly recommend using Saf instant yeast, as I was surprised by how much better my bread tasted after I began using it.
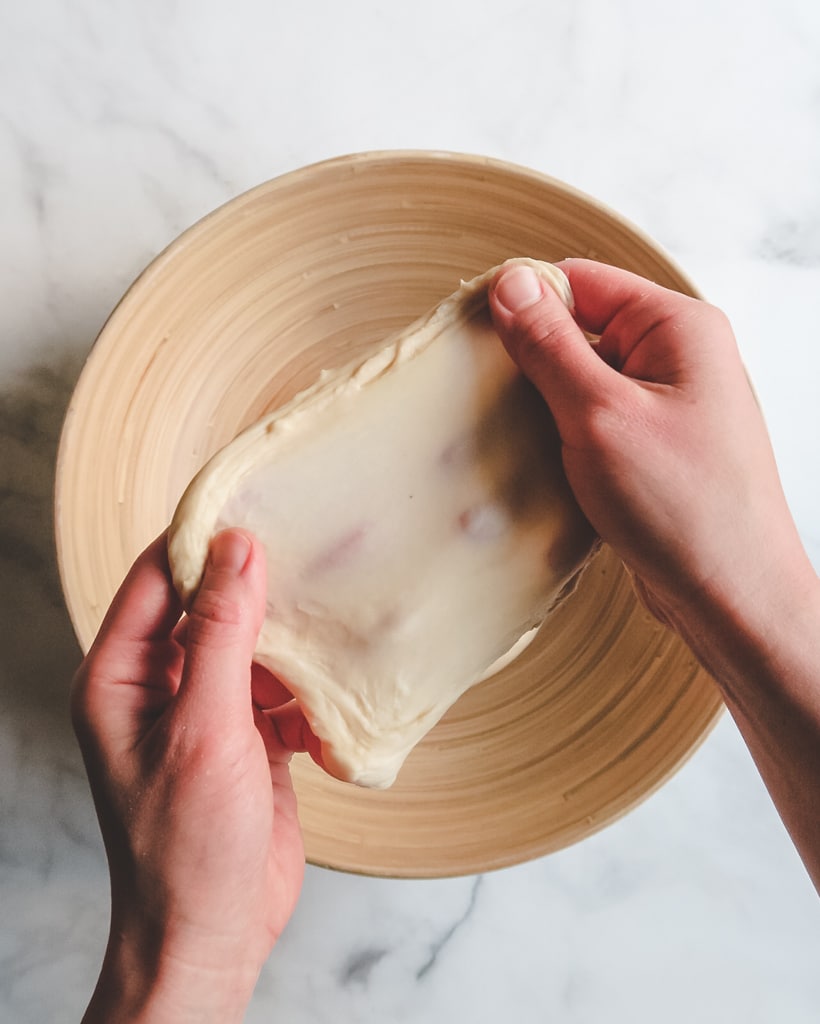
In order to achieve a dreamy bun texture, a lot of kneading is required. We need to knead the dough until the surface of the dough is smooth and the can pass the windowpane test (meaning that you should be able to stretch the dough into a smooth and nearly see-though membrane). Kneading generates heat, and we don't want our dough to become too warm (ideally never going above 82°F) during the kneading process. If the dough ever gets too warm, then (1) the flavor of the resulting bread will suffer, the bread itself will (2) have a rougher texture and will (3) be prone to getting stale quickly. That's why we want to start with using a cold liquid. I learned this technique relatively recently from some professional bakers in Taiwan, and it really leveled up the texture of the Asian breads that I make.
Try the Autolyse method
I highly recommend trying the Autolyse method. This method simply consists of allowing the dough to rest for 30 minutes for the gluten to develop right after forming the dough and before adding salt and butter. Using the Autolyse method is almost like cheating on your (windowpane) test, as it really makes developing the proper dough for this recipe nearly fool-proof. This is why the instructions in the recipe box includes this resting step.
Use a scale
It's important to weigh your ingredients with a scale instead of using a measuring cup, since the cup of flour I measure will easily be different than the cup of flour you measure due to differences in how we handle the measurement. Making Asian buns/breads requires a higher accuracy than normal bread, and it is how I developed this recipe. I used this OXO kitchen scale that's recommended by Cook's Illustrated, but any cheaper one will work just fine!
Spread out the work
Since there are three main parts for this recipe -- cookie dough, cream cheese filling and the bread itself (which includes the Tangzhong), I would recommend spreading the work out into two days. I usually make the Tangzhong and the cream cheese filling the night before baking, make the bread dough the next morning, and make the cookie dough while the bread dough is proofing. I found that this makes the entire process a lot easier!
How to get the pretty pink color
I use freeze dried strawberry powder and strawberry jam for the color. Since I use all natural ingredients in this recipe, the color won't be as vibrant as if using food coloring. Keeping this color is also challenging, since we need to bake it until the top portion is done and crisp, yet without any browning to affect the color. I accomplished this by omitting the egg wash, placing the baking tray with buns on the middle rack and another empty baking tray on the rack above to prevent the bread from browning. If you don't care about maintaining the pink color, then just bake it in the normal way and the bun will taste just as good.
Storing and reheating
While the bun portion can last up to three days in room temperature and still be soft and yummy, I wouldn't recommend doing this because of the cream cheese filling. If you are not eating these on the first day, I would recommend storing them in the freezer once they're cool in order to maintain the best texture. When you want to eat them, just bake in the oven at 350°F (180°C) for 10 minutes or until the top becomes crispy. Don't store these in the fridge, or else they will become dry and stale.
If the cookie top looses its crispiness (this usually happens a few hours after coming out from the oven), simply bake them for 3-5 minutes and they will be awesome and crispy again.
If you like this recipe, make sure you also try
IF YOU MAKE THIS RECIPE, DON’T FORGET TO TAG ME @COOKINGINCHINGLISH #COOKINGINCHINGLISH ON INSTAGRAM, I WOULD LOVE TO SEE IT!
Strawberry Cream Cheese Pineapple bun
Ingredients
Tangzhong
- 30 g boiling water, 2 tbsp
- 25 g bread flour, 2½ tbsp
Cream Cheese Filling
- 170 g cream cheese, 6 oz, softened
- 70 g strawberry jam, ¼ cup
- 20 g sugar, 1½ tbsp, or to taste
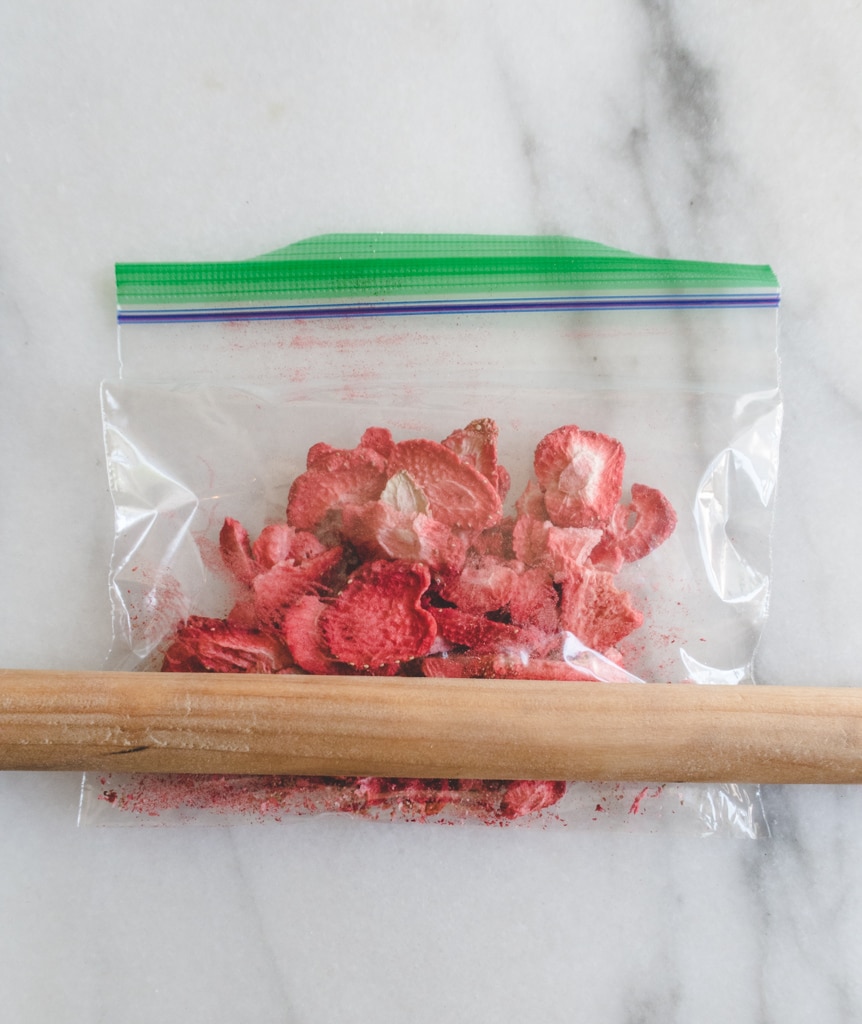
- 1⅓ tablespoon freeze dried strawberries (pulverized into powder)
Bun Dough
- 250 g bread flour, 2 cup
- 30 g cake flour , ¼ cup
- 30 g sugar, 2 tablespoon + 1 tsp
- 15 g honey, a little bit less 1 tbsp
- 1 teaspoon instant yeast
- 25 g beaten egg, ½ large egg, ⅛ cup, save the rest for making cookie top
- 80 g milk, ⅓ cup
- 60 g water , ¼ cup
- all Tangzhong Paste
- 4 g sea salt, ½ tsp
- 30 g cold unsalted butter, 2 tbsp, cut into 6 pieces
Cookie Top
- 70 g butter, 5 tbsp, soften
- 60 g powdered sugar, ¼ cup + 2 tbsp
- 25 g beaten egg, use the rest of the egg from making bread dough
- 20 g condensed milk, 1 tbsp
- 120 g bread flour, 1 cup, plus more for dusting
- 2 tablespoon freeze dried strawberries (pulverized into powder)
Instructions
Mak Tangzhong the Night Before
- Measure 25 grams of bread flour in a bowl. Set the kitchen scale to zero with the flour and bowl on it and pour in 30 grams of boiling water. Stir until combined to form a sticky dough.
- Let it cool down before storing in the fridge for overnight or at least 4 hours
Cream Cheese Filling
- Mix cream cheese and jam together until smooth. Taste before adding sugar as the sweetness of the jam depends on the brand you use. Adjust the amount of the sugar based on your taste.
- Pulverize the freeze dried strawberry before adding to the cream cheese mixture and mix until well combined. Cover and store it in the fridge until it's ready to use.
Bun Dough
- Add all the ingredients for the dough except for sea salt and butter into the stand mixer and knead on low speed until the dough is formed.
- Cover the mixing bowl and let it rest for 30 minutes.
- When it's done resting, add salt and continue to knead the dough until you can pull and stretch the dough for 2" (5 cm) without breaking.
- Add butter cubes one at a time and knead until the dough is very smooth and passes the windowpane test, see the picture in the post. (This step takes me about 6-7 minutes, with 5 minutes on low speed and 1 -2 minute on medium speed. The actual time it takes you depends on your mixer.)
- Form the dough into a ball (it will be very sticky, but if it's too sticky to handle, then add a little bread flour and knead for another 1~2 minutes) and put it in a lightly greased bowl. Cover, and let it rise for 1 hour to 1.5 hours in a warm place (about 82°F to 90°F) until it doubles in size.
Cookie Top
- Meanwhile, make the cookie top. In a bowl, mix butter and powdered sugar together. Add the egg mixture in four batches into the mixture, incorporating one batch before adding the next.
- Add condensed milk and mix well.
- Add bread flour and the pulverized freeze dried strawberries, fold a few times until the butter mixture is all coated with flour before pouring onto a working surface.
- Use a bench knife (dough cutter) to fold and press with your palm until the flour and the butter mixture are well combined.
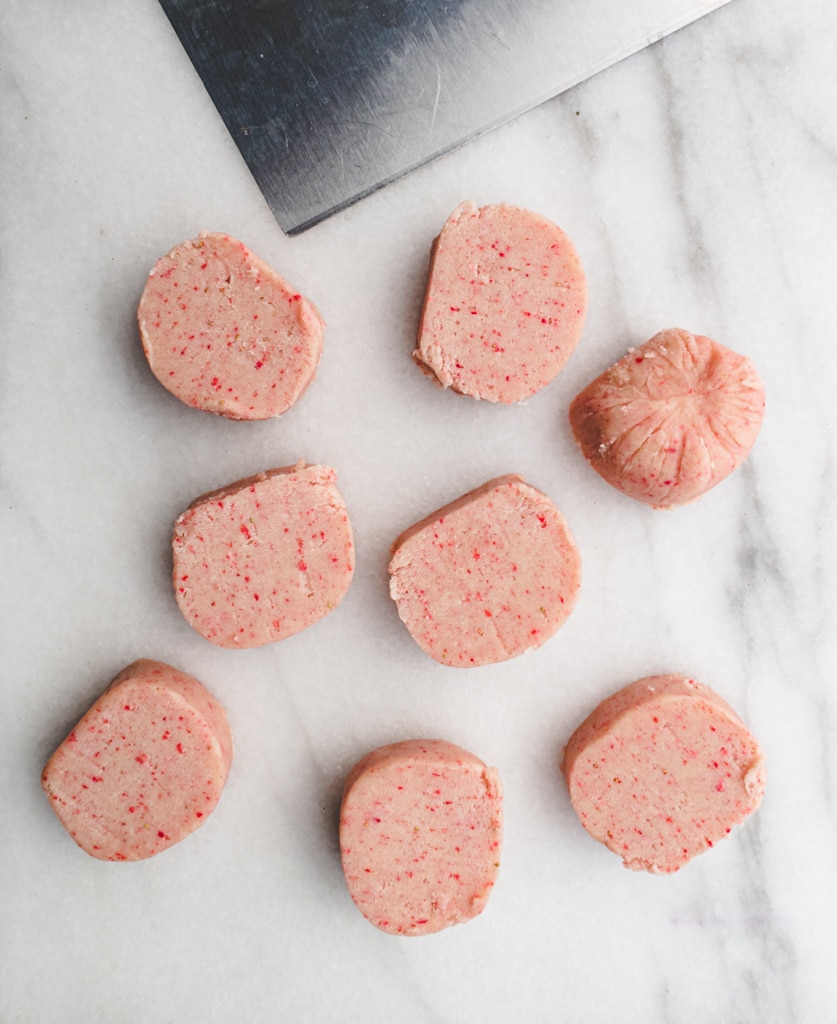
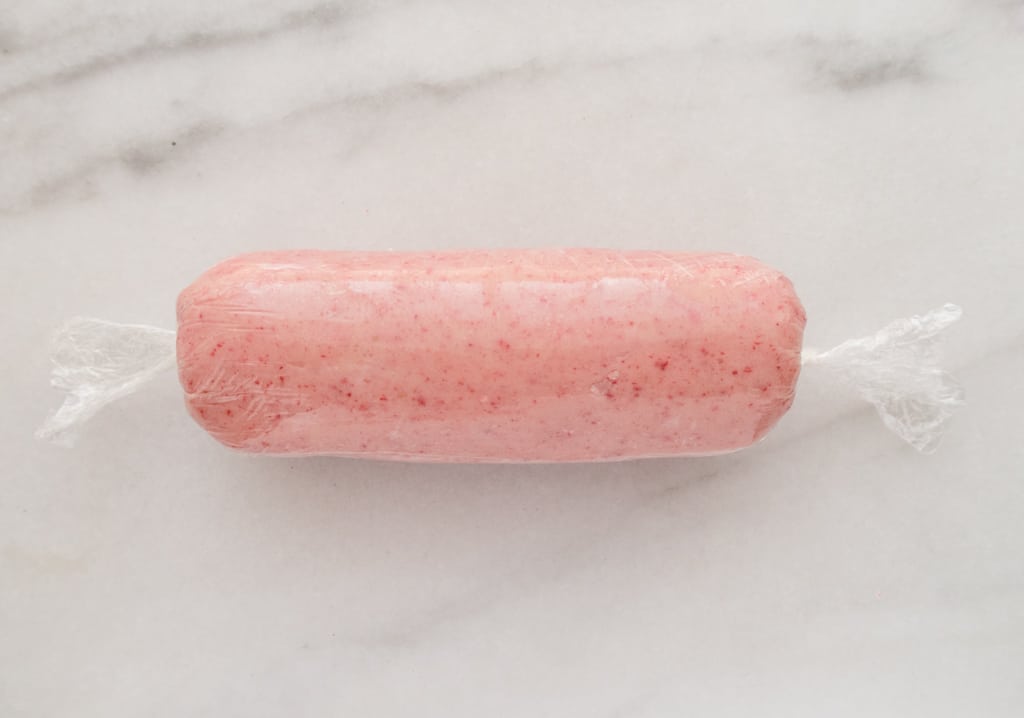
- Place the cookie top mixture on a piece of plastic wrap and roll it into a log. Twist the two sides to seal (see the picture in the post) and store it in the fridge until ready to use.
Assemble
- Transfer the dough onto a working surface and cut it into 8 even pieces. Form each piece into a ball by tucking the edges into the bottom. Cover them all with a piece of greased plastic wrap and let rest for 5 minutes.
- Take the cream cheese filling our from the fridge and set it aside.
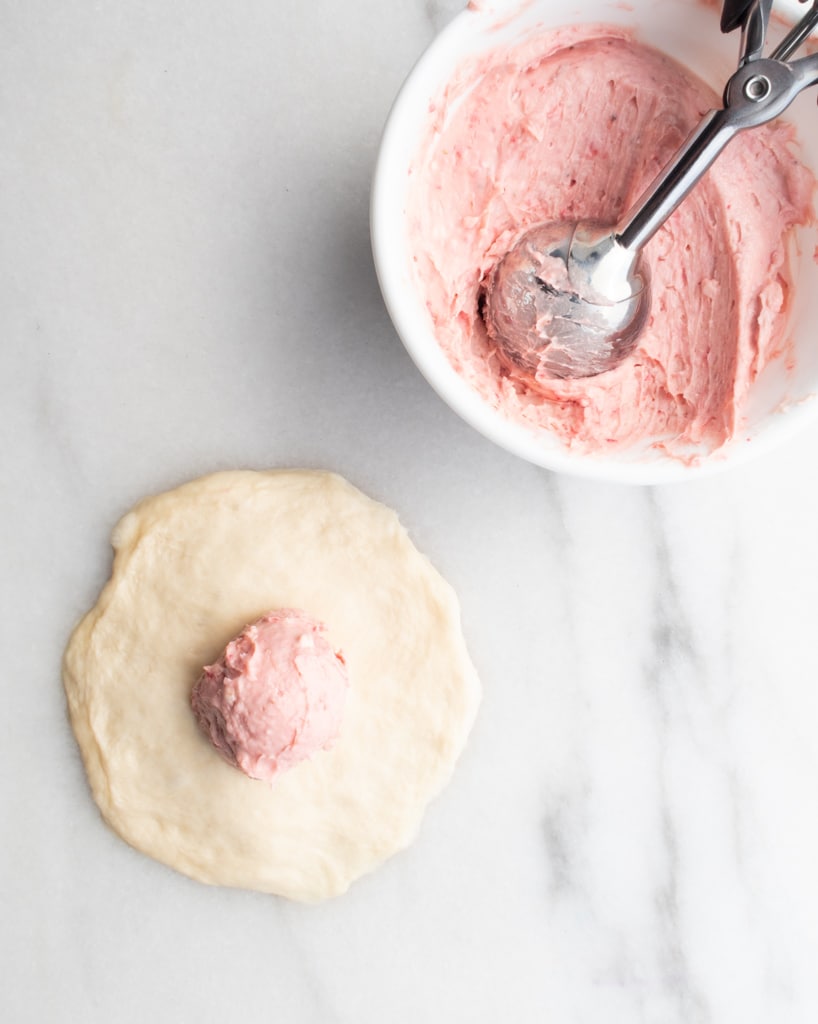
- Take one piece of the dough, flatten it with your finger to form a round 3½" (10 cm) diameter disk with the edge thinner than the middle part.
- Place a scoop of cream cheese filling in the center and wrap the edges together over the filling and pinch to seal. Repeat the same for the rest.
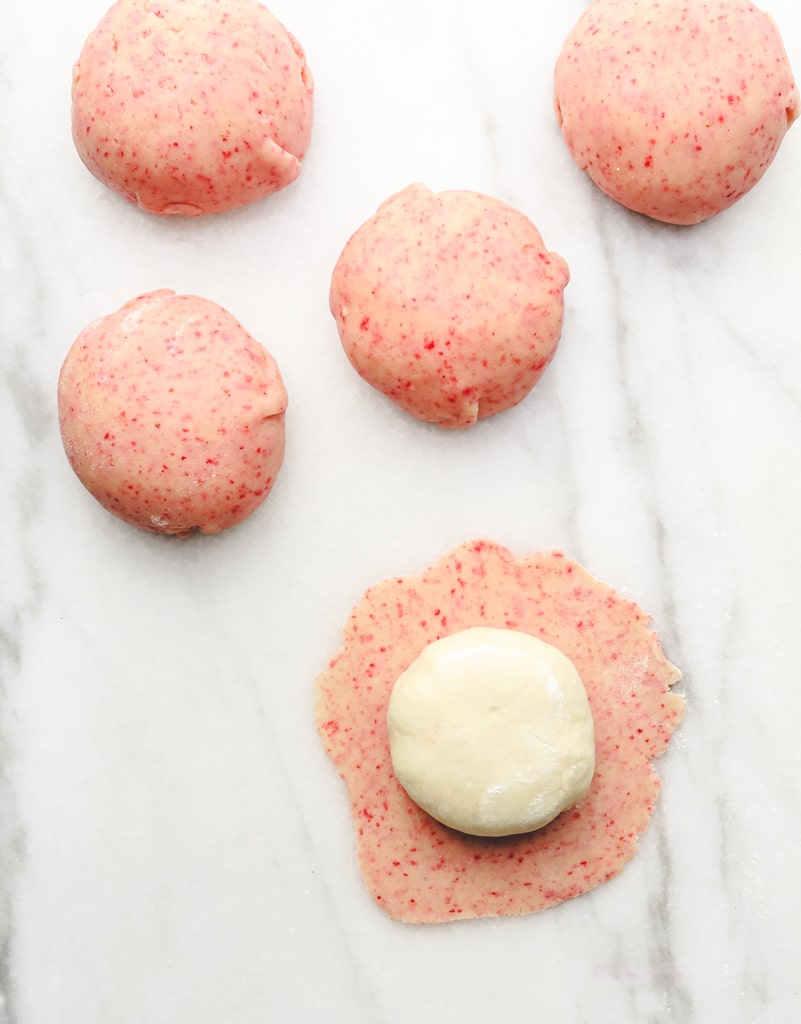
- Take the cookie dough out from the fridge, cut it into 8 even pieces.
- Dust some flour on the working surface and just a little bit on the top side of the cookie dough. Using a rolling pin, roll the cookie dough out to be big enough to cover the surface of the bun (the bottom part doesn't need to be covered).
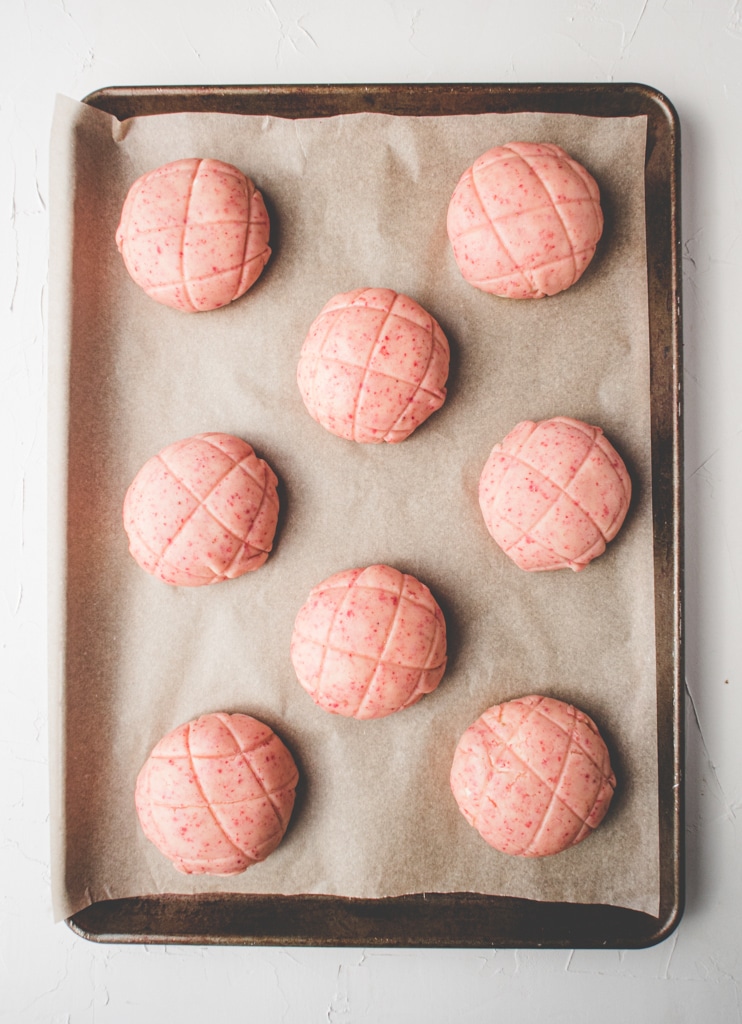
- Place the cookie dough on the bun with the top side (the side with less flour) touching the bun and wrap it over the top side carefully. Make sure to let the cookie dough stick directly to the bun dough without any gaps. Repeat the same for the rest of the buns and place them on a lined baking tray with 2½" (6 cm) space between each. If you cannot work fast enough before the cookie dough begins to soften, store half in the fridge until you are ready to use.
- Use a bench knife to make the classic criss cross patterns on the top of the buns if you like. You can also just let it split naturally after proofing, depending on your preference.
- Cover with plastic wrap and let it rise in a warm place for around 50 minutes or until the expanding dough causes cracks/separation in the cookie top.
Baking
- Preheat the oven to 375°F (190°C) towards the end of the proofing process. Adjust the rack such that one is in the middle, and the other is 2-3 levels above.
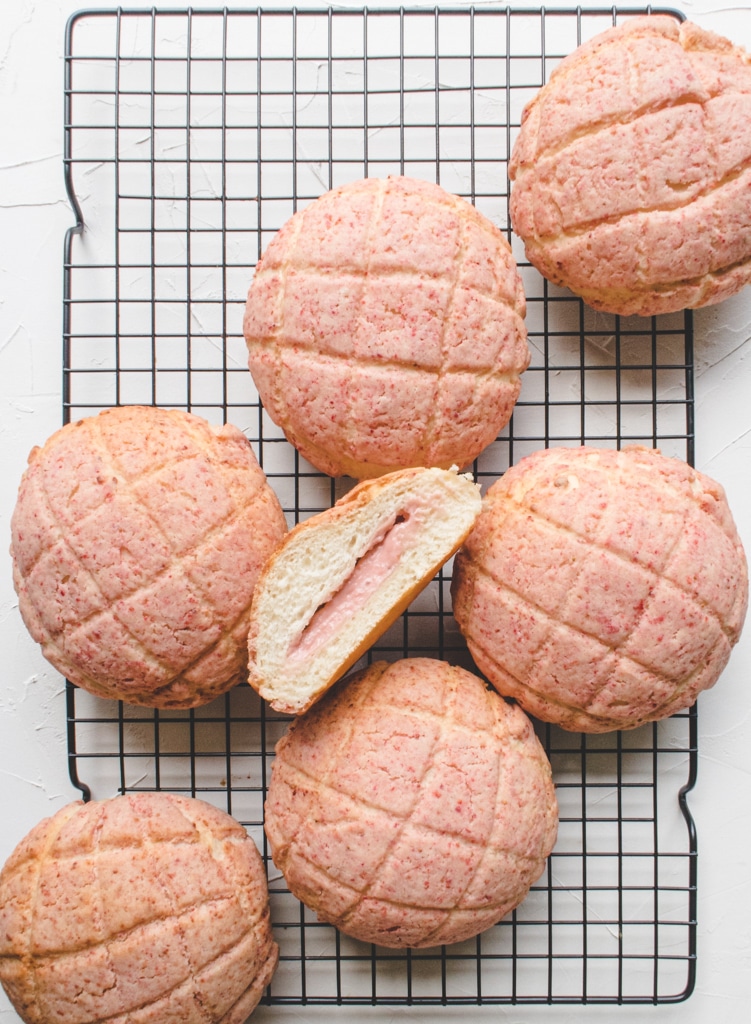
- Place the tray with buns on the middle rack, and a empty tray on the rack above to prevent the buns from browning. Bake for 16 minutes or until the top is very crispy.
- Place the buns on a cooling rack and let it cool down for 15 minutes before enjoying.





Super easy-to-follow recipe, and super delicious! I've been intimidated by making Asian-style buns and have had a few failures using other recipes, but these came out really good. Thanks for sharing!
Hi LS, thank you for trying the recipe. I'm happy to hear the buns came out delicious! I love making Asian buns, I will share more recipes in the future 🙂
This recipe was so easy to follow and delicious. This is the fifth time I've made them and they never disappoint. Thank you for sharing this recipe! ❤️
Thank you, Martha!