

Black sesame bun (Zhi Ma Bao) is a popular Chinese sweet pastry that can usually be found in dim sum restaurants. Growing up in Taiwan, we usually eat black sesame bun for breakfast or as a snack. It's basically a Chinese steamed bun filled with sweet black sesame paste, which is something tragically absent from western style baked goods. The sweet black sesame filling in this bun is creamy, rich, nutty, and just all around amazing. Basically, any time I make some kind of baked good, my husband always ends up suggesting creating a black sesame version of it...
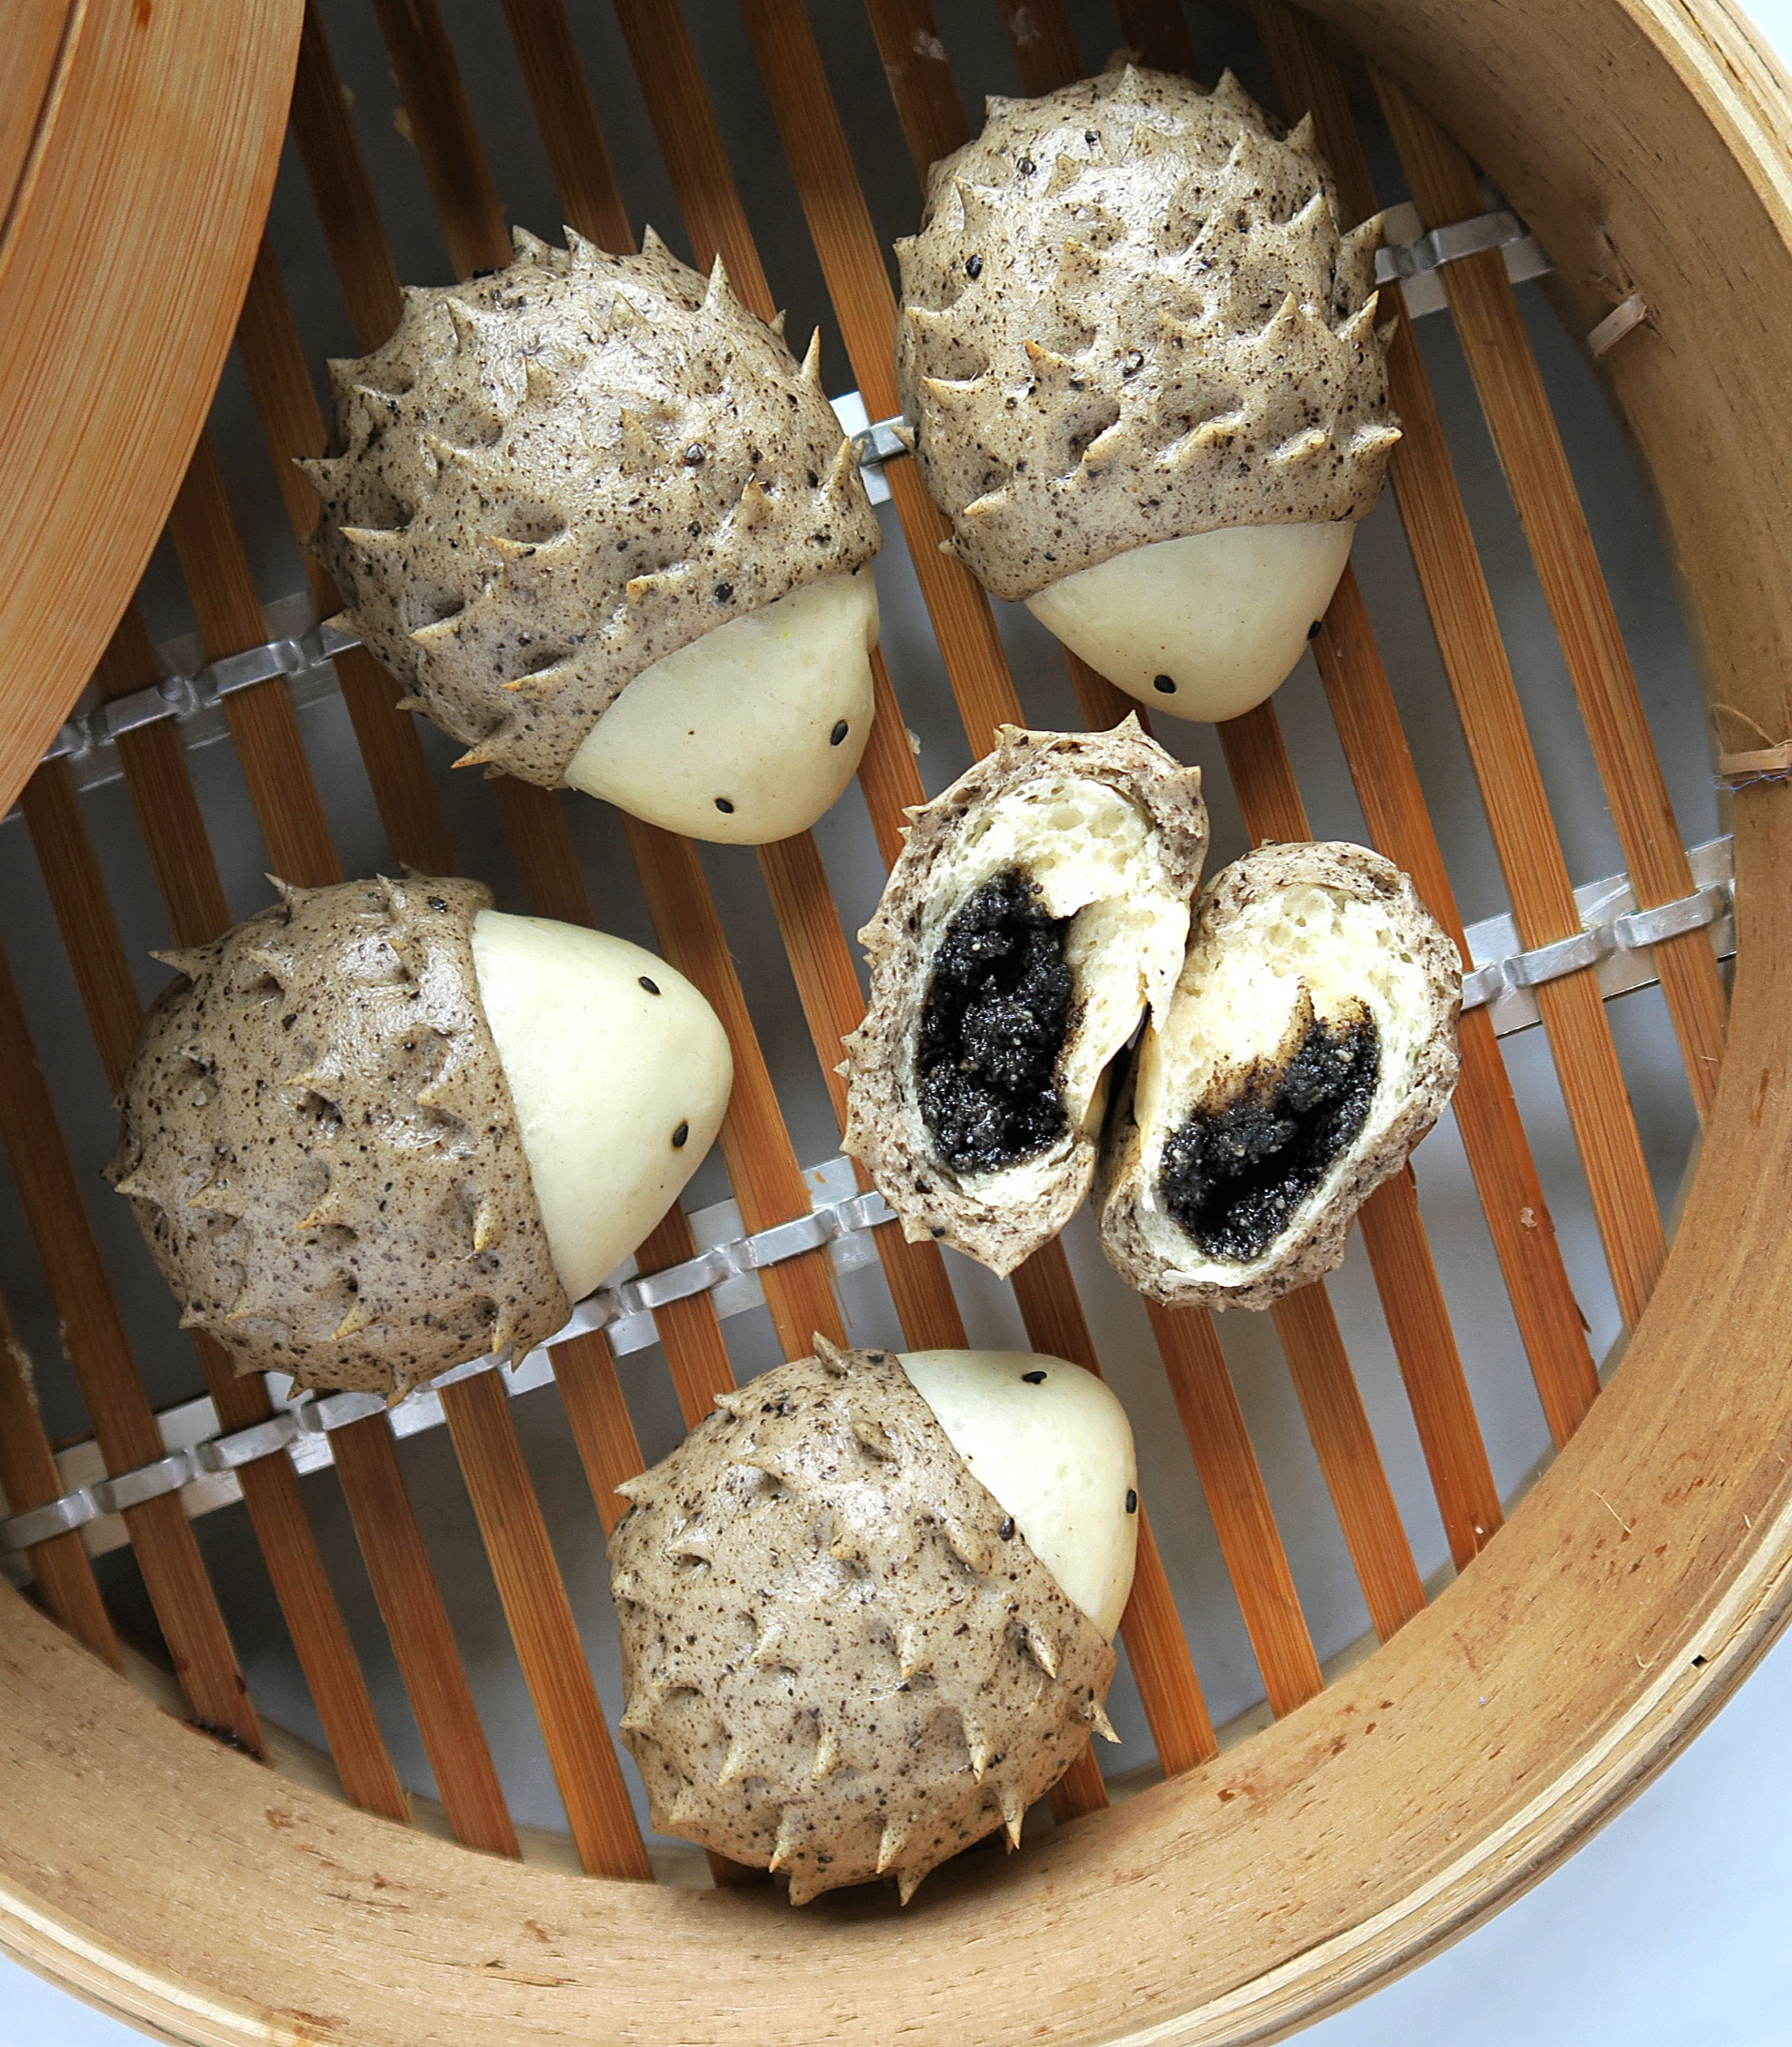
If you need another reason to try this recipe, black sesame seeds are super nutritious with tons of health benefits. They're especially good for pregnant women, nursing mothers and children; so, I always try to incorporate some into my children's diet. Black sesame bun is one of the best way to consume lots of black sesame seeds at a time, especially since it's super delicious!
When I first made it for my 3-year-old daughter, in order to encourage her to try it, I made the buns into little hedgehog shapes. Just as I expected, she loved the cute little hedgehogs. After finishing the first one, she asked for a second one, and then a third one, until I ended up asking her to save one for daddy, who also loves black sesame buns.
Making cute steam buns has became one of my favorite activities recently, it's very fun and relaxing. I'm not an expert, so if I can make it, you can make it too. Here are some tips for how to successfully make cute steam buns and steam buns in general:
Measuring
I know many people prefer to use measuring cups instead of a scale, but a scale is just a lot more accurate. Your one cup can be very different from my one cup. Then, when you double or triple the recipes, the difference will become more significant and can noticeably affect your result. So, while I prefer using a scale for baking in general, this is especially helpful if you are new to making steam buns.
Kneading
You can either knead with a stand mixer, bread machine or by hand. Since this recipe only uses a very small amount of dough, I usually just knead by hand. It doesn't take very long and it's good exercise! Sufficient kneading is the key to whether or not your steamed buns will end up with a smooth and pretty surface. If you don't knead the dough enough and there are air bubbles remaining, the surface of your buns will end up looking like the surface of the moon.
Shaping
In this recipe I only make 5 buns, since you need to work fast to finish shaping before the dough rises too much, otherwise, the first bun may end up overproofing before you even finish the last one. Overproofed buns will collapse and become wrinkly after steaming, and the texture will suffer as well. What's worse is the hedgehog will end up looking very sad! If you are experienced or making it with friends, feel free to double or triple the recipe.
Cooking
I usually steam these in a bamboo steamer, which you place over a pot with boiling water. If you are using a bamboo steamer as well, make sure you use a deeper pot so that the water in the pot won't be too close to the buns, which, in my experience, results in buns with damaged surfaces. I once steamed these buns over a shallow frying pan, and all the buns end up looking very wrinkly and sad because of the water dripping on the buns.
I usually fill the pot with just half an inch to an inch of water, this way the water will boil sooner and you'll have less risk of overproofing before the bun is able to cook. After cooking is complete, remove the steamer as soon as possible so the buns won't continue absorbing water. Let the buns sit in the steamer for about 2 minutes before opening the lid.
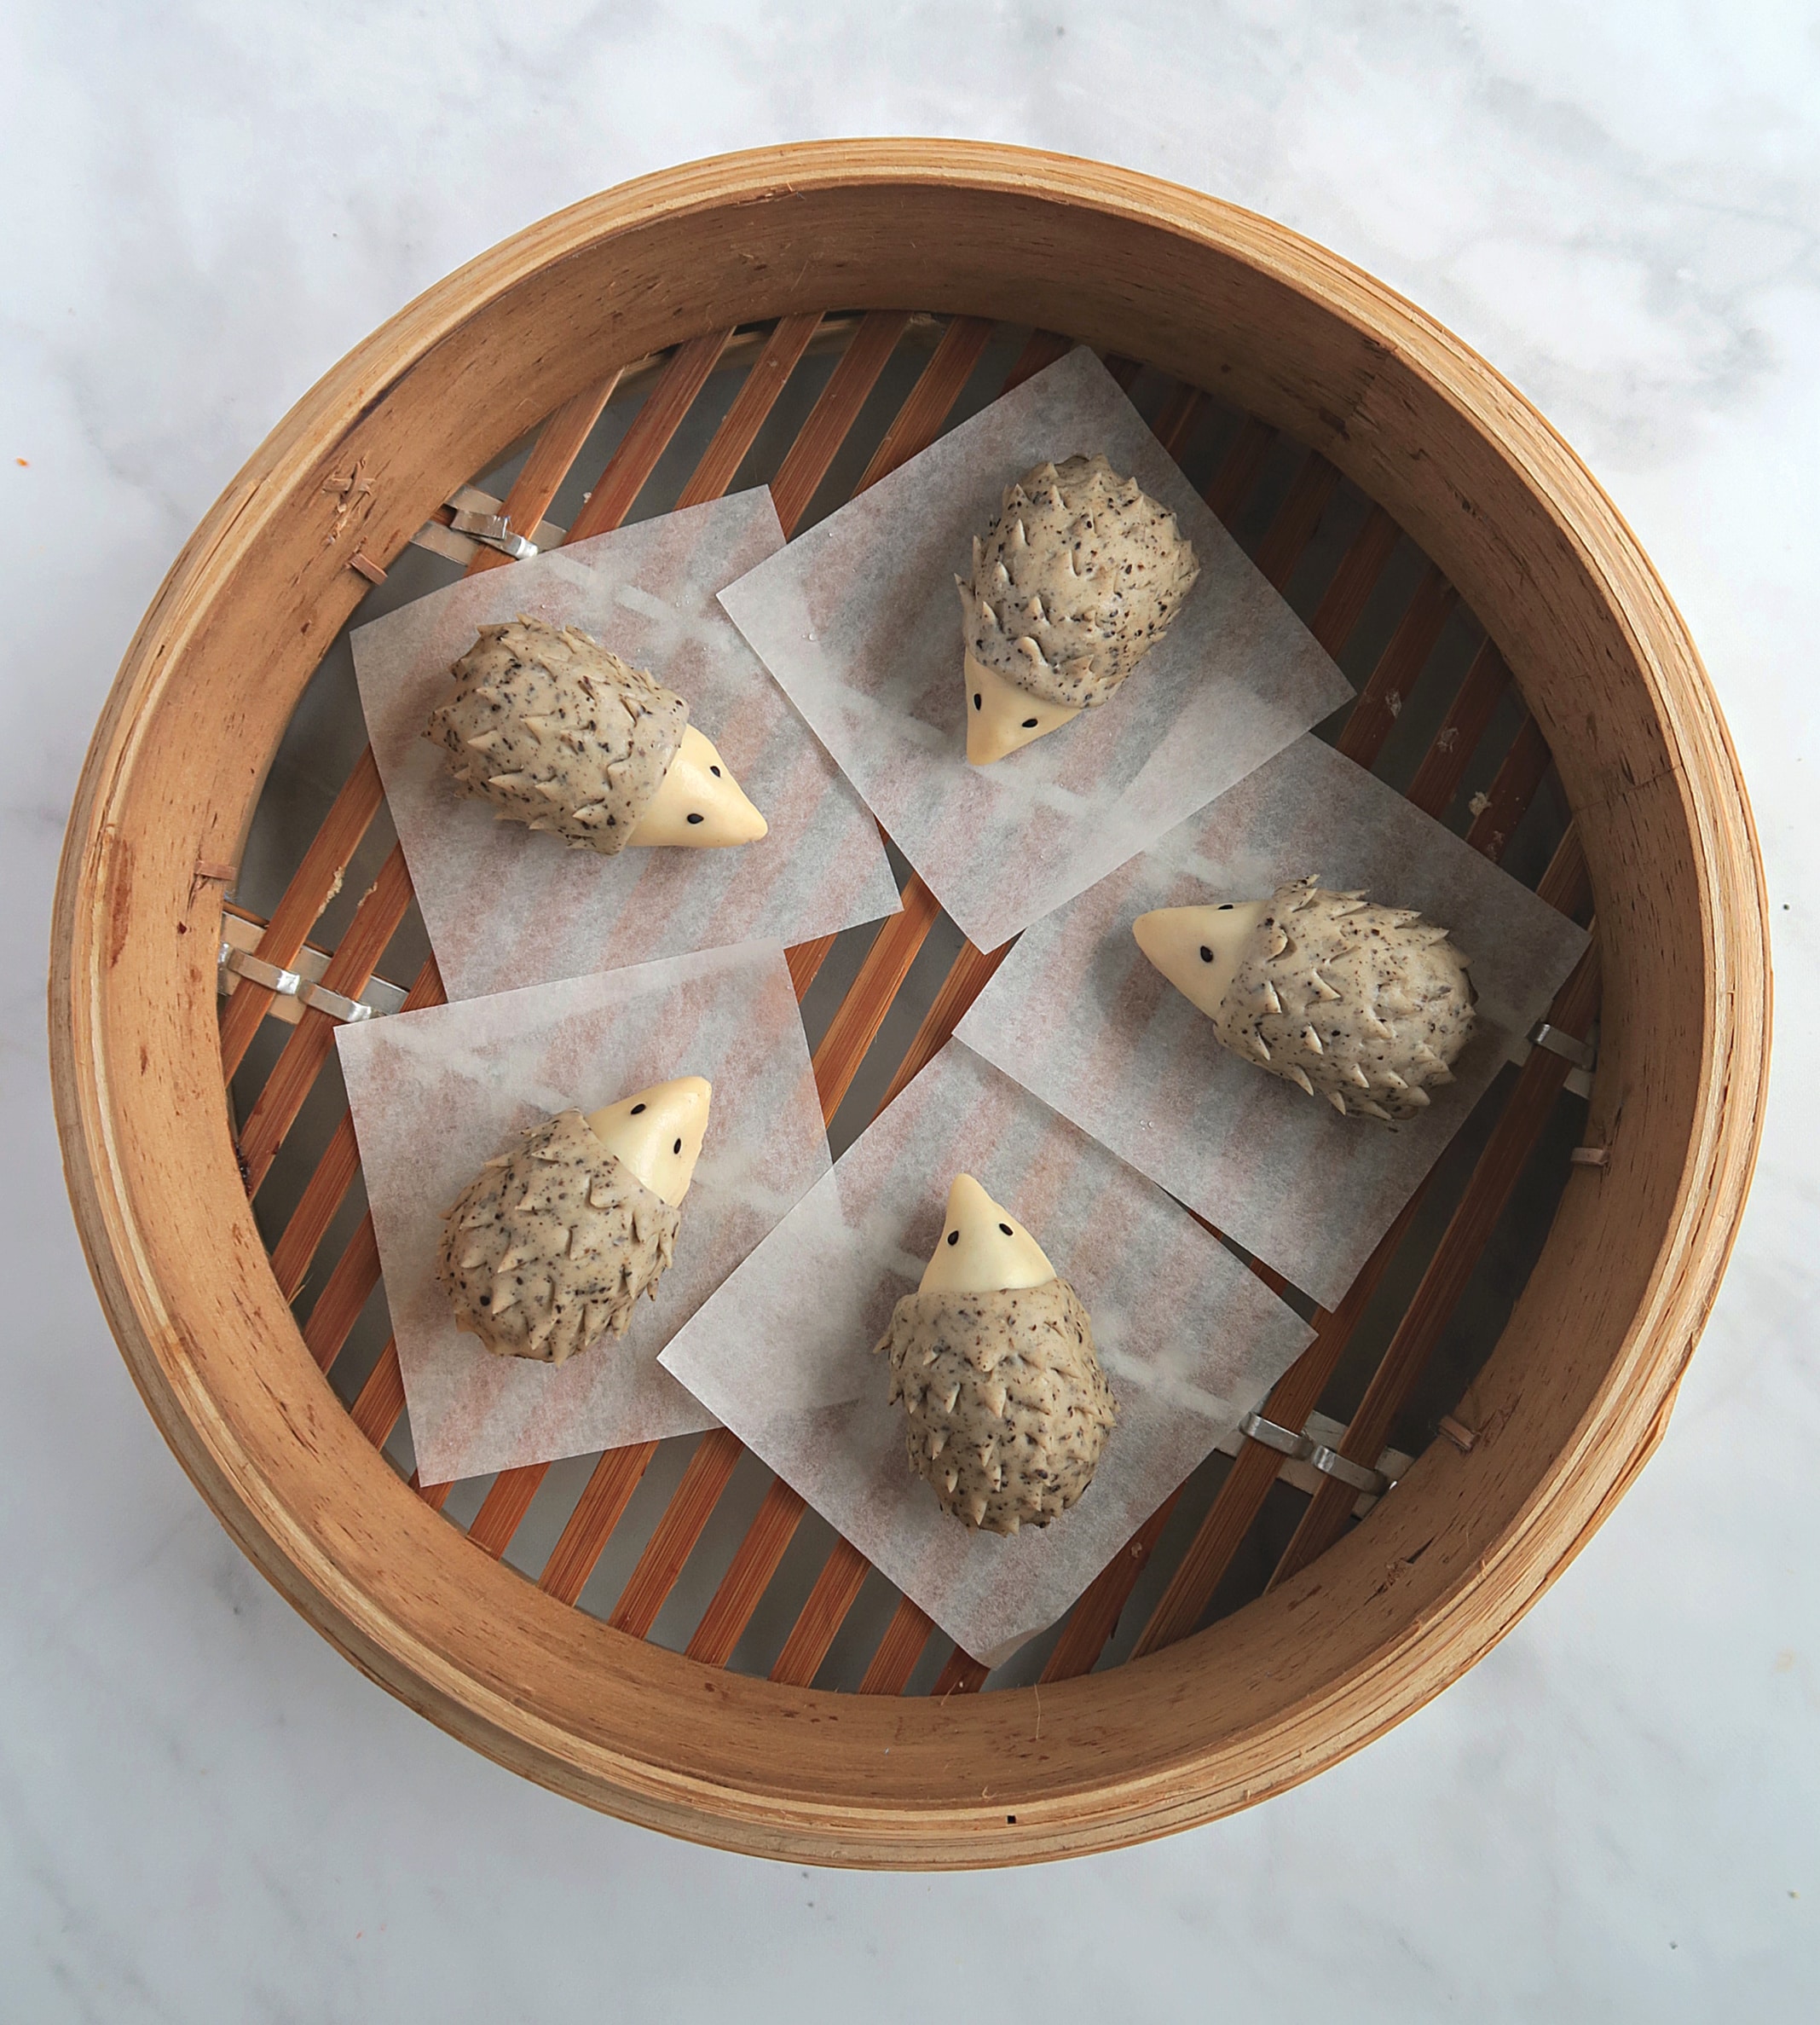
If you have a digital steamer then everything will be a lot easier! I have a steamer oven that allows me to adjust the temperature. In this steamer all I need to do is to set the temperature to 300°F, set the timer and wait for the buns to be done. It's a lot more convenient, but I do slightly prefer the results of the bamboo steamer.
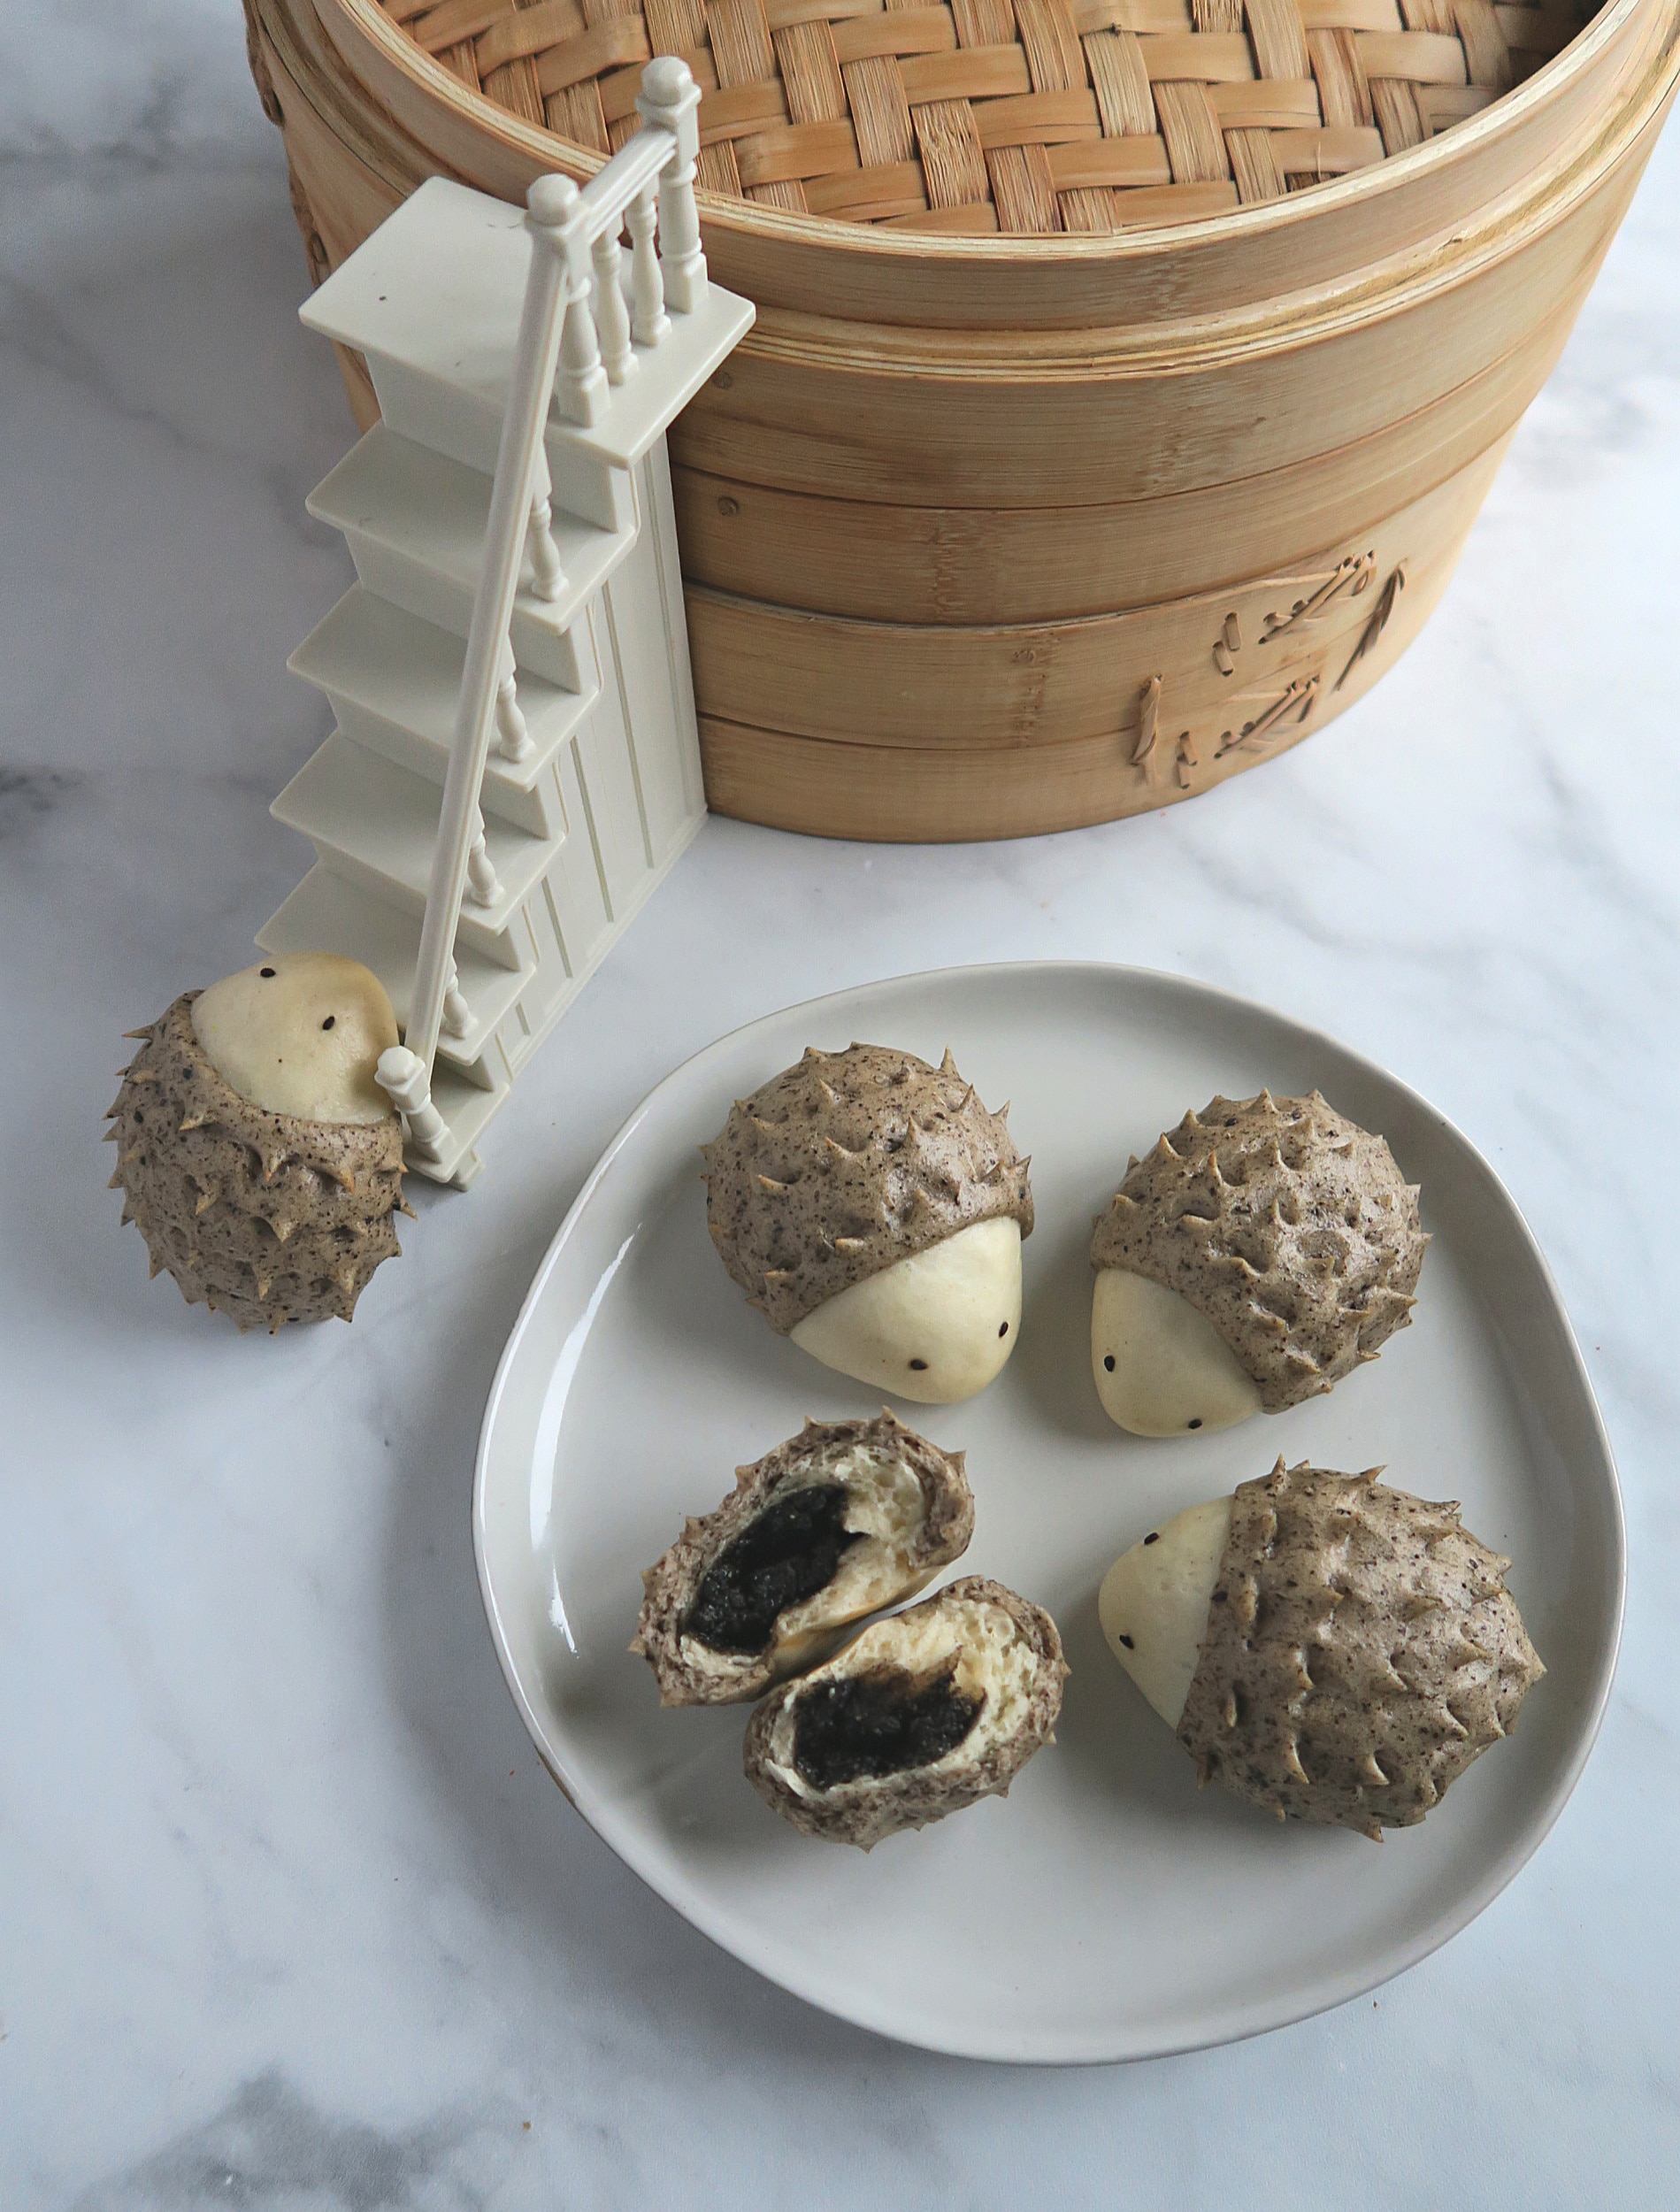
Now it's your turn to try these out! Especially if you have kids, this would be an awesome treat for them! Leave me a comment below in you still have any questions.
I think you may also like these recipes
Chinese Sesame Flatbread (Shaobing)-Taiwanese Breakfast Style
The Ultimate Chinese Scallion Pancake
Taiwanese Traditional Style Egg Crepe (Dan Bing)
IF YOU MAKE THIS RECIPE, DON’T FORGET TO TAG ME @COOKINGINCHINGLISH #COOKINGINCHINGLISH ON INSTAGRAM, I WOULD LOVE TO SEE IT!
Hedgehog Black Sesame Steam Buns (Zhi Ma Bao)
Ingredients
Sesame Filling
- 25 g black sesame powder, 3 tbsp
- 15 g unsalted butter, softened, 1 tablespoon
- 10 g powdered sugar, 1 tablespoon
Dough
- 100 g all purpose flour (I use King Arthur), ¾ cup
- ¼ teaspoon instant yeast, ½ teaspoon if using active dry yeast (see note)½
- 10 g sugar, 1 tbsp
- 1 teaspoon vegetable oil, I use coconut oil
- 60 g whole milk or milk alternative of your choice., ¼ cup
- 1 tablespoon black sesame powder
Decorating
- Small handful of black sesame seeds
Instructions
Making sesame filling
- Mix the ingredients for the filling together in a small bowl and store it in the fridge.
Making the dough
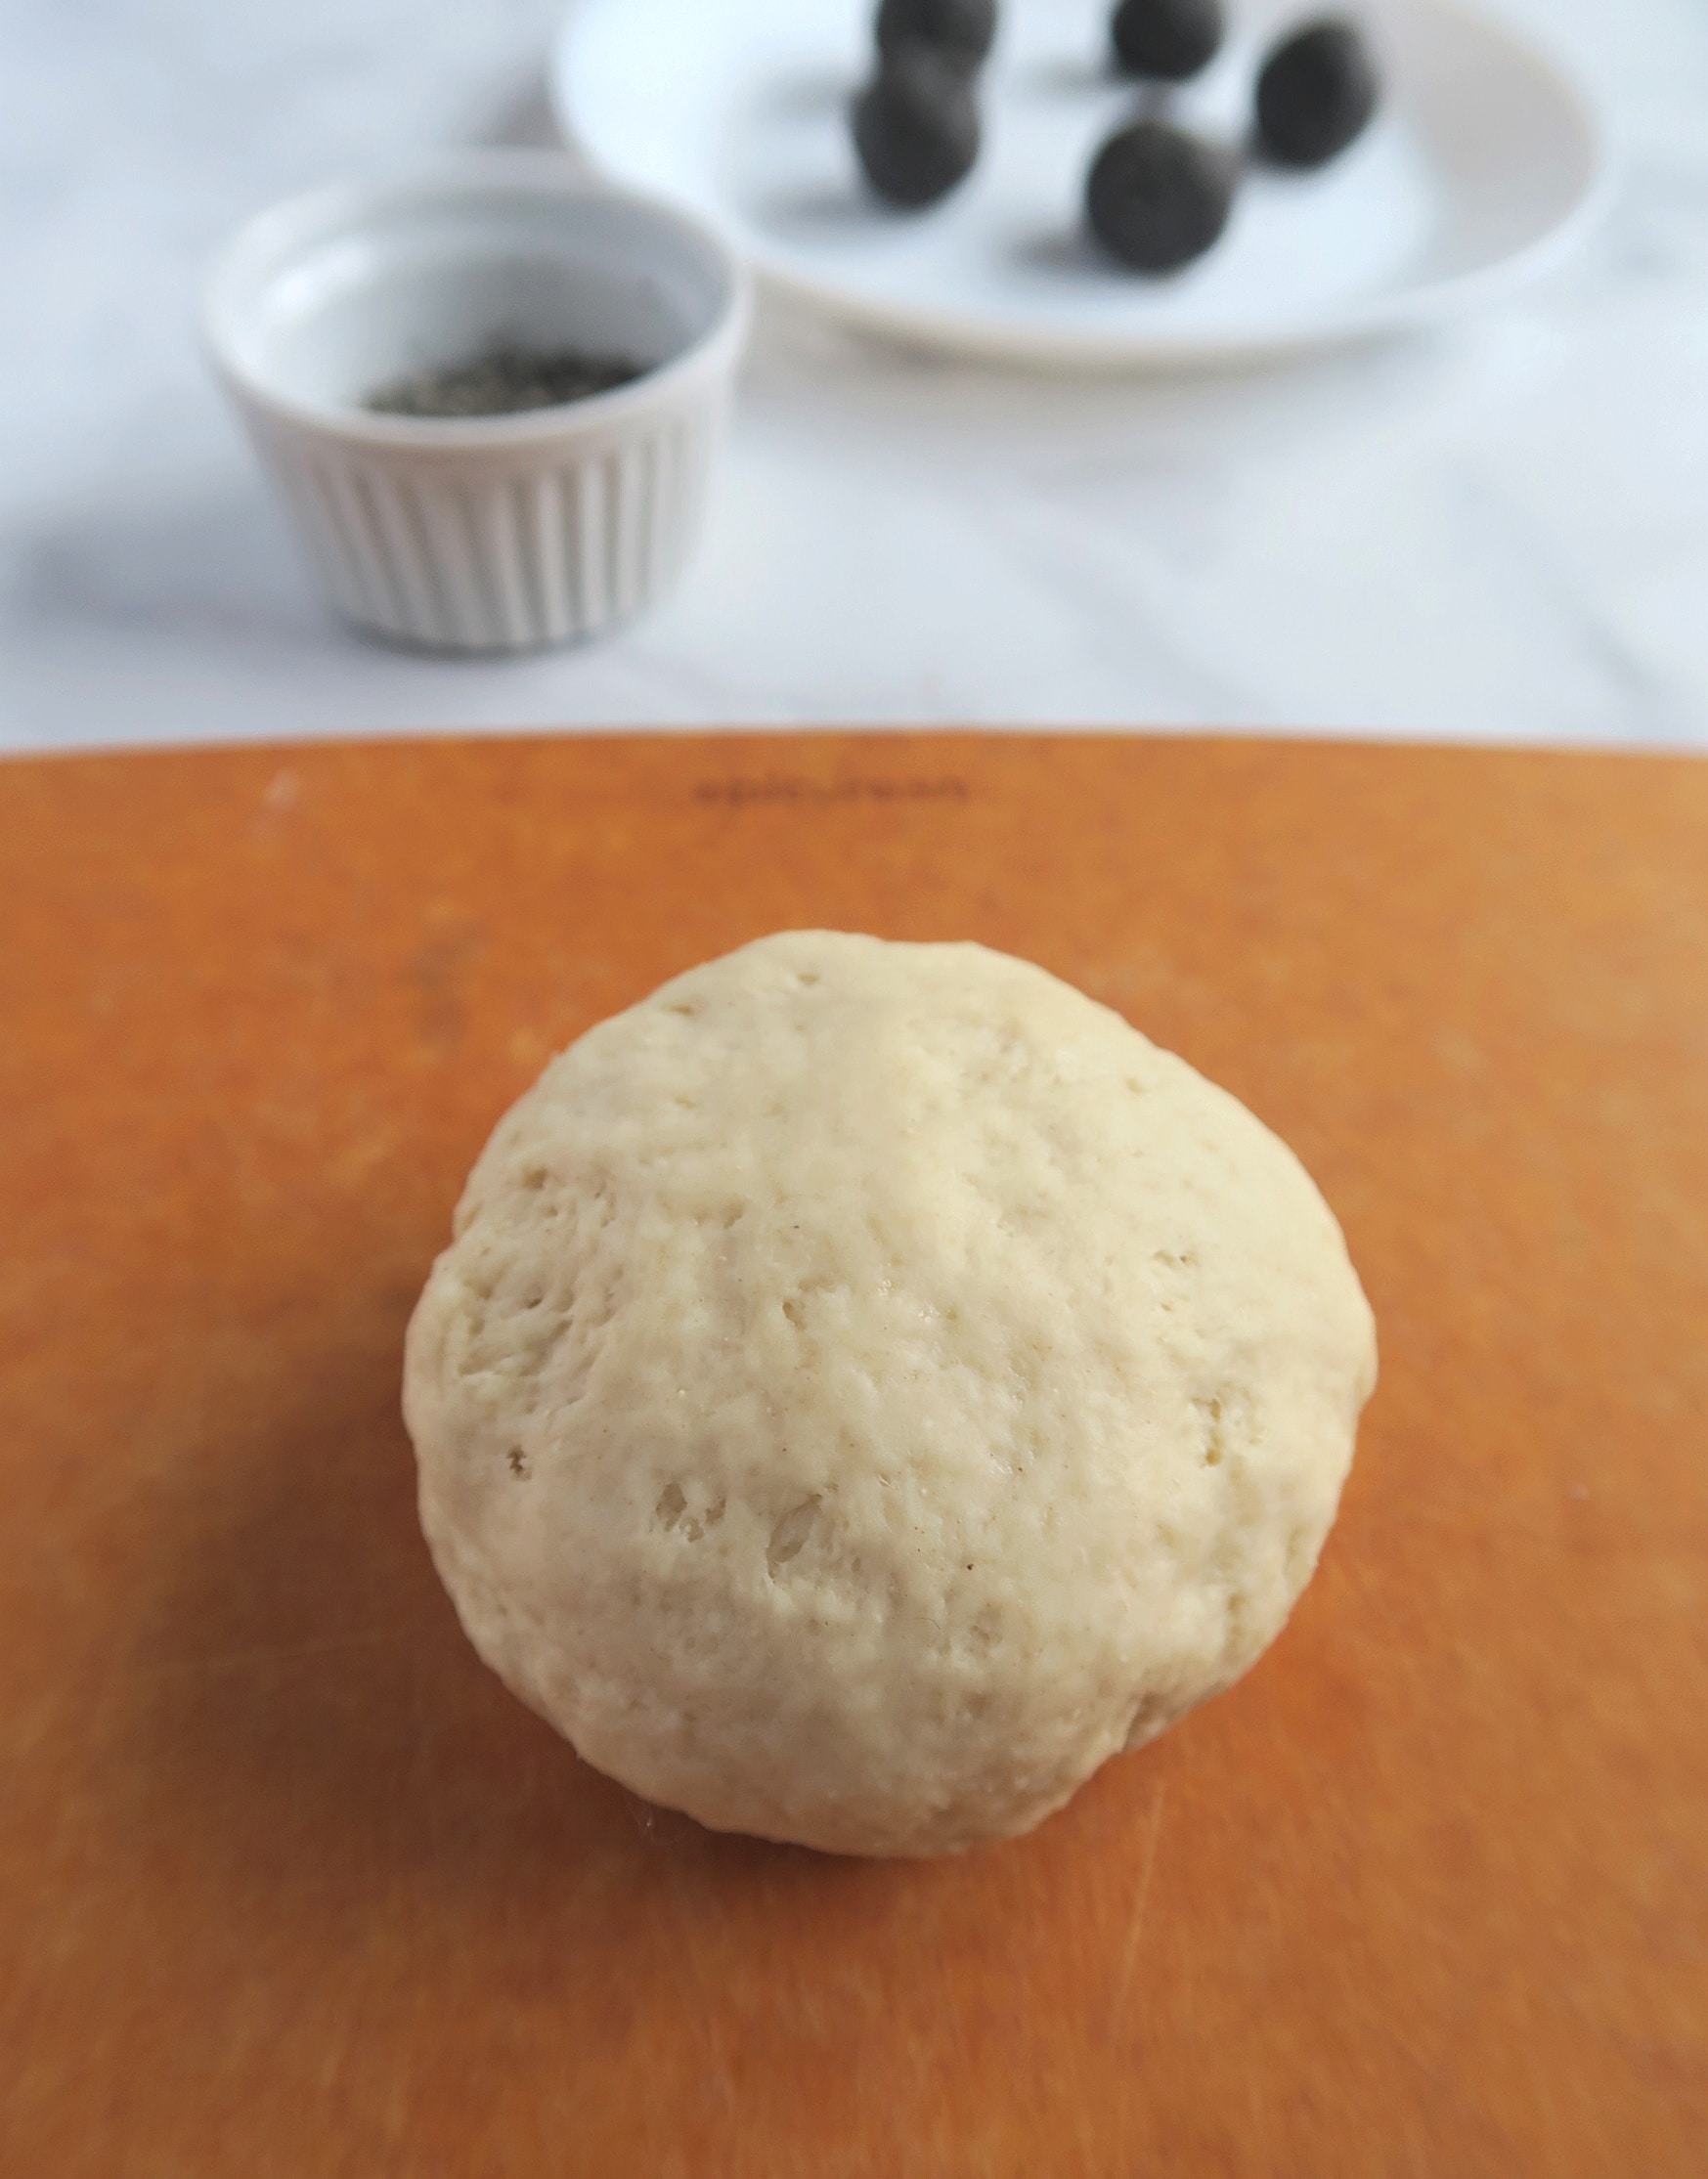
- Mix all the dough ingredients together except for the sesame powder and knead for 1 minute until a rough ball is formed.
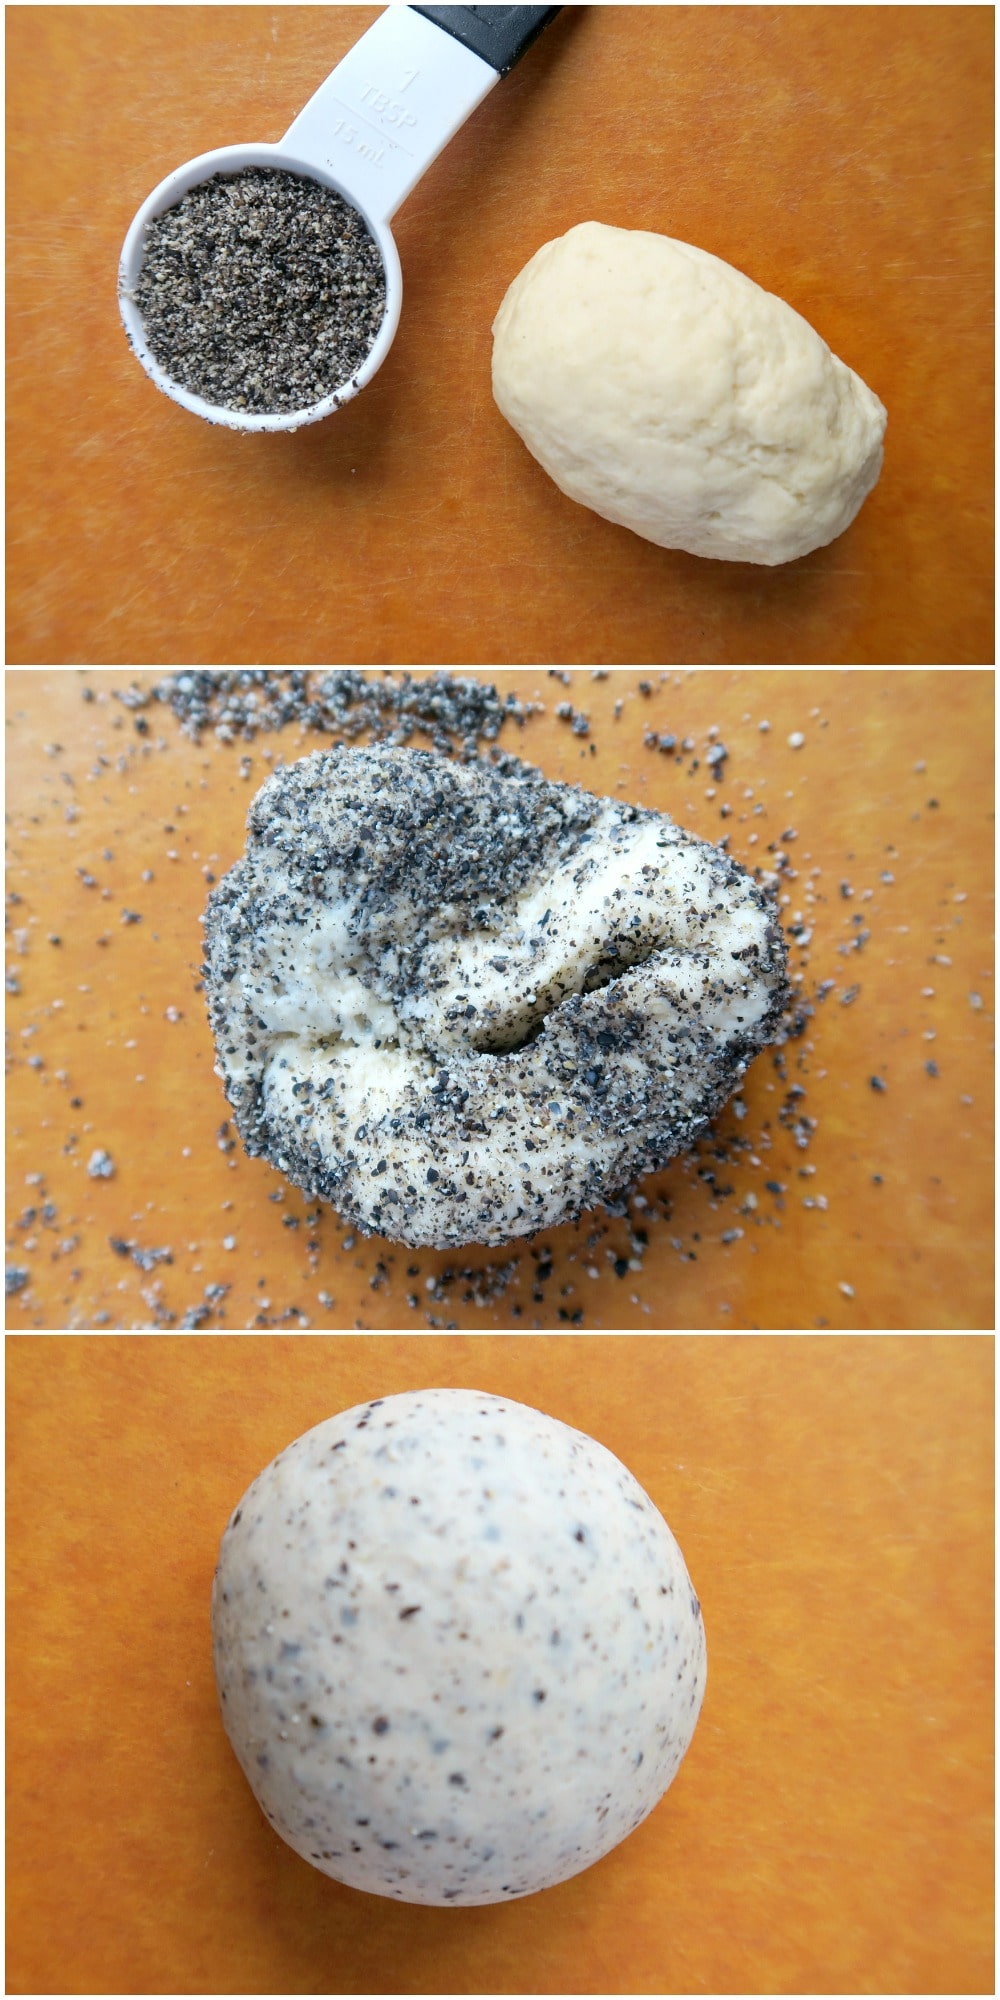
- Separate the dough into two equal parts, cover one part with plastic wrap and mix the other part with sesame powder. Knead until the sesame powder is thoroughly and evenly incorporated in the dough. Cover the the dough with plastic wrap to rest.
- Now cut the white dough into five equal pieces, take one piece and cover the rest.
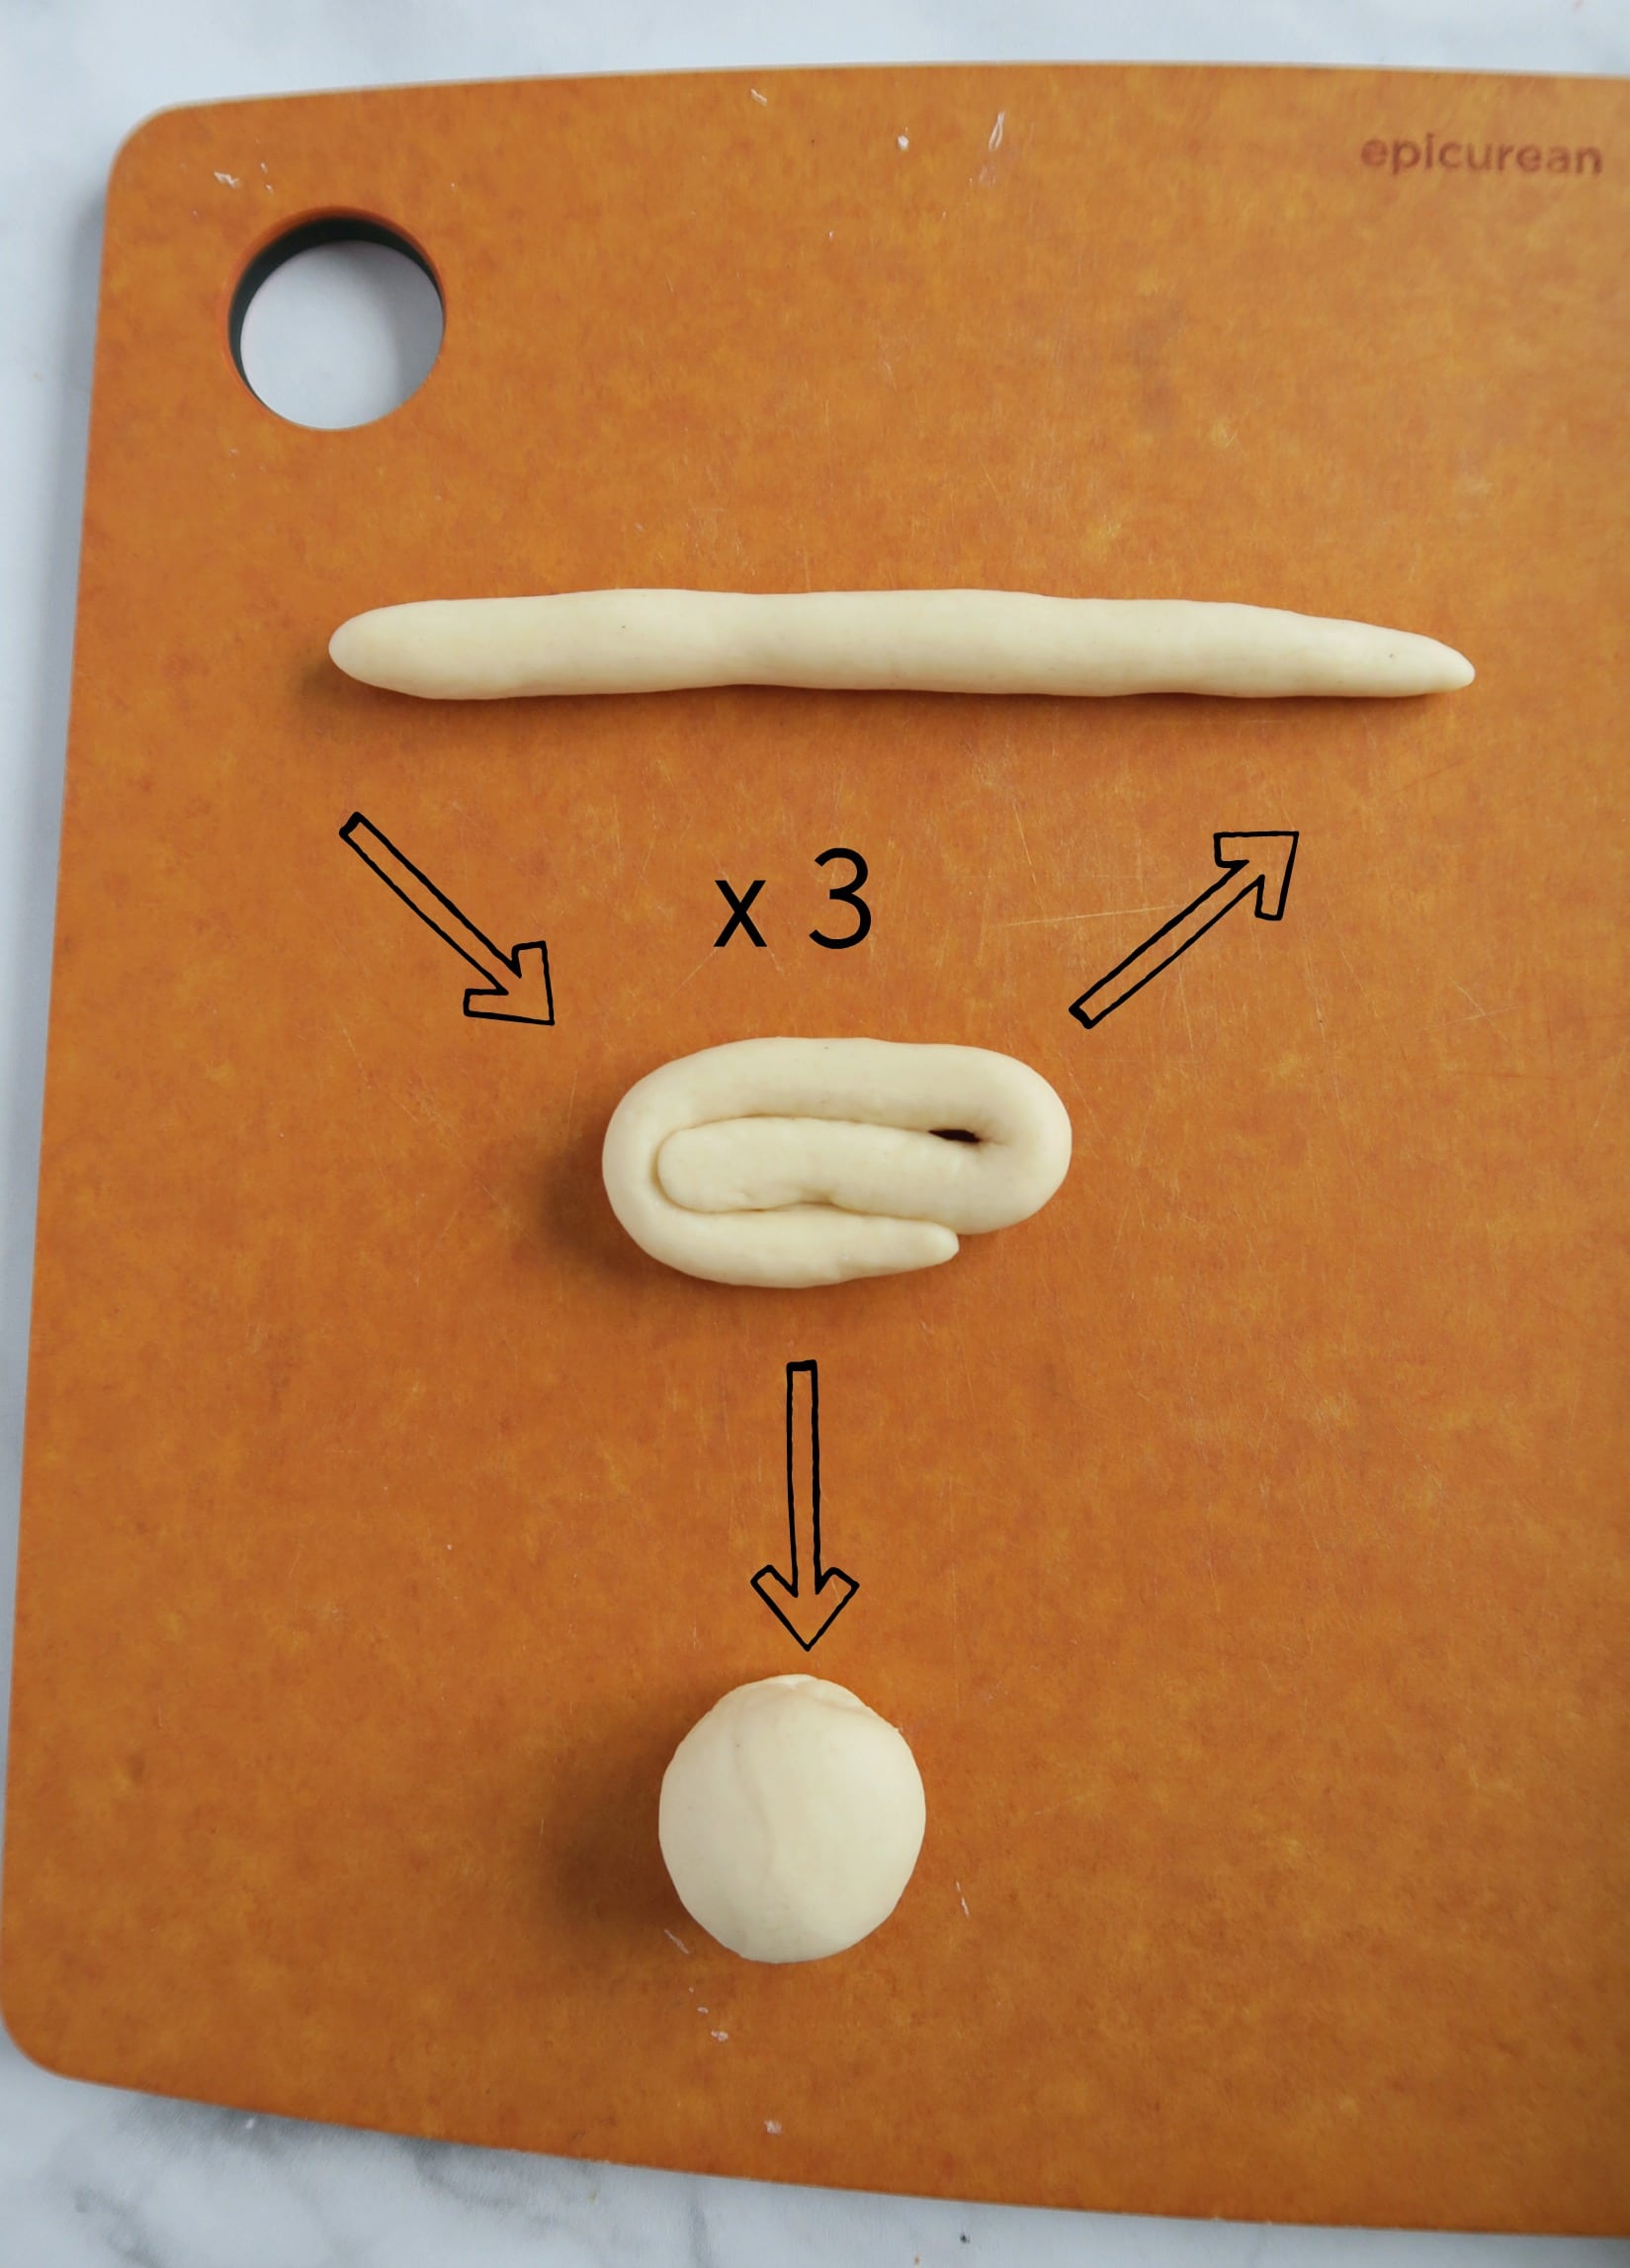
- Roll the small piece of dough into a long log, fold two sides in and roll it out to a long log again (see the picture in the main post). Repeat this step 2 more times before rolling the dough into a ball with smooth surface by tucking the edges to the center and pinching them together.
- Separate the sesame paste into 5 equal portions and roll into balls.
Assembling
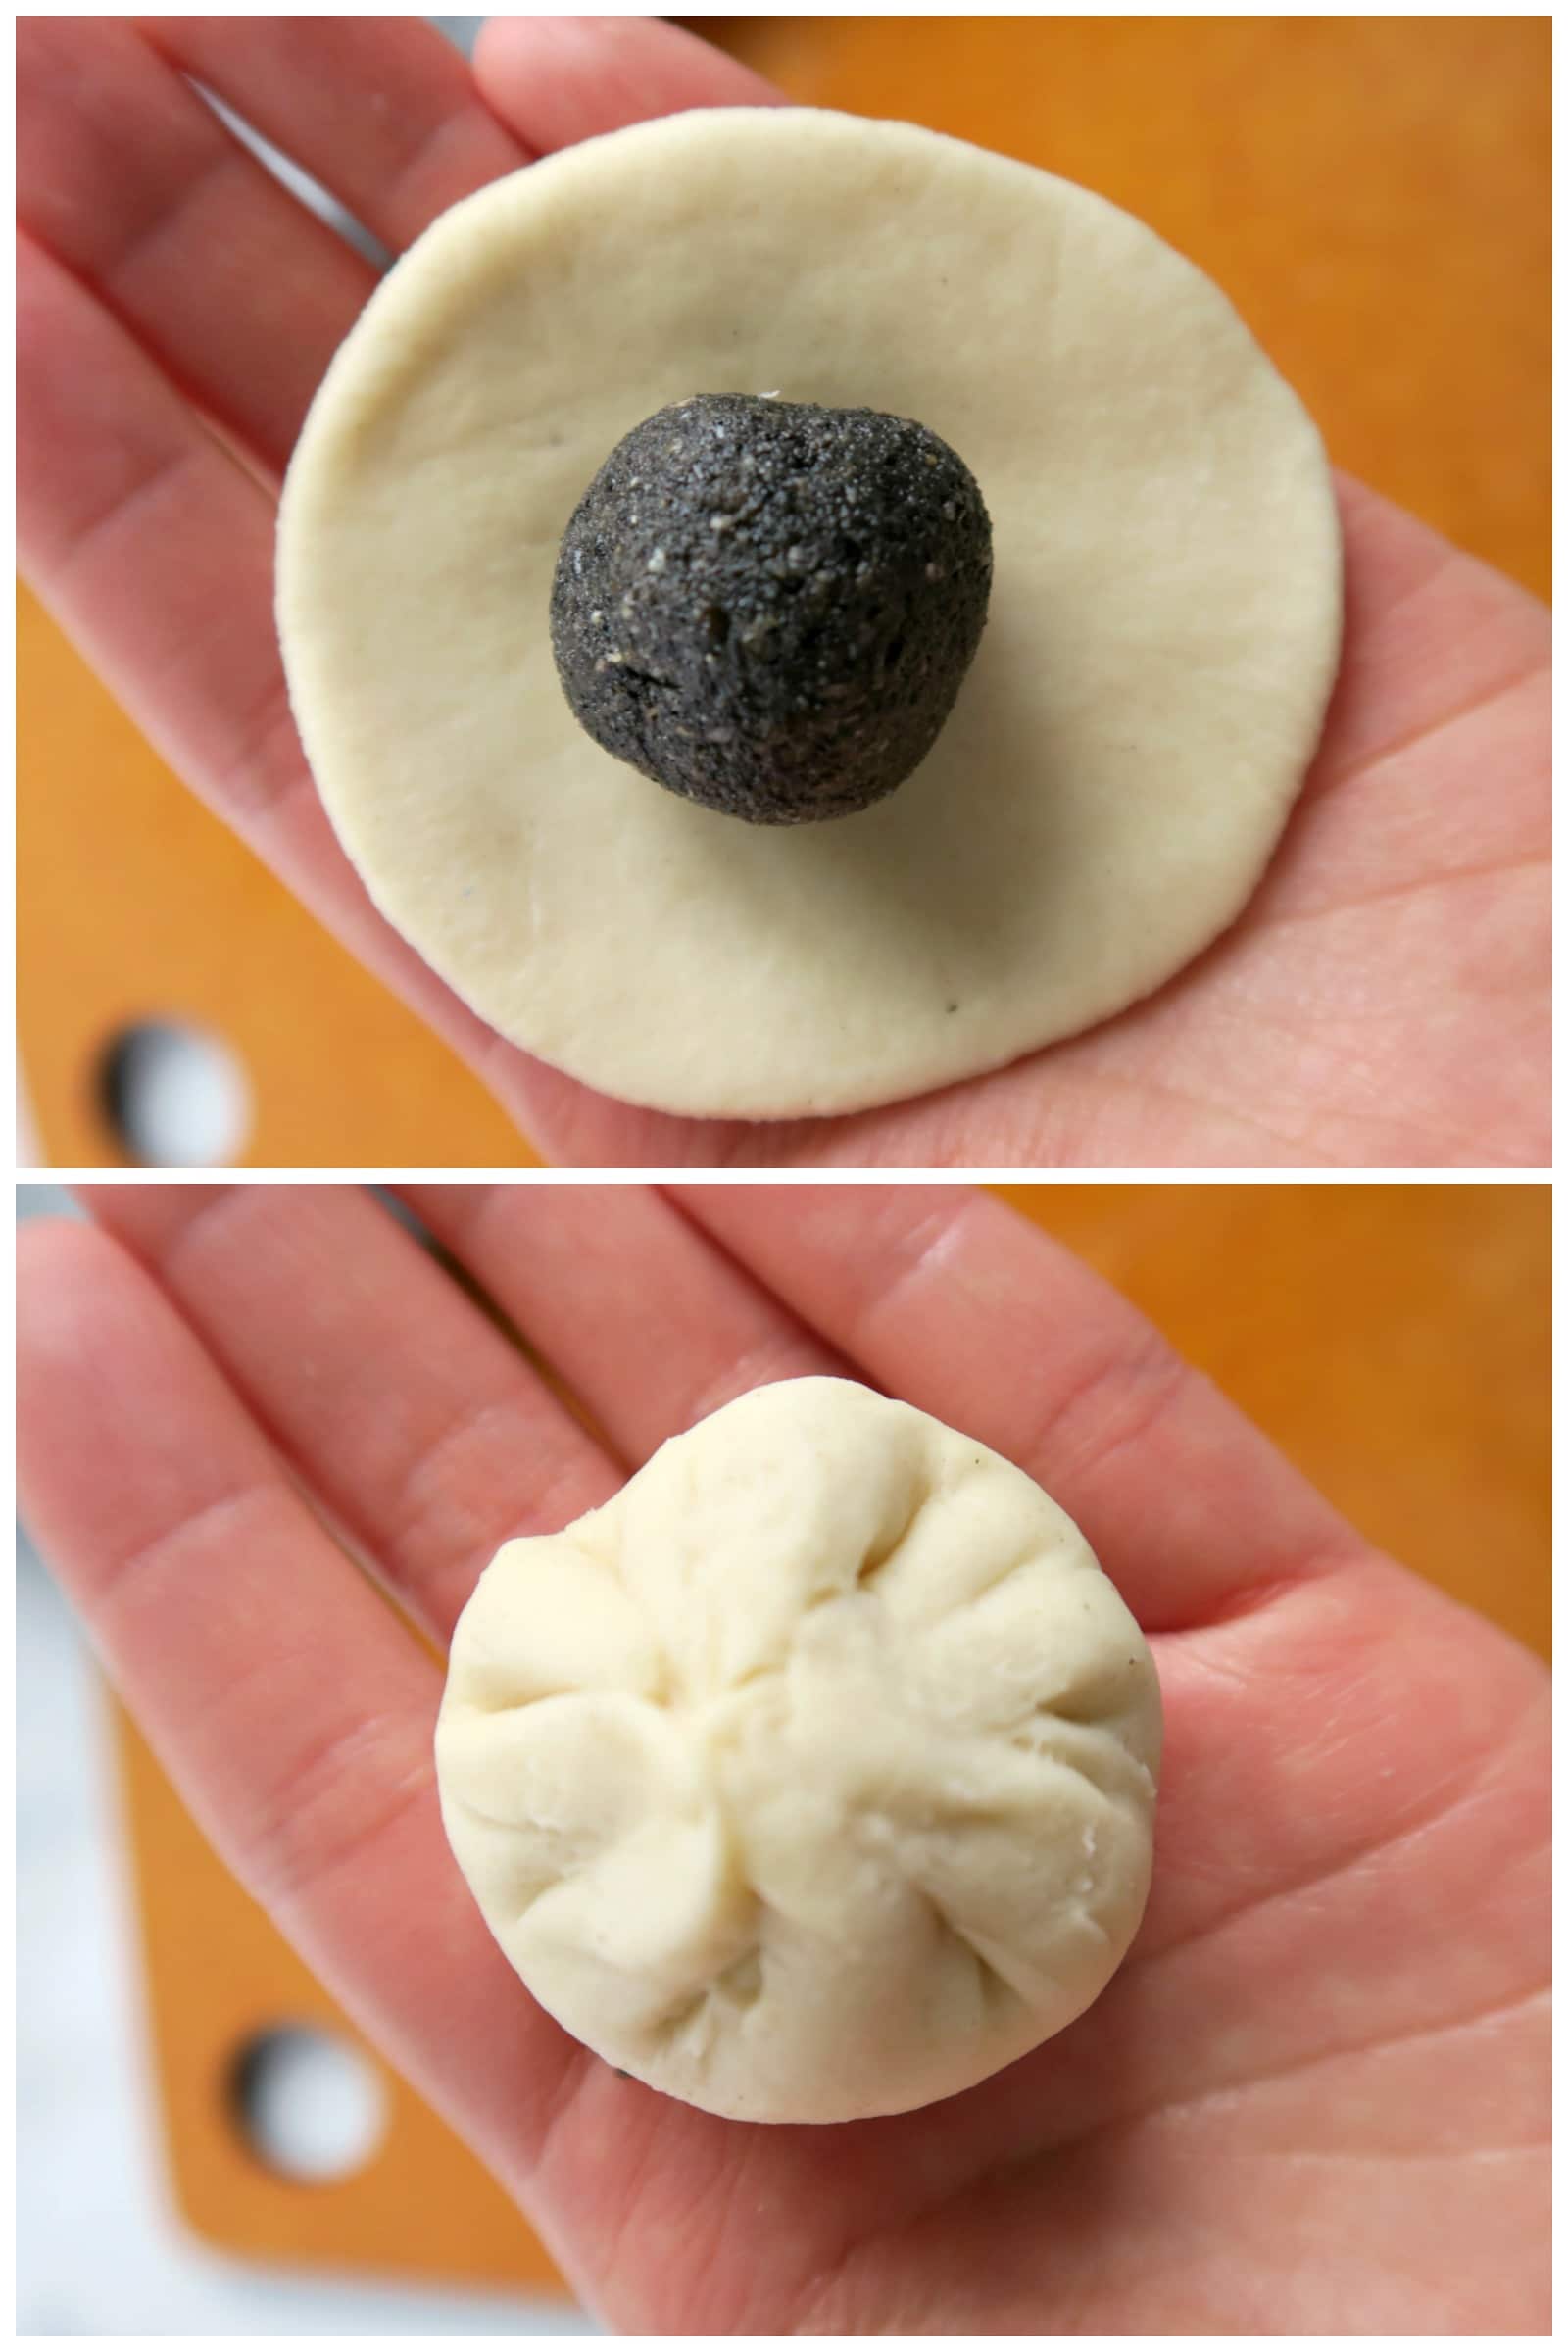
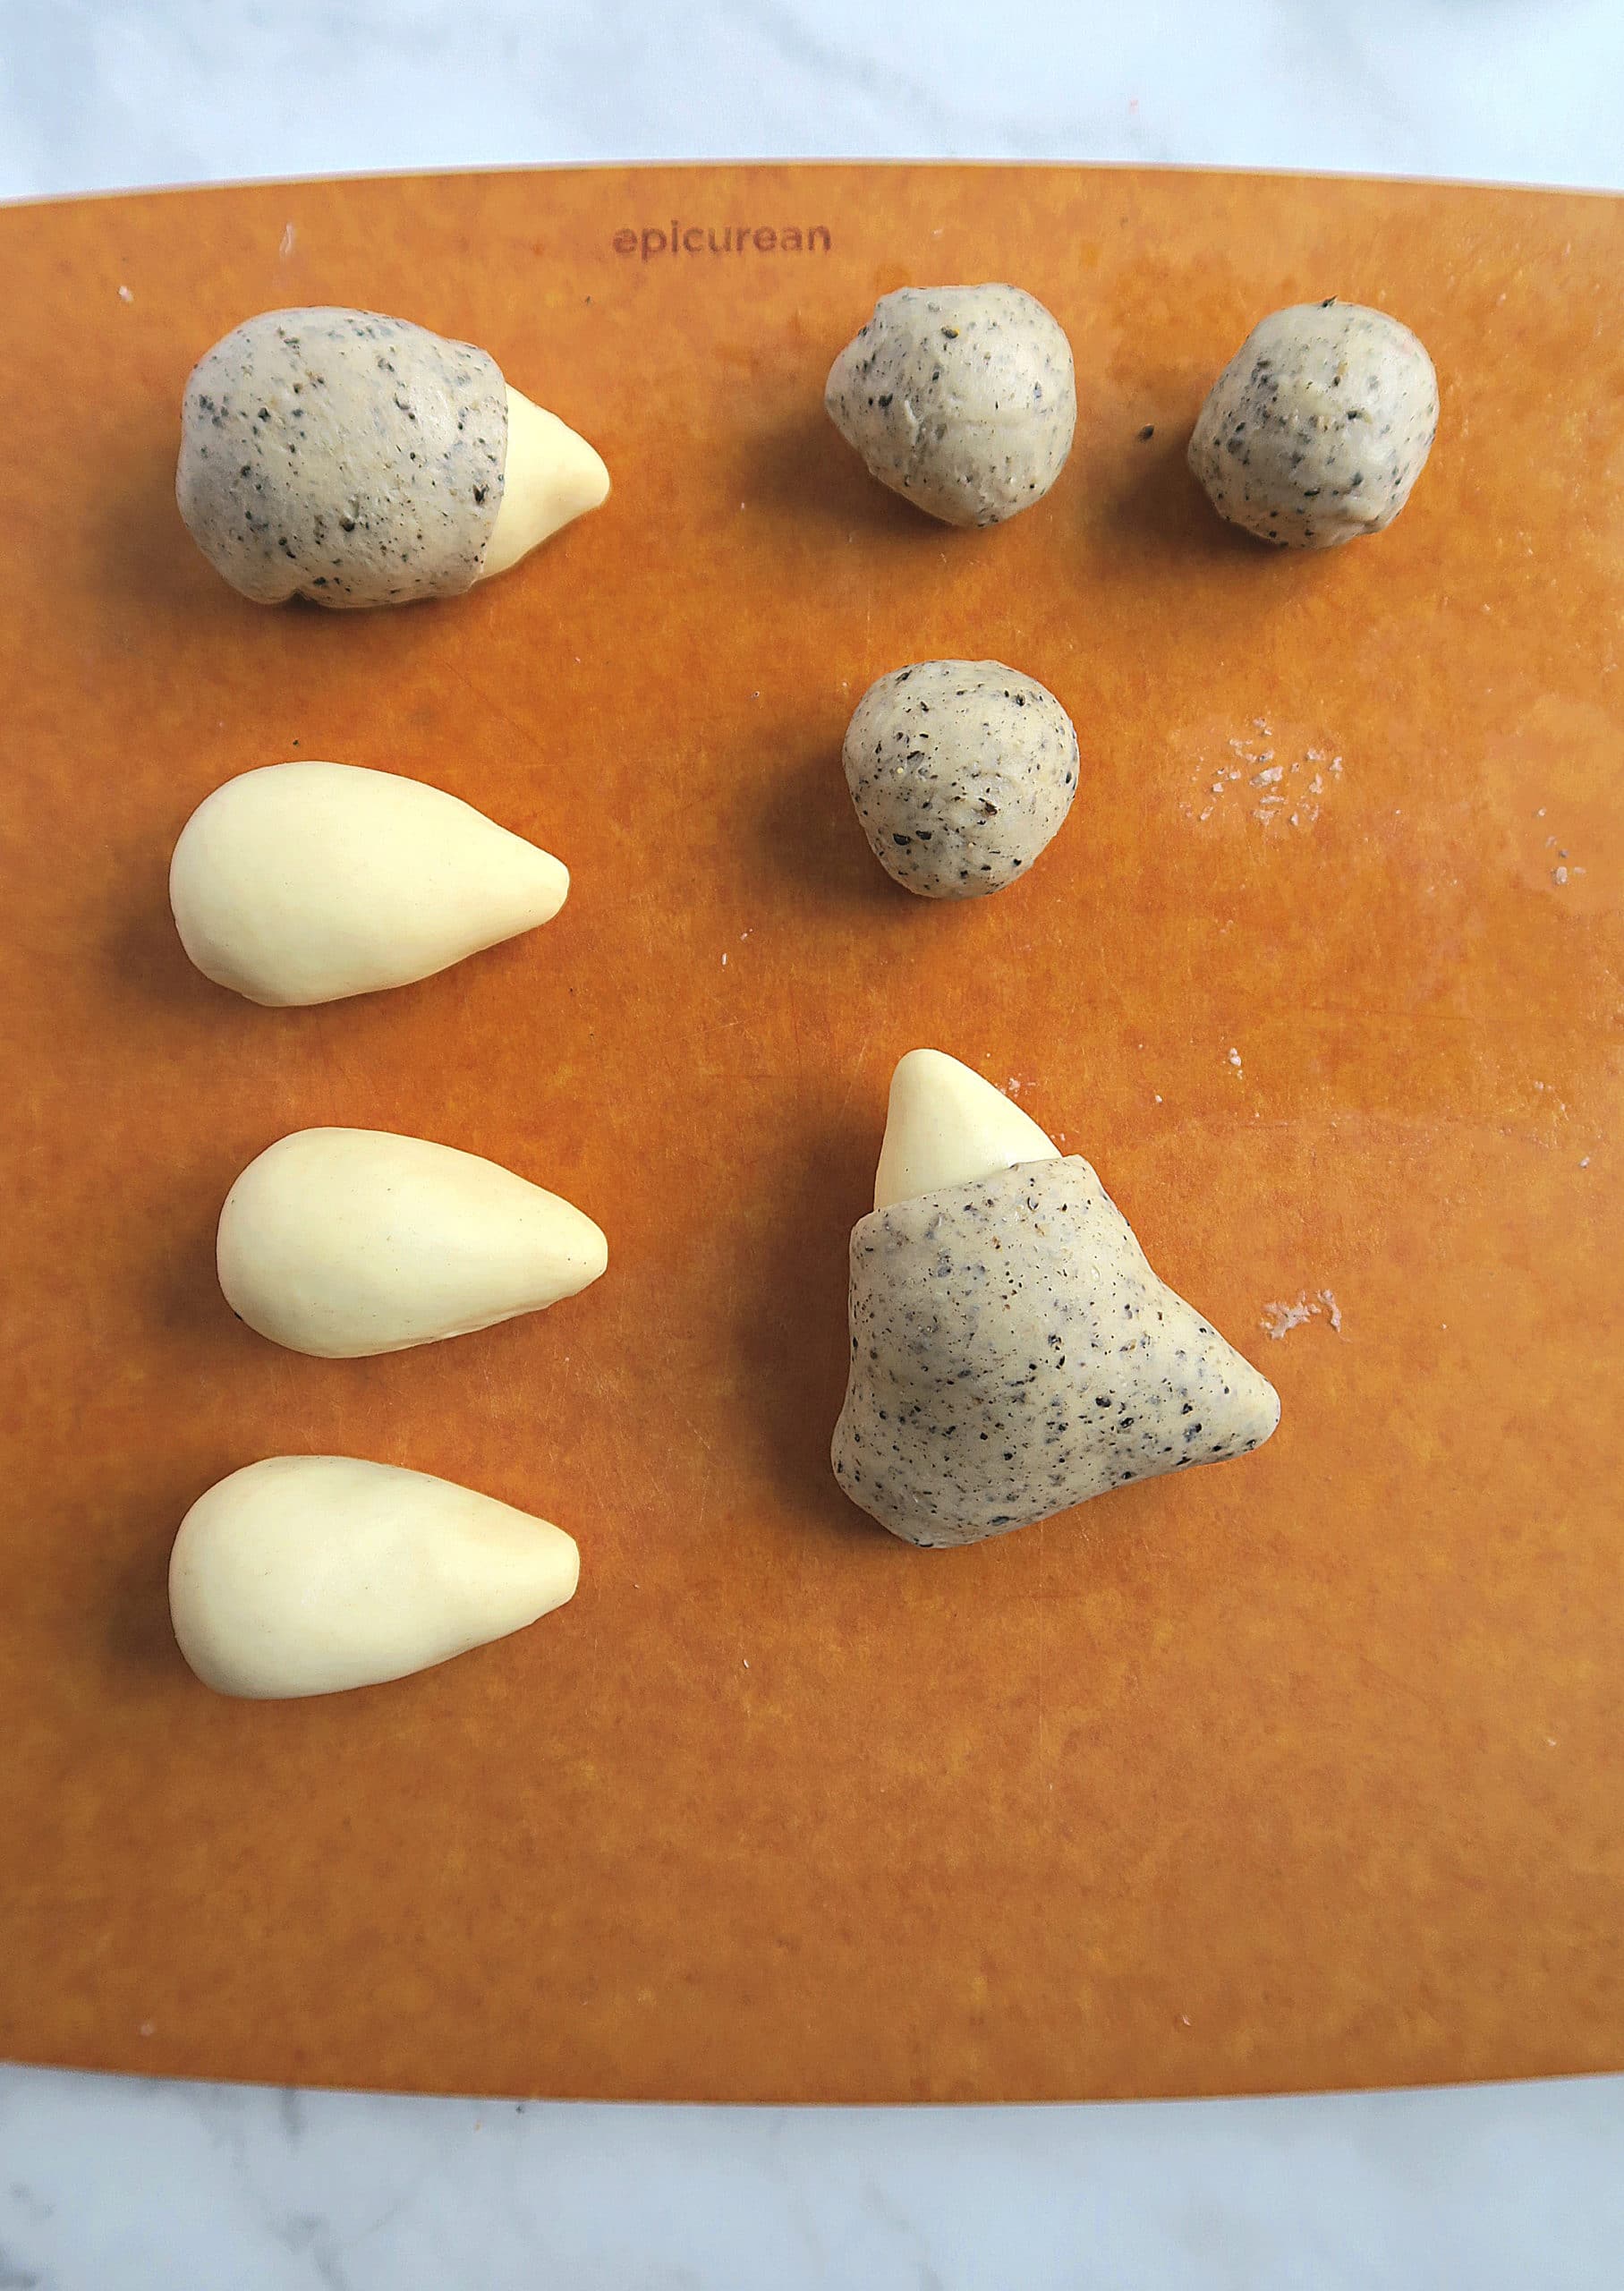
- Roll the white dough into a 3" diameter rough circle, wrap one portion of filling in the dough and then shape it into a tear drop shape. Repeat the same for the rest of the dough.
- Cut the grey dough into 5 equal pieces, roll each piece into a ball.
- Use a rolling pin to roll the ball into a 3" diameter rough circle. Fold the top part down a little bit to create a flat side that will join to the hedgehog's head.
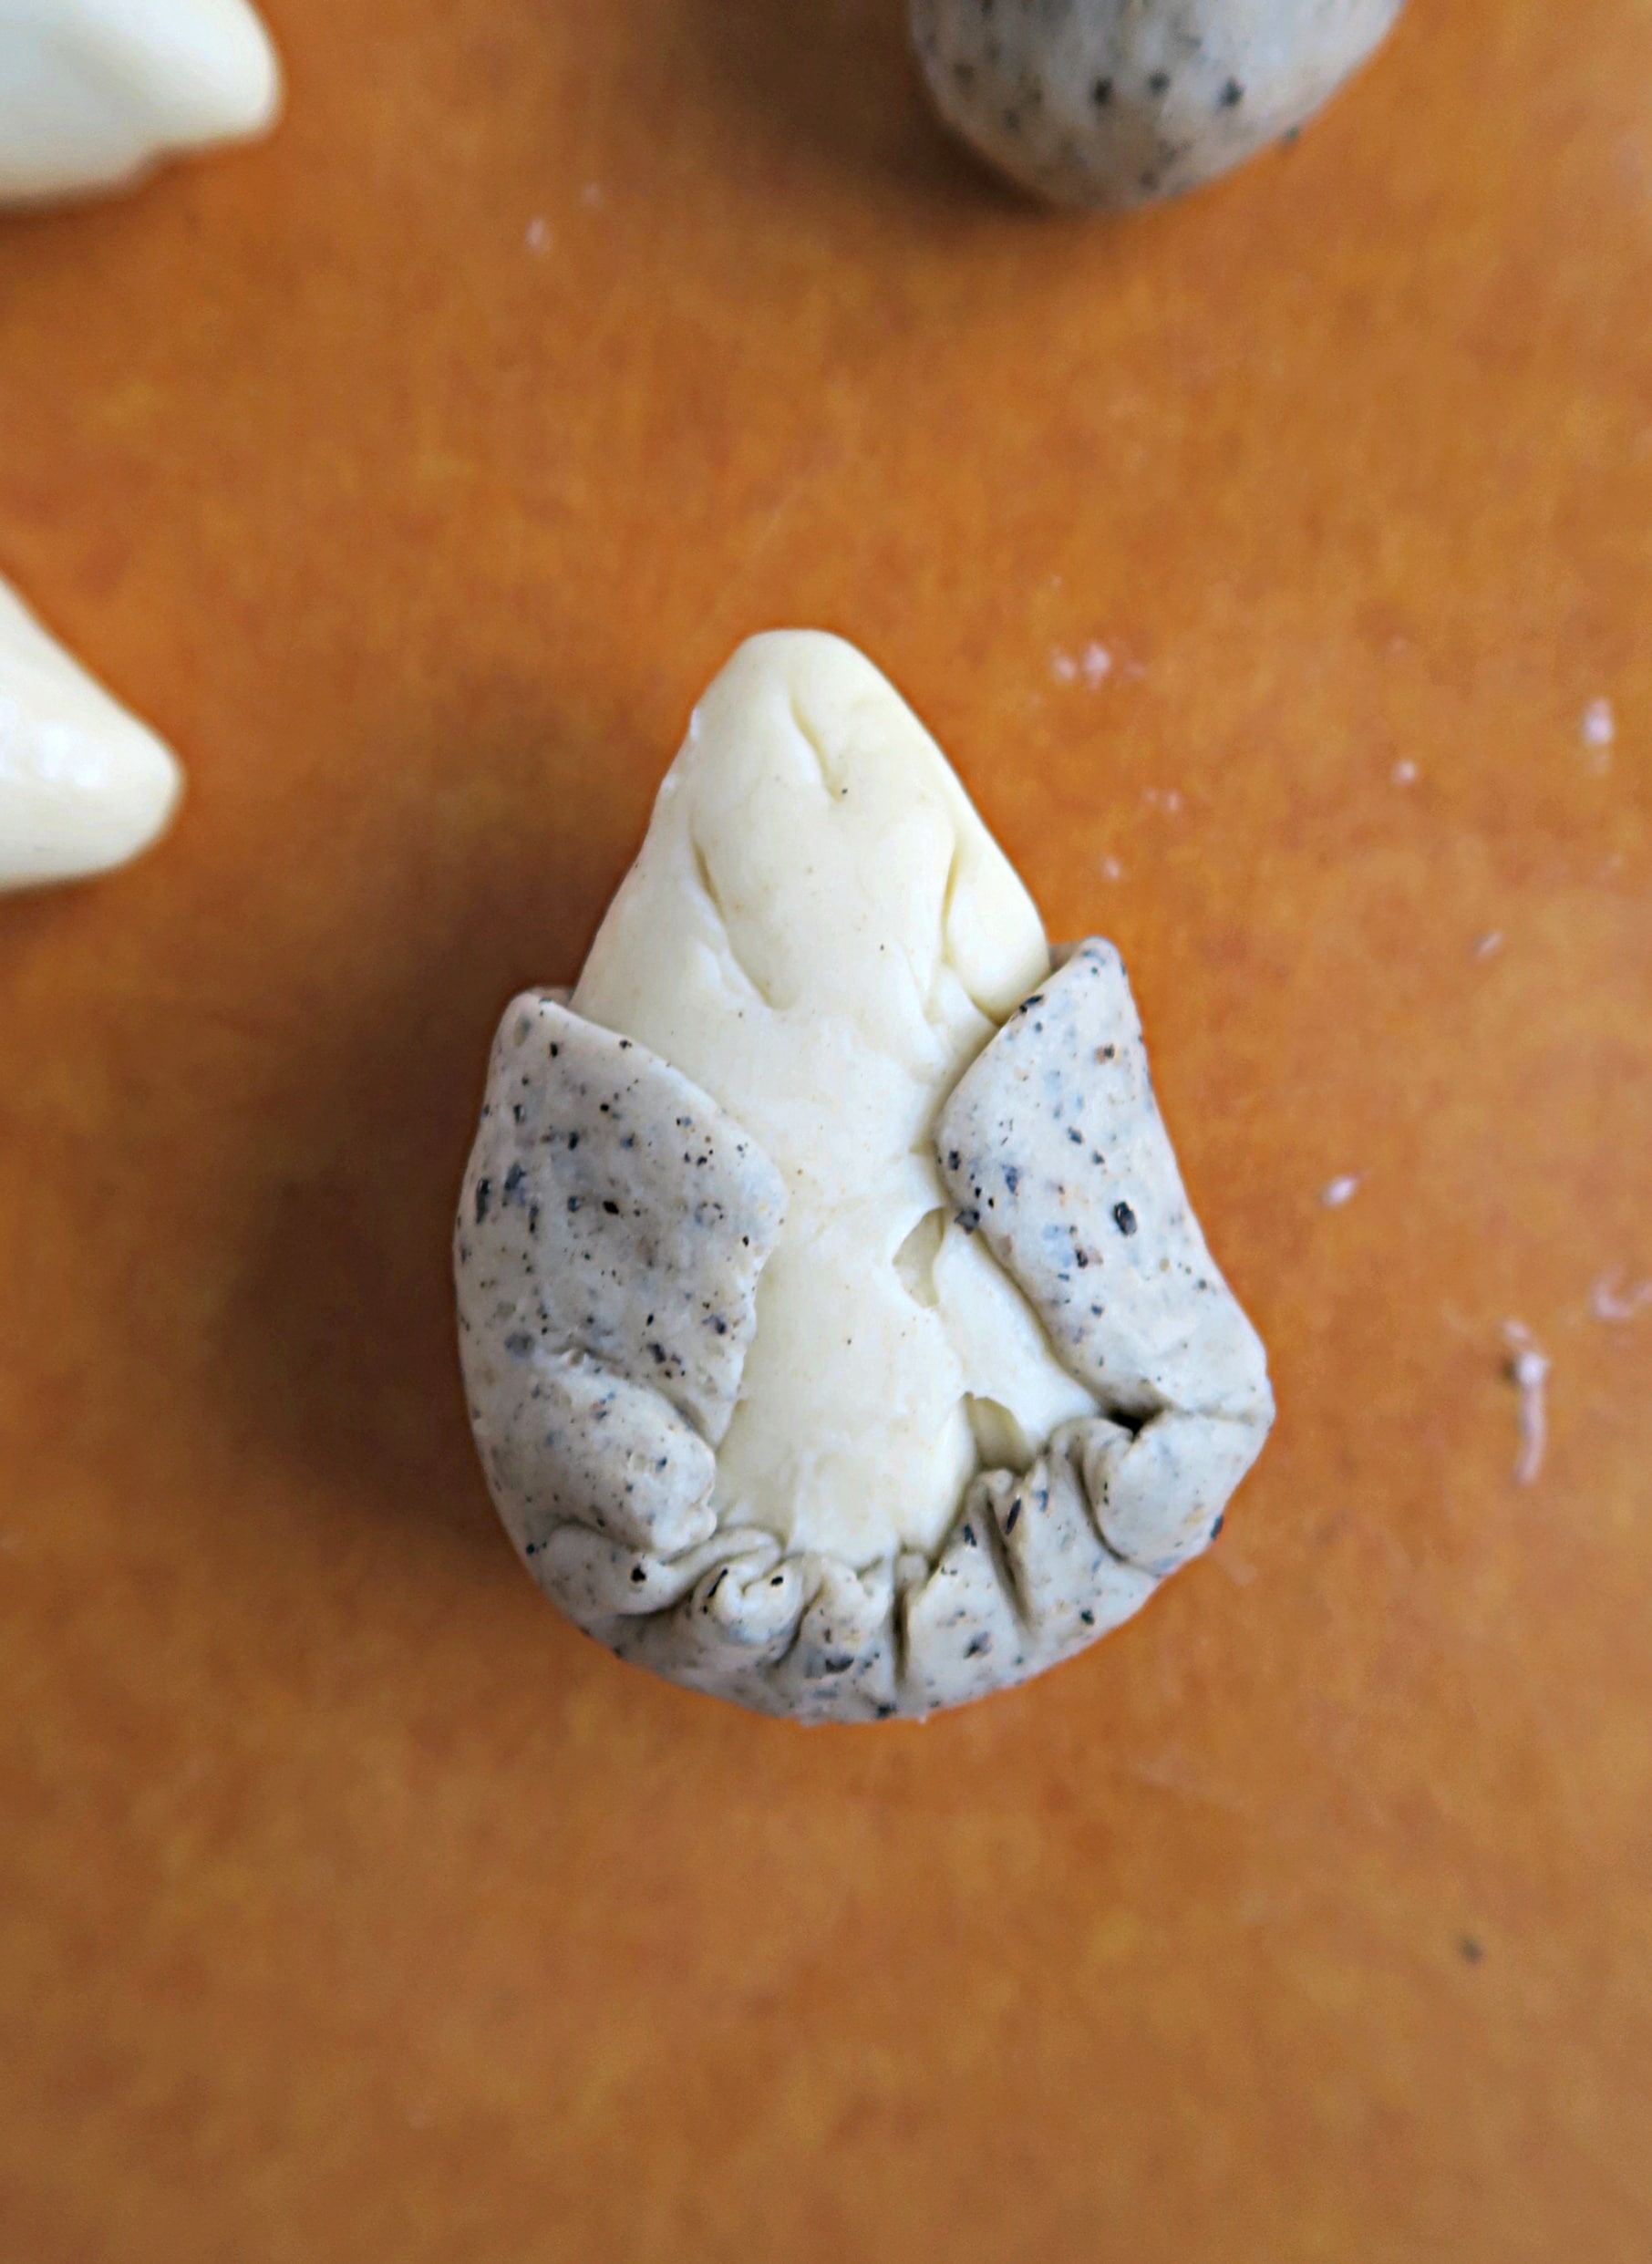
- Use your fingers to flatten the edge of the dough so that it would more easily stick to and wrap onto the "body".
- Moisten the white dough with a bit of water before covering with the grey dough. Start from the "head" side first when covering the white dough with the grey, making sure to leave the head uncovered. Fold the excess grey dough under. (see the picture in the post). Repeat this step for the rest of the hedgehogs.
- Gently squeeze two sides of the hedgehog to make it thinner and taller, as it will flatten down after cooking.
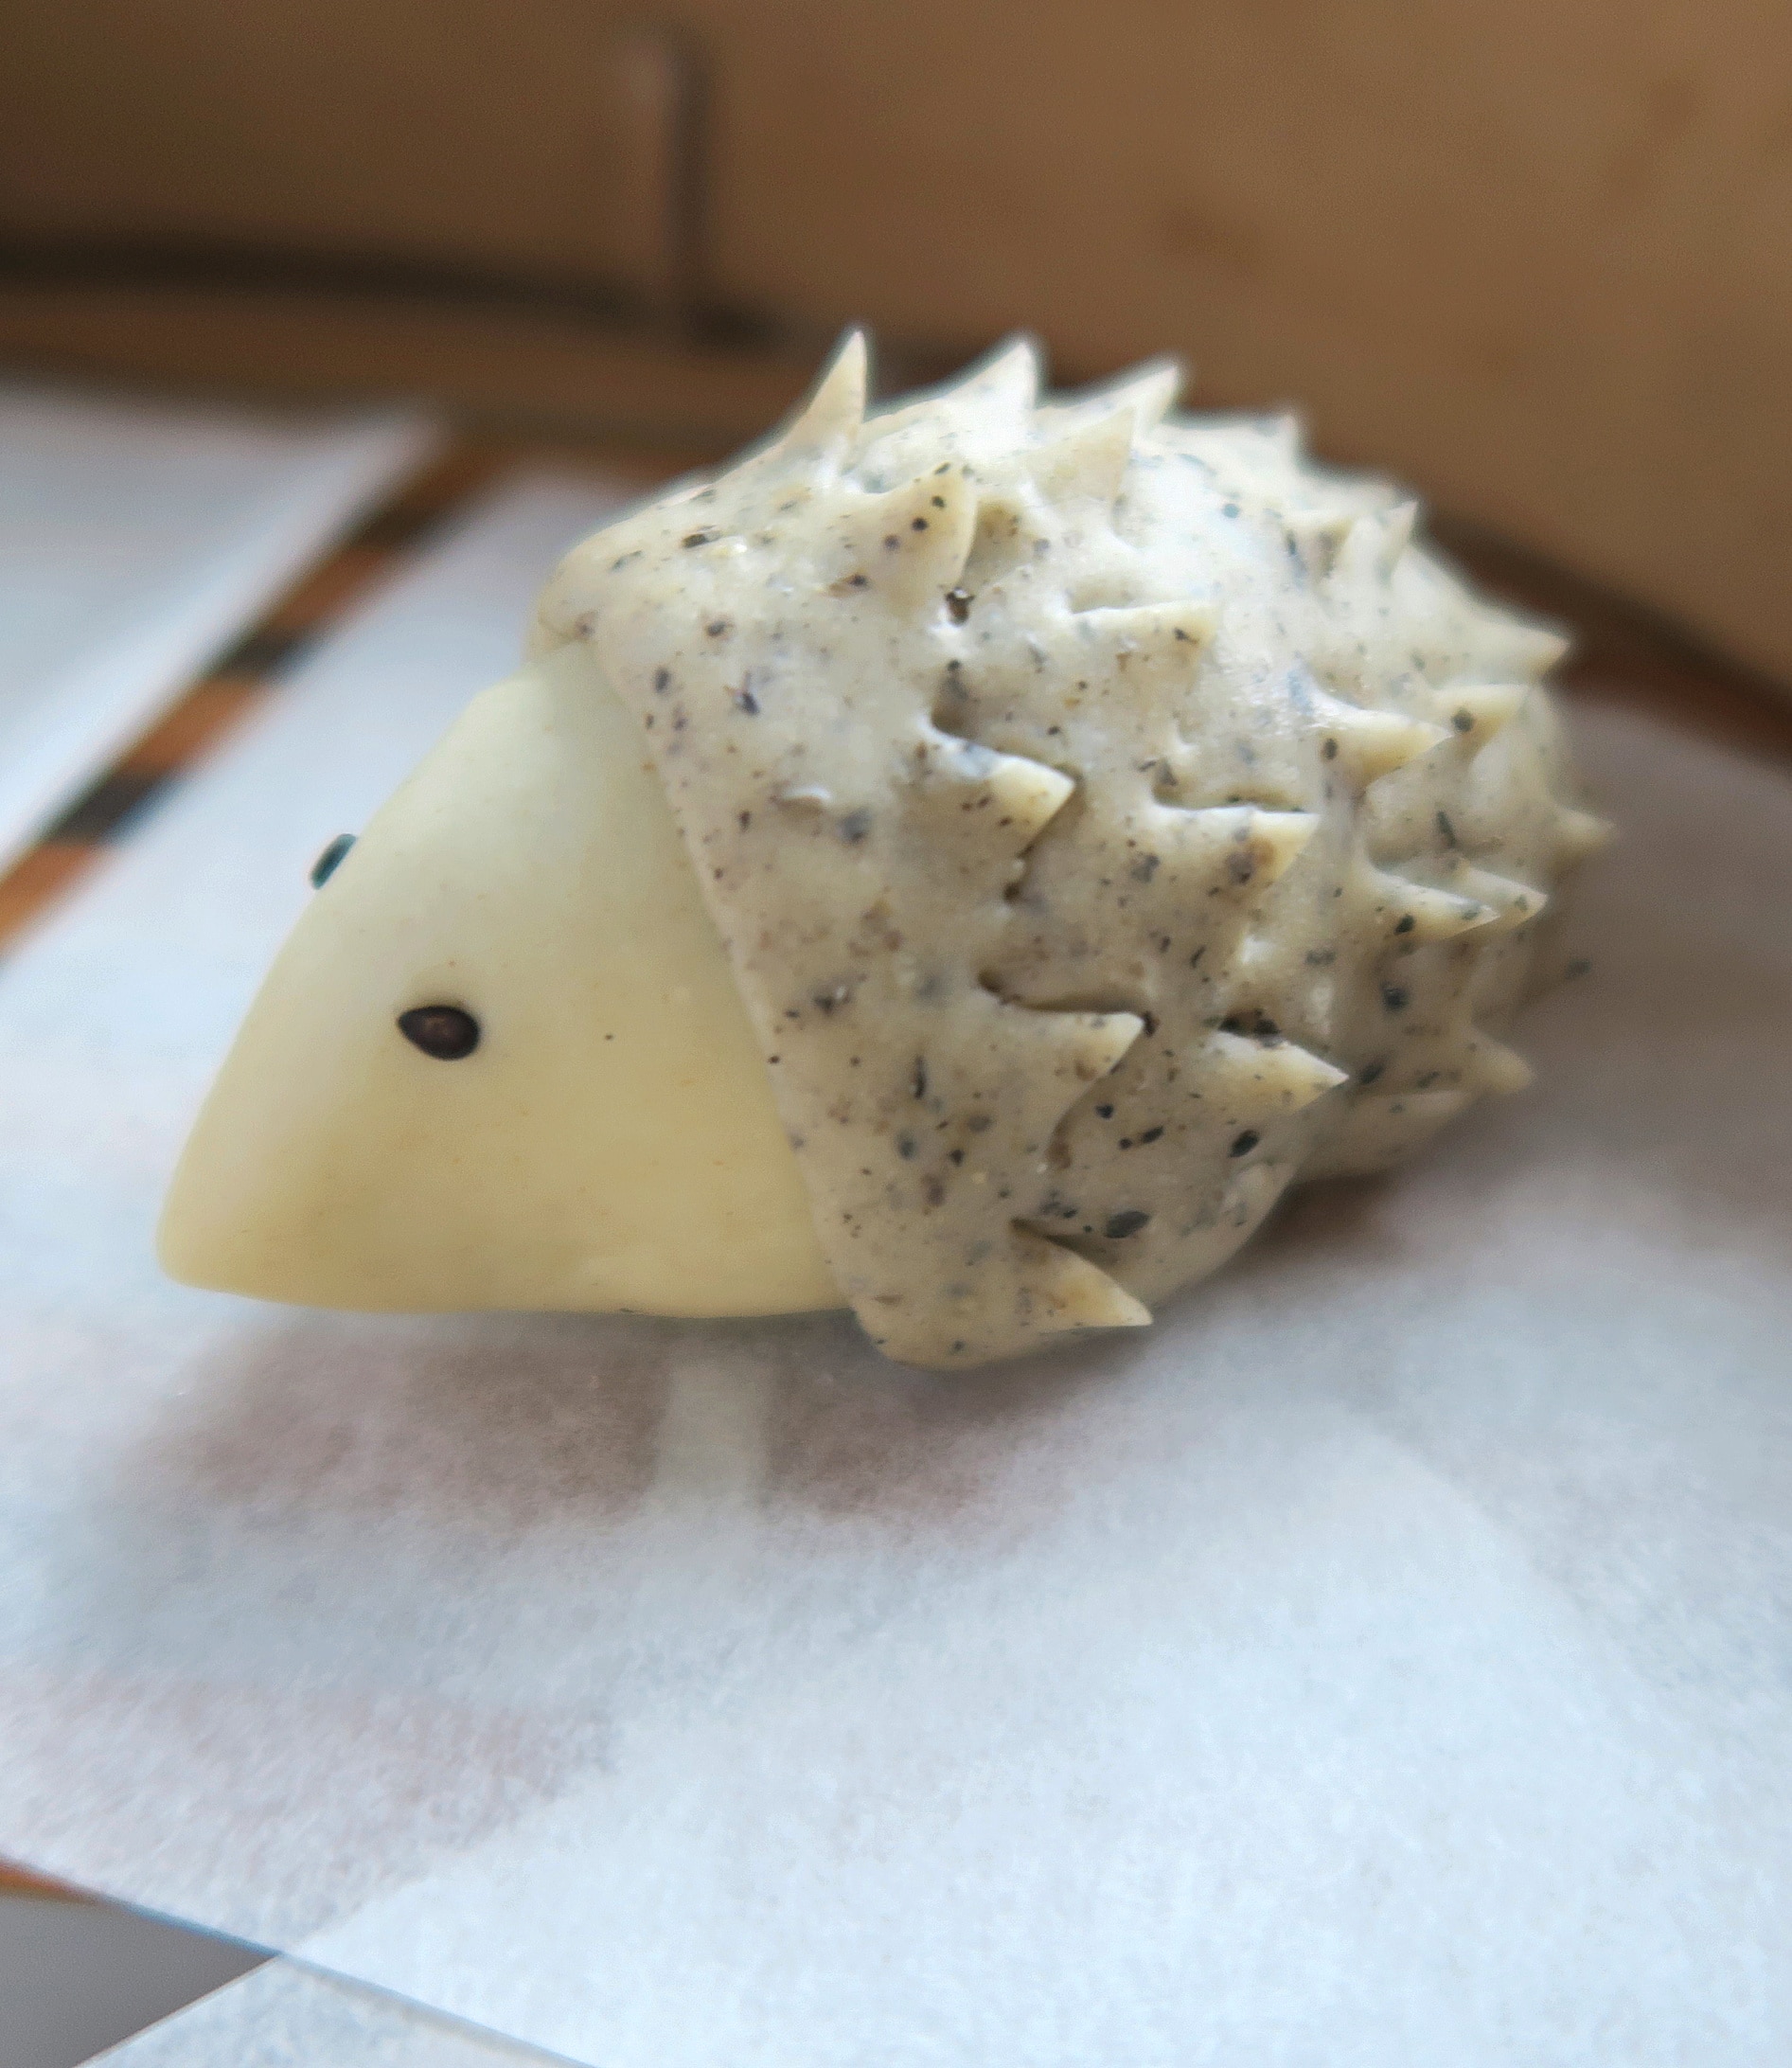
- Use a small pair of scissors to make some small cuts on the back for the hedgehog spikes and place the hedgehog on a small piece of parchment paper or whatever you use to line the steamer.
- moisten the head with a bit of water and stick two black sesame seeds on it as eyes. Stick the eyes on a bit higher and closer than you want it to be, as they will move apart and lower after cooking.
- Place the buns in the steamer, spray each bun with some water, cover with the lid and let it rise in a warm place for about 40-50 minutes until it grows to be about 1.5 times the original size. One good way to check if it's ready is that when you lift the bun, it should feel pretty light, and when you slightly press on the bun, it will bounce back.
Cooking
- Place the steamer on top of a pot with 1⁄2" to 1" of water, turn the heat to medium. Once the water is boiling, reduce the heat to medium low and cook for 13 minutes.
- Remove the steamer from the pot and let it sit for 2 minutes before open the lid.
Notes
Thanks for the recipe - these turned out perfect and cute! I'm really impressed at how easy the recipe was to follow, please keep the recipes coming 🙂
Hi Jonathan, That's awesome! I hope you had fun making them 😀
These were perfect! It didn’t come out wrinkly or shrink like other recipes I have tried before. I wish I can upload a photo of the results. I froze the filling after rolling into a ball which made it easier to seal the dough for me. It was the right amount of dough and filling. I trimmed the extra sesame dough after wrapping the white dough.
Hi Paine,
I'm so happy to hear of your success with these buns! I hope you had fun making them, too. And yes, I would love to see your work. Do you Have Pinterest or Instagram? Or you can just email me the photo at [email protected] if you'd like 🙂
Thanks for sharing! Just made these tonight and they were a hit with my kids 😊😊 They came out so fluffy and tasty!
Hi Jackie, thank you for trying this recipe, I'm glad your kids like it!
Thanks so much for posting this recipe - I can't wait to try them because A) I love black sesame and B) they are so cute!! I just have one question. It looks like you just briefly knead the dough and then fill and shape and have only one rise. Is that correct or am I supposed to let it rise before filling/shaping as well? Thanks in advance!
Hi Marnie,
Yes, in this recipe we skip the first proofing and start assembling right after the dough is formed. However, you do need to knead a lot when incorporating the black sesame powder and before folding in the black sesame filling as described in the recipe box. Hope it turns out well for you and let me know if you have any other questions!
Thanks so much for your reply! I'm also making rousong (pork sung) rolls at the same time, so I'm trying to work out the timings. Do you think the dough would do well if refrigerated at some point in the process? I was thinking I could get the bodies filled/assembled and then put everything in the fridge to slow the proving while I work on the other dough/rolls and then bring it back out and rest at room temp for 10 minutes before adding the spiky backs to the hedgehogs. Alternatively, I wondered if I could just assemble them all the night before and prove overnight in the fridge? Or do you think they would over prove that way?
Hi Marnie,
Unfortunately I've never tried those methods for this recipe (I've only done that for my milk bread dough) so I am not 100% sure, but you can always experiment and see how it goes 🙂
Update: They turned out perfectly! I basically tied my sister for the bake off with this recipe (she made some super impressive rose shaped marmalade buns). I ended up using a saucier pan with an inch of water and about 3" of space between water and baos. No splattering. Took about 6 minutes to come to a full boil and I forgot to turn it down lower after the boil, but they still came out great. The only thing I did wrong was that I shaped the filling into balls and then when I wrapped it, I just extended the dough for the snout instead of the whole filling. So there was a ball of filling in the body and none in the snout. Next time I'll probably make the filling into teardrop shape too, then wrap. The only change I made was to add some finally chopped toasted walnuts because I love the sesame walnut flavor combo. Thanks again!!
Hi Marnie, thank you so much for your update! I really appreciate it. Adding walnut sounds like a great idea that I might need to try that next time! 🙂
Oh also, I doubled the recipe and made ten because the competition required me to make 6 buns. I put them outside intermittently while shaping them because I knew I had to be careful not to overprove them while I did all 10. It was around 60 F so that worked perfectly. It took me about 90 minutes total to mix and get them all formed and ready for the steamer.
I want to make these with poppy seeds.
easy to follow recipe and instructions and they turned out great and tasty! I halved the sugar since I like things less sweet and family and friends love them. Thank you so much! super adorable 🙂
Thank you so much, Angela!
I am beyond excited to have found your page! I recently moved back to the USA after living in Taiwan for 10 years and thought I might never get to eat the delicious foods and drinks again - or only have access to the store-bought Americanized versions of the items. I can't wait to make your turnup cake recipe and have it wrapped in a fried egg like I used to get from the breakfast cart on my way to work and make some of these adorable sesame buns for my daughter!
Hi Amanda, welcome to my blog!! I totally understand the disappointment when eating Americanized version Taiwanese food lol, fortunately it's not hard to make them at home. I hope you and your daughter will enjoy these recipes 🙂