

In this recipe I will show you how to make authentic Taiwanese gua bao bun that should both taste great and look professional.
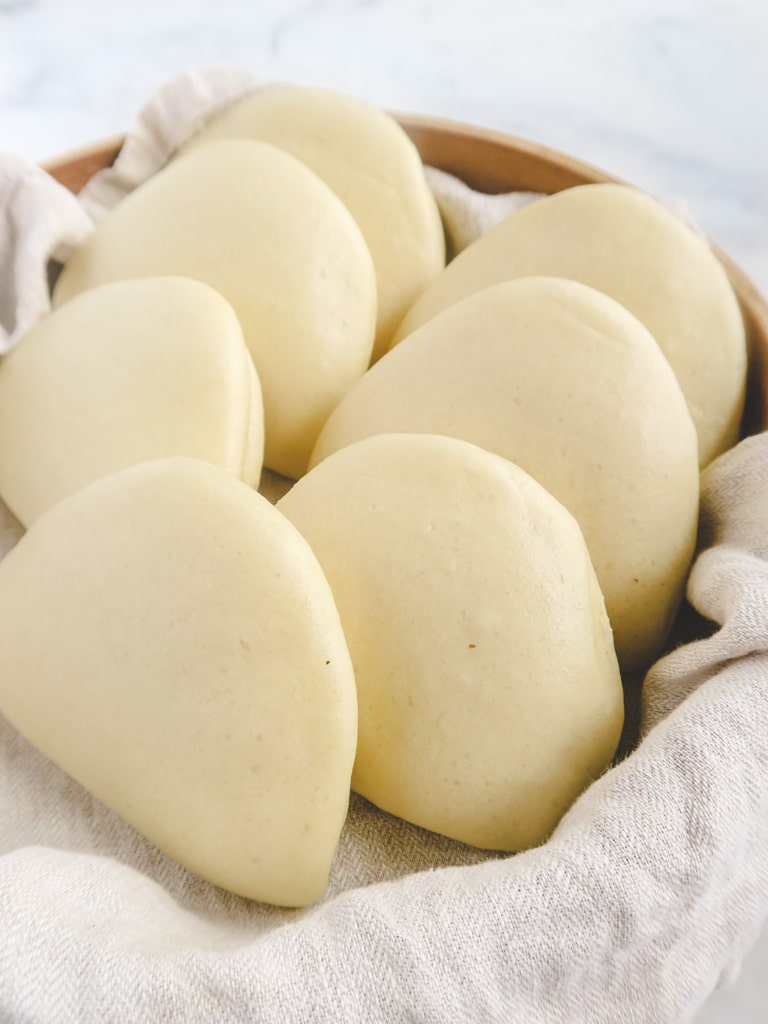
I got addicted to gua bao when I was 10 years old. I joined my dad for a one day business trip to a place that happened to be famous for its gua bao. My dad bought one for me to try, and it was so delicious that, even today, I still can't forget how it looked and tasted.
After moving to Michigan, other than scallion pancake and beef noodle soup, gua bao is definitely something that I miss all the time. Ordering gua bao from a restaurant is so expensive, and don't even mention to me about how small they are! Thankfully none of that matters anymore now that I know how to make them myself. so now I can just make a lot of gua bao buns to store in the freezer for whenever I want to make some gua bao (yay!).
What is gua bao?
Gua bao is kind of like a taco that can be stuffed with whatever you like. Unlike a taco, though, the guao bao bun is puffy and pillowy. Traditionally, they are filled with braised Pork belly, cilantro for some freshness, pickled mustard greens to balance the richness of the pork belly, and coarse peanut powder with confectioner sugar for textural contrast and another layer of flavor.
Though the star of this combination is the melt-in-your mouth braised pork belly, the other elements harmonize so well with it that the whole experience becomes something unique and amazing. I usually replace the pickled mustard greens with pickled onions or banh mi pickles, which also goes very well with the gua bao. But really, you can put anything you like inside. For example, sometimes I will put a fried egg drizzled with a bit of soy sauce in it and eat it for breakfast, so good!
Shape of the bao bun
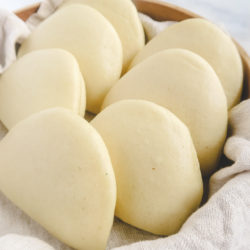
Many recipes in English online form the buns by folding circular disks of dough into a semicircle, but the result doesn't resemble the gua bao you'd find in Taiwan. The bao bun needs to be formed with a deeper "pocket" and the bun cannot be too puffy, that way, the bun will be able to easily hold enough fillings and the fillings won't fall out when you try to eat your gua bao.
Tips for making buns with smooth surface
First, after cutting the dough into small pieces, shape the dough into a ball by tucking the edges into the center so that the top side is smooth. The smooth side will be the surface of the bun. No clue what I'm talking about? Don't worry, watch the gif below:
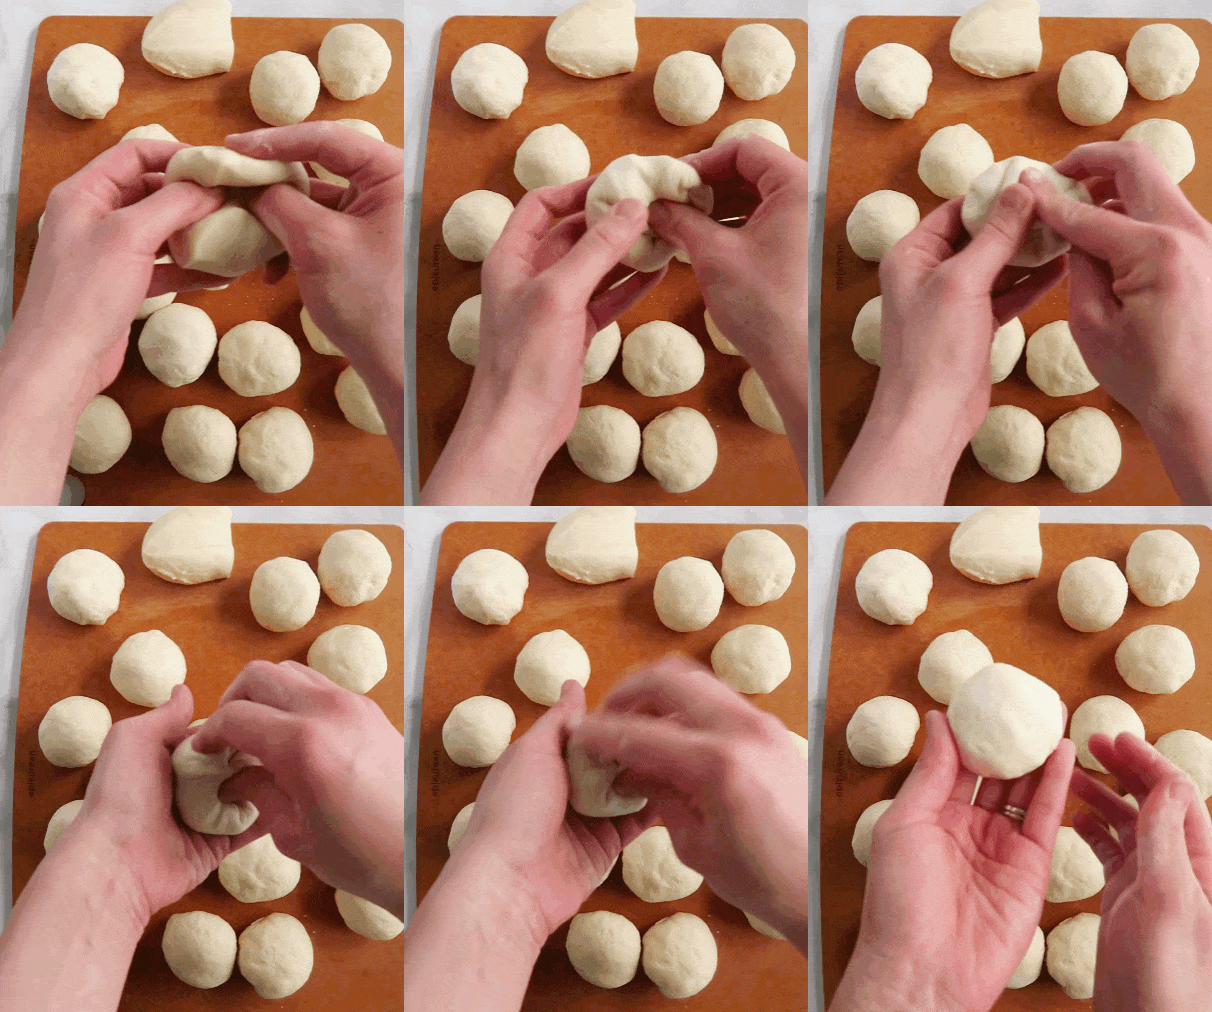
The second tip for a smooth surface is to work fast, especially in warmer temperatures. We want to finish shaping the buns before it starts rising, otherwise once the small air bubbles start appearing, the surface will looks lumpy.
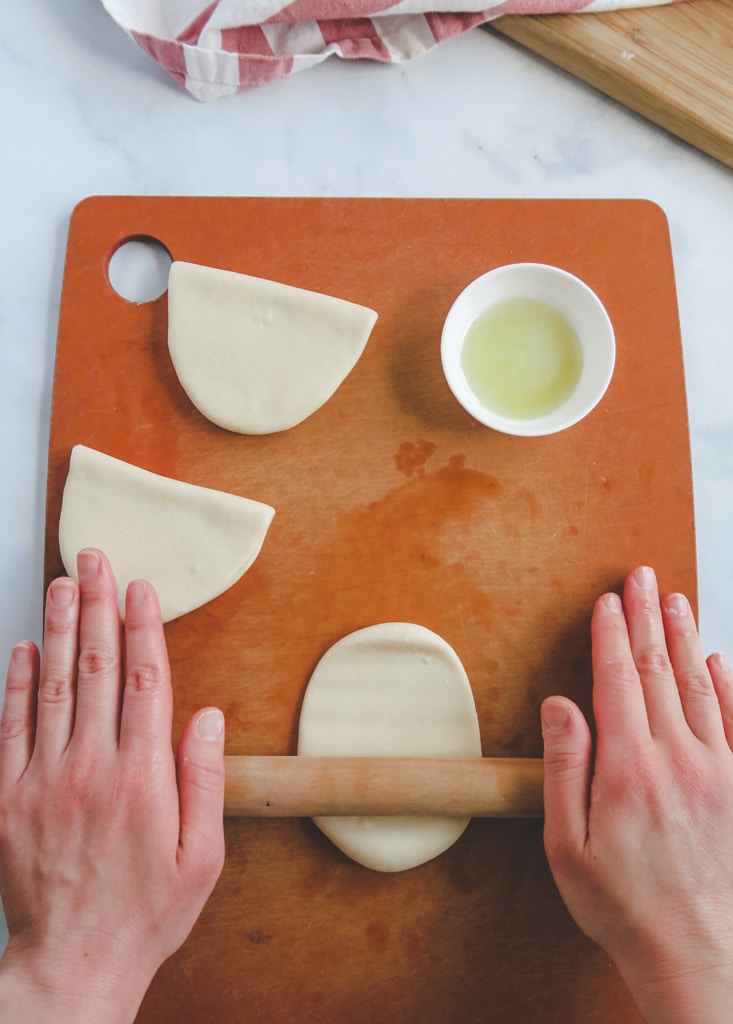
Third, don't over-proof. Only proof until the buns look a bit puffier, and when you touch the dough it will spring back, which takes about 40 - 50 minutes in a warm place. The over-proofed dough will result a overly airy bun, which will not taste good and can be hard to open.
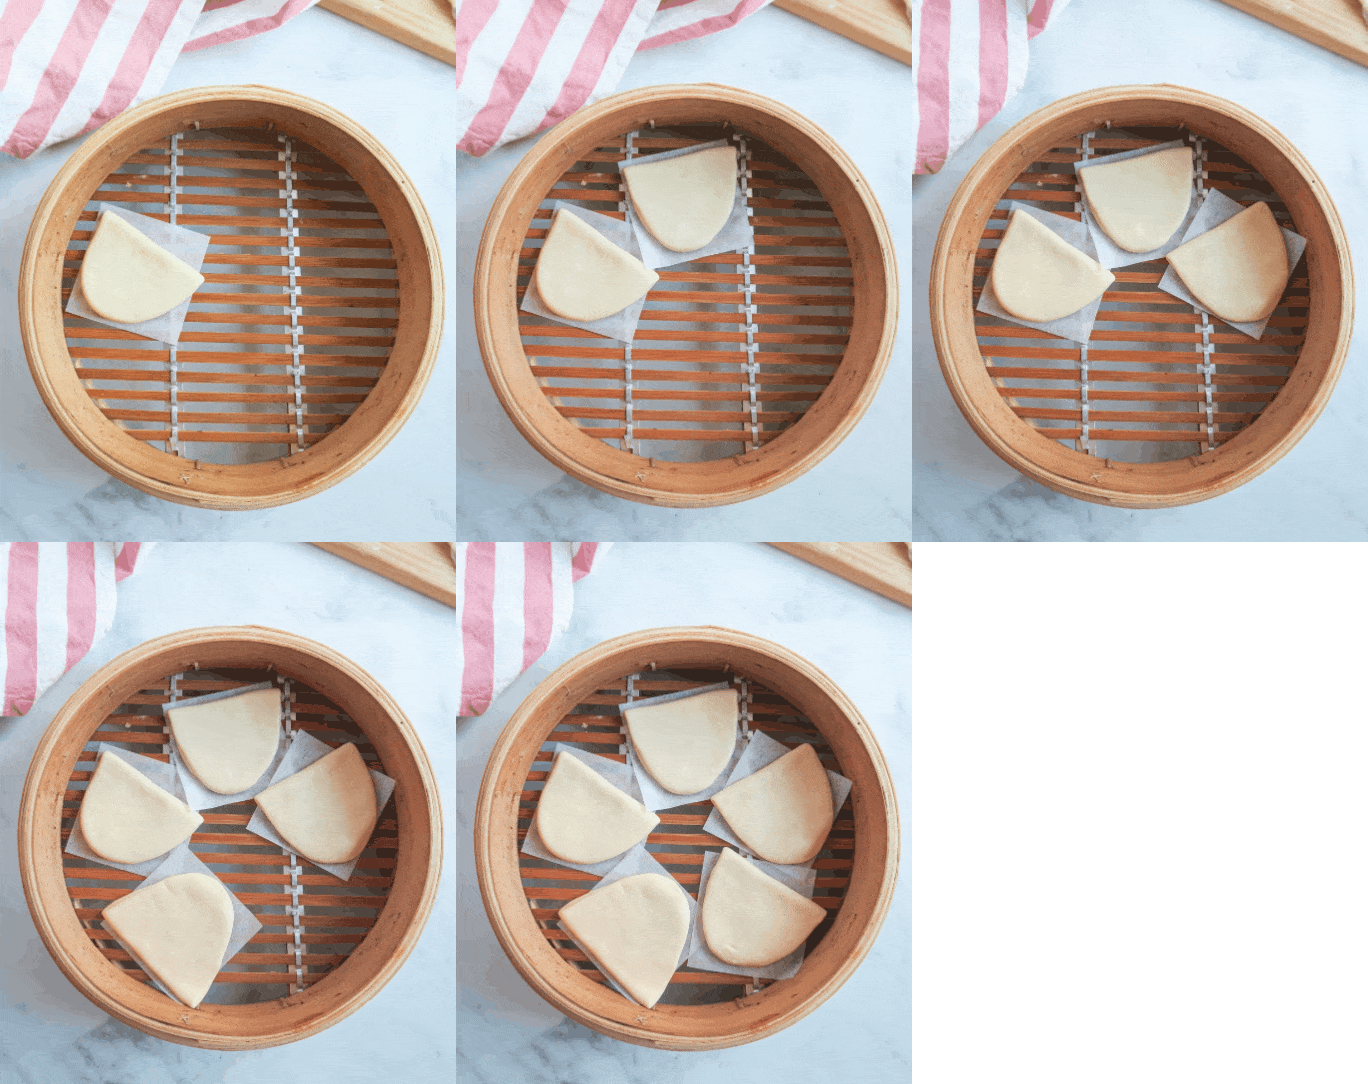
Finally, during the cooking process, make sure that water isn't dripping onto the buns. This usually happens when the heat is too high and the water boils too rapidly so that the steam trapped in the steamer becomes water before it's able to escape. If that happens, the buns end up looking lumpy like the surface of the moon, which is cool, I guess, but not appetizing.
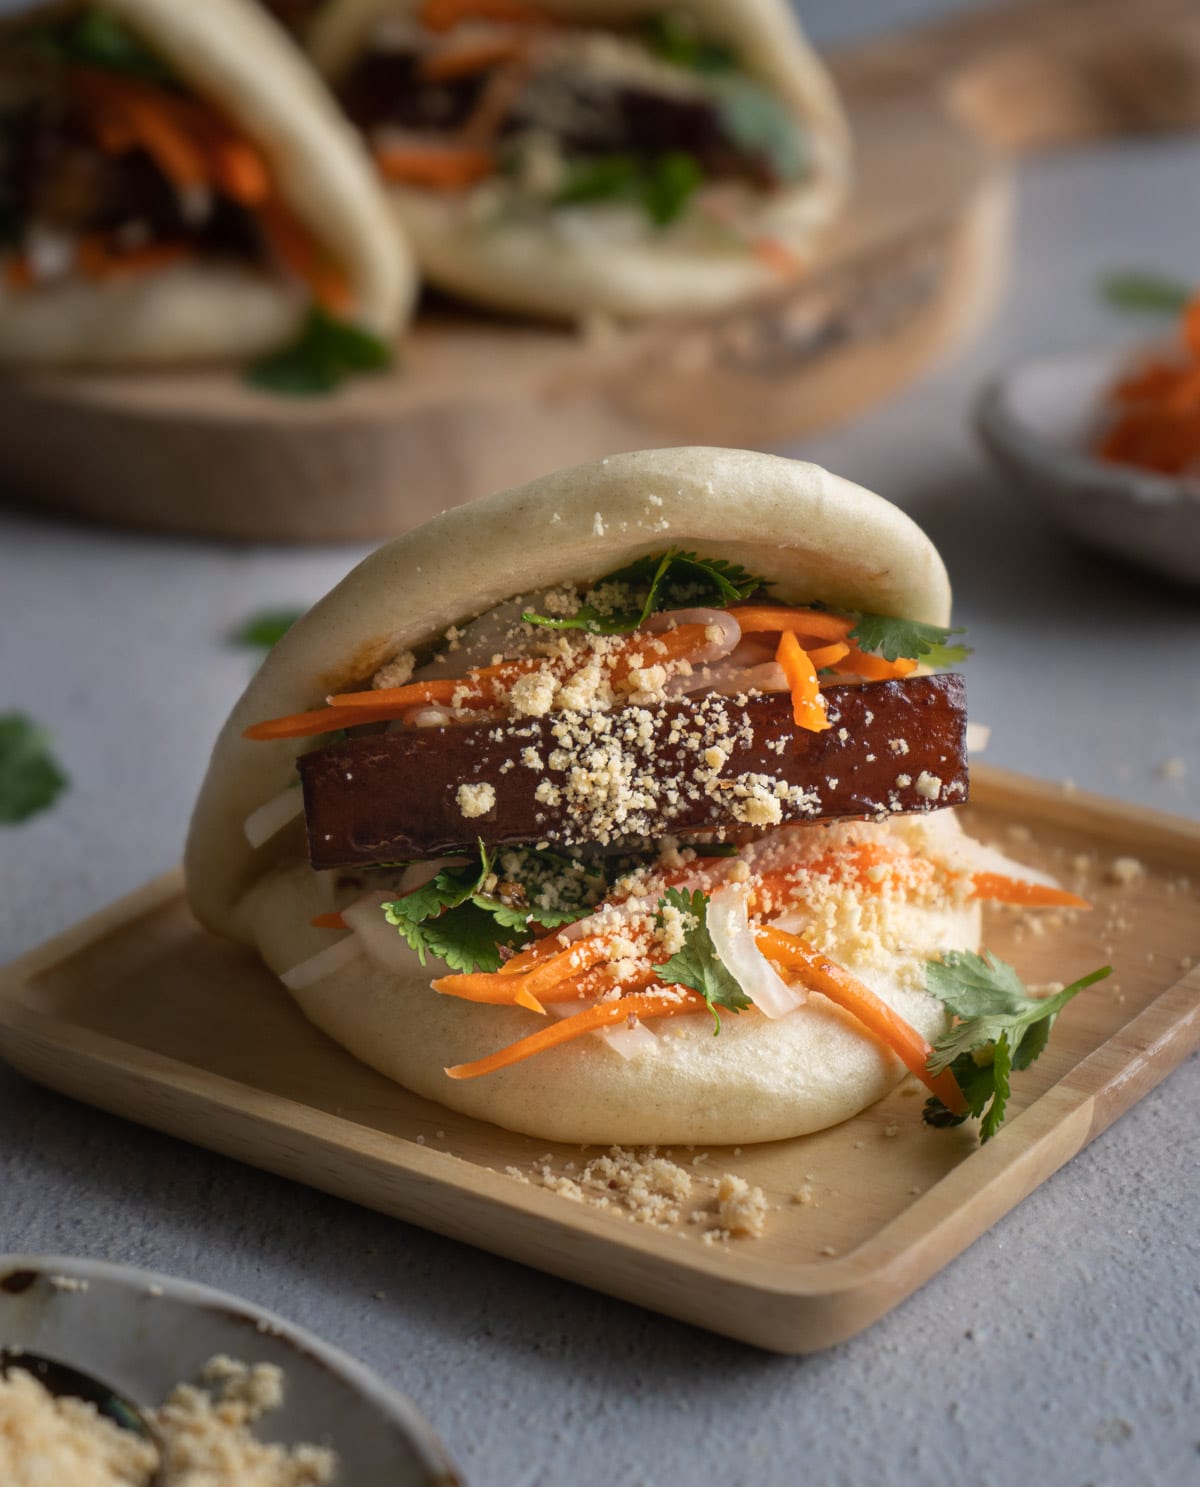
After you learn how to make this bao bun, you can make endless varieties of gua bao. Make sure you try my favorite combination - gua bao with braised pork belly and pickled carrots and daikon!
Related Recipe
I would like to hear from you! If you make this recipe, please consider leaving a star rating and comment in the section further down the page. Stay in touch by following my Instagram and Pinterest!
Taiwanese Bao Buns
Equipment
- Steamer
Ingredients
Dough
- 170 g whole milk (see note), 2⁄3 cup + 1 tablespoon
- 20 g sugar, 1 tablespoon + 2 teaspoon
- 1 teaspoon instant yeast
- 2 teaspoon vegetable oil
- 300 g all purpose flour, 2 1⁄4 cup
Brushing
- 1 tablespoon vegetable oil
Instructions
Making dough
- Mix milk, sugar, yeast and oil in a mixing bowl, add half of the flour in and stir with a spatula until well combined.
- Add in the rest of the flour, mix and knead until there's no dry flour and a rough ball can be formed. If the dough is too dry, add 1 to 2 tbsp. of water. Cover and let it rest for 15 minutes.
- Knead the dough again until the surface of the dough is smooth, about 2 minutes. The dough should be very easy to knead after resting.
Form the bun
- Divide the dough into 8 -10 portions, cover with greased plastic warp and let it rest for 5 minutes.
- Form each portion into balls by tucking the edge to the center, and place the seam side down (see the gif in the post), cover and rest for another 5 minutes.
- Take one portion out, roll the dough out with a rolling pin into a long oval.
- Flip it over to the back side, roll it several times to form an oval with a length to width ratio of about 2:1. Use your hand to gently shape it at the edges if needed.
- Brush the surface with a layer of oil before folding into half and place it on a piece of parchment paper.
- Repeat for the remaining portion and place the buns in a steamer. Remember to leave at least half an inch of space between the buns as they will grow bigger after cooking. Whatever can't fit into the steamer should be left at room temperature, covered with a greased plastic wrap.
- Cover the steamer with its lid and place a damp kitchen towel on top of it. Let it proof in a warm place until it's slightly puffy and springs back to the touch, about 50 minutes.
Cooking
- Place the steamer on top of a pot with 1⁄2" to 1" of water and turn the heat to medium. Once the water is boiling, reduce the heat to medium low and cook for 12 minutes.
- Remove the steamer from the pot right away and let it sit for 3 minutes before removing the lid. Refill the pot with water before cooking the remaining buns.
Storing
- If you are not eating the buns right away, reheat them before enjoying for the best taste.
- Leftover buns can be stored in a freezer for up to one month.
Thanks for posting this recipe. Can't wait to try it. I haven't worked with dough much. Do you mind giving me more of an estimate of time used to knead the dough please? Is it better to knead by hand or use the machine? Thanks.
Hi Jennifer,
I would say around 5 minutes. I usually just hand knead it because it's very easy to do it by hand (unlike typical bread-making that requires a lot of kneading). All you need is to form a dough, let it rest for 10 - 15 minutes (covered), and knead for another 2 minutes or so until it's smooth. But of course you can use machine, too! It's hard for me to get too detailed with using the machine because it really depends on the machine. Some larger machines can only really work well when there's enough dough for it to work with, though some others may be able to do this well (like a bread machine). Hope this help and let me know if you have other questions 🙂
Hi Edwina,
Can you also teach us how to make braised pork belly for the gua bao.
Of course! I've been wanting to do that for a long time but haven't gotten around to it yet. Will definitely do it soon 🙂
Hi Edwina,
Thanks ! Will try soon.
Could you please advise the the choice of oil (should it be aromatic like sesame one?) ? Have you ever try with rice flour?
I have seen a recipe with soy or coconut milk instead of whole milk - have you ever try ?
Cheers
Fred
Hi Fred, I usually just use regular vegetable oil (I use avocado oil), but you can also use coconut oil if you want your bun to have a bit of that flavor. Rice flour won't work for this recipe, and yes, you can use any kind of milk of your choice.
This recipe works! And it freezes well.
We use the Bao buns for a quick meal, with ham slices and egg, and sriracha sauce 🙂 thank you for taking the time to explain it step by step.
Thank you Sheauping! That sounds delicious 😀
This gua bao recipe along with the braised pork filling is fantastic! I hadn’t eaten gua bao in over 12 years, and trying out these recipes took me straight back to Taiwan. They’re also easy to follow for someone who has never made them. Thank you so much for sharing, Edwina!
Thanks Audra! I'm so happy for you 😀
Hello Edwina,
Please clarify how the yeast is activated. Is it assumed that the milk is warm or is it as stated with cold milk? Your starting steps seems never to indicate. What am I missing? Thank you!
Hi Lou! Since I’m using instant yeast, there’s no need to activate it,just mix it directly with the other ingredients as stated in the instructions. I’ve also used active dry yeast the same way before, and it worked just fine. That said, if you prefer, you can dissolve it in warm milk before adding the other ingredients.
I have skim milk- should I use it like water in the recipe or like milk, in terms of volume?
Thanks!
Hi MJ, you can use it to replace regular milk.
I made these and am happy with the first effort. How big, approximately, should the buns be after forming them? But before steaming. TIA BTW, mine look like yours, but seem a bit smaller….
Hi! Do you mean how big the dough should be after proofing and how to tell when it’s ready to steam? That’s probably the most challenging part of making Chinese steamed buns. One trick I like to use is to place a small piece of dough in a cup as an indicator, when it doubles in size, you know the buns are ready to steam. Please see this post for more information: https://cookinginchinglish.com/mantou-chinese-steamed-buns/